TIMER OPERATIONS
(USING THE REMOTE CONTROL UNIT)
Setting the timer
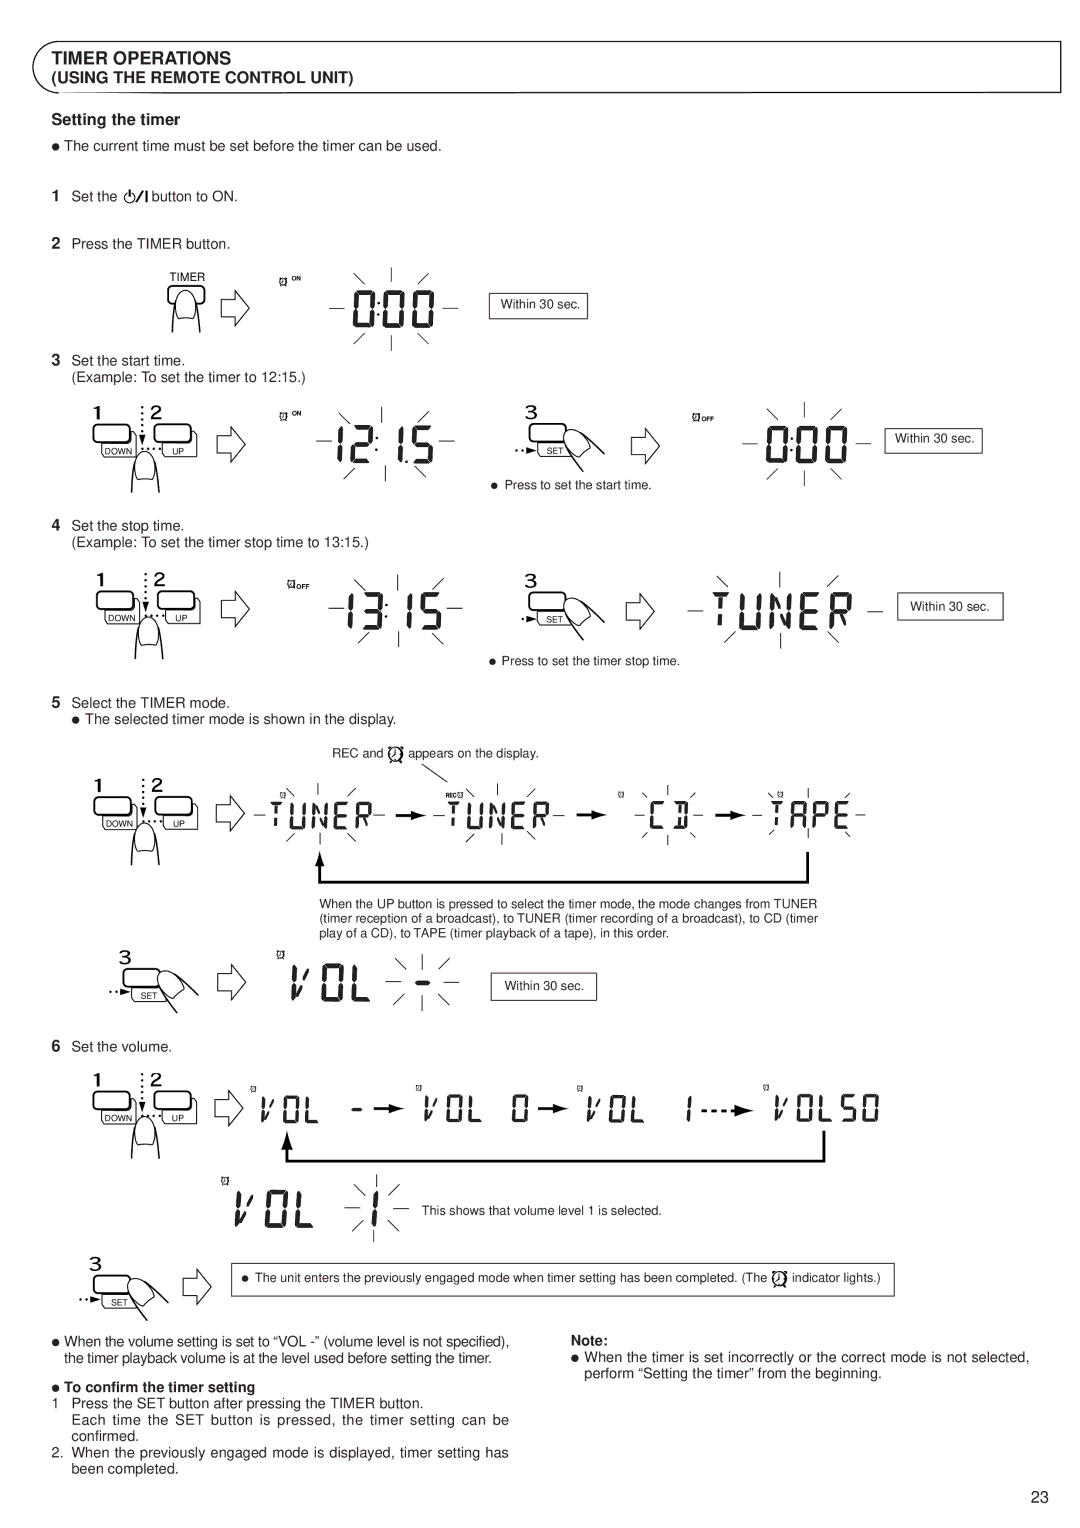
ÖThe current time must be set before the timer can be used.
1Set the ![]()
![]() button to ON.
button to ON.
2Press the TIMER button.
TIMER![]()
![]() ON
ON
3Set the start time.
(Example: To set the timer to 12:15.)
ON
DOWN ![]()
![]()
![]() UP
UP
4Set the stop time.
(Example: To set the timer stop time to 13:15.)
![]() OFF
OFF
DOWN ![]()
![]()
![]() UP
UP
Within 30 sec.
![]() OFF
OFF
SET
ÖPress to set the start time.
SET
ÖPress to set the timer stop time.
Within 30 sec.
Within 30 sec.
5Select the TIMER mode.
Ö The selected timer mode is shown in the display.
REC and ![]() appears on the display.
appears on the display.
DOWN ![]()
![]()
![]() UP
UP
When the UP button is pressed to select the timer mode, the mode changes from TUNER (timer reception of a broadcast), to TUNER (timer recording of a broadcast), to CD (timer play of a CD), to TAPE (timer playback of a tape), in this order.
SET
Within 30 sec.
6Set the volume.
DOWN ![]()
![]()
![]() UP
UP
This shows that volume level 1 is selected.
Ö The unit enters the previously engaged mode when timer setting has been completed. (The ![]() indicator lights.)
indicator lights.)
SET
ÖWhen the volume setting is set to “VOL
ÖTo confirm the timer setting
1Press the SET button after pressing the TIMER button.
Each time the SET button is pressed, the timer setting can be confirmed.
2.When the previously engaged mode is displayed, timer setting has been completed.
Note:
ÖWhen the timer is set incorrectly or the correct mode is not selected, perform “Setting the timer” from the beginning.
23
