BASIC OPERATIONS ON DVD DECK EN 31

8 Press FG to select your country code, then press ENTER.

Parental LockIf you do not need to change your country code, jump to 10. See ACountry/Area Code List for Parental LockB (A pg. 87)


9

Press the number keys to enter the same password as in


step 6 above, then press ENTER.


10 Press SET UP to complete the setting.

This function restricts playback of DVD VIDEO discs which contain

violent (and other) scenes according to the level set by the user.

NOTE:

For example, if a movie which includes violent scenes supports the

Remember your password, or make a note of it.

parental lock feature, such scenes which you do not want to let

To Change The Settings

children view can be cut or replaced by other scenes.


You can change the Parental Lock settings later.

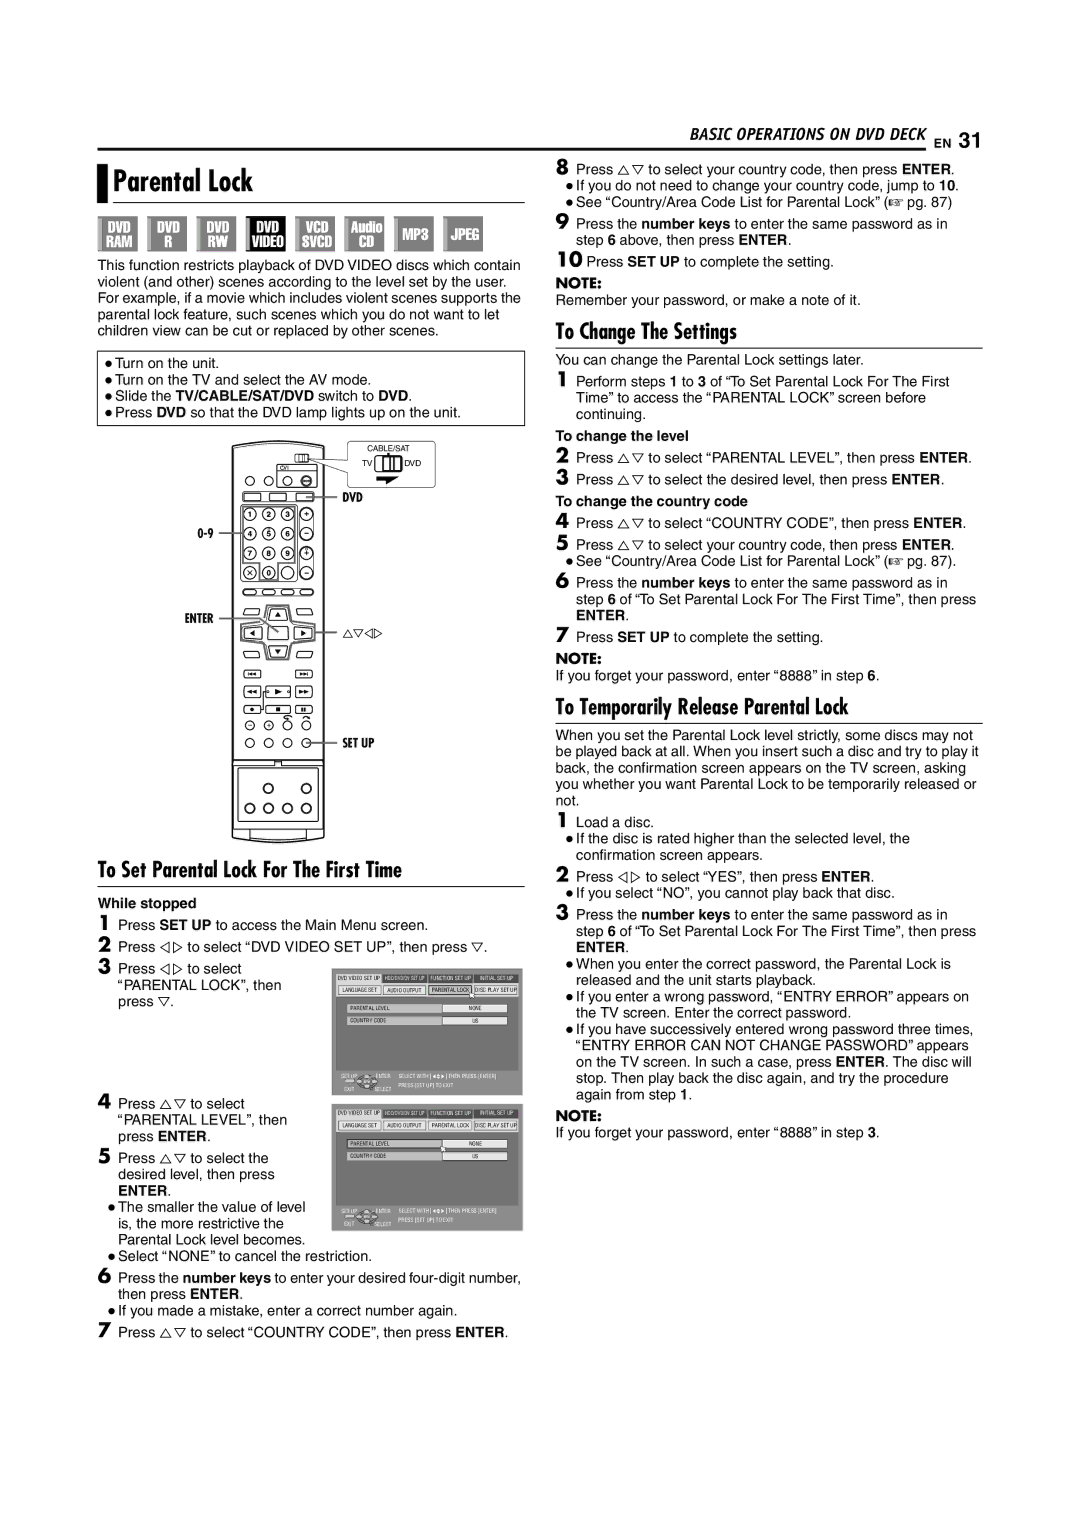
Turn on the unit.


Turn on the TV and select the AV mode.


1

Perform steps 1 to 3 of ATo Set Parental Lock For The First

Slide the TV/CABLE/SAT/DVD switch to DVD.


TimeB to access the APARENTAL LOCKB screen before

Press DVD so that the DVD lamp lights up on the unit.


continuing.


To change the level


CABLE/SAT

2

Press FG to select APARENTAL LEVELB, then press ENTER.


TV


DVD


3

Press FG to select the desired level, then press ENTER.


DVD

0-9

ENTER

FGDE

To change the country code

4Press FG to select ACOUNTRY CODEB, then press ENTER.

5Press FG to select your country code, then press ENTER.

See ACountry/Area Code List for Parental LockB (A pg. 87).

6Press the number keys to enter the same password as in step 6 of ATo Set Parental Lock For The First TimeB, then press

ENTER.

7Press SET UP to complete the setting.

NOTE:

If you forget your password, enter A8888B in step 6.

SET UP

To Set Parental Lock For The First Time

While stopped

1Press SET UP to access the Main Menu screen.

2Press DE to select ADVD VIDEO SET UPB, then press G.

3Press DE to select

APARENTAL LOCKB, then


DVD VIDEO SET UP

HDD/DVD/DV SET UP

FUNCTION SET UP

INITIAL SET UP


LANGUAGE SET

AUDIO OUTPUT

PARENTAL LOCK

DISC PLAY SET UP


press G.


PARENTAL LEVEL


NONE


COUNTRY CODE


US


SET UP

ENTER

SELECT WITH @ THEN PRESS [ENTER]


4 Press FG to select


EXIT

SELECT

PRESS [SET UP] TO EXIT


APARENTAL LEVELB, then


DVD VIDEO SET UP

HDD/DVD/DV SET UP

FUNCTION SET UP

INITIAL SET UP


LANGUAGE SET

AUDIO OUTPUT

PARENTAL LOCK

DISC PLAY SET UP


press ENTER.


PARENTAL LEVEL


NONE


5 Press FG to select the


COUNTRY CODE


US


desired level, then press


ENTER.


The smaller the value of level


SET UP

ENTER

SELECT WITH @ THEN PRESS [ENTER]


is, the more restrictive the


EXIT

SELECT

PRESS [SET UP] TO EXIT


Parental Lock level becomes.

Select ANONEB to cancel the restriction.

6Press the number keys to enter your desired four-digit number, then press ENTER.

If you made a mistake, enter a correct number again.

7Press FG to select ACOUNTRY CODEB, then press ENTER.

To Temporarily Release Parental Lock

When you set the Parental Lock level strictly, some discs may not be played back at all. When you insert such a disc and try to play it back, the confirmation screen appears on the TV screen, asking you whether you want Parental Lock to be temporarily released or not.

1Load a disc.

If the disc is rated higher than the selected level, the confirmation screen appears.

2Press DE to select AYESB, then press ENTER.

If you select ANOB, you cannot play back that disc.

3Press the number keys to enter the same password as in step 6 of ATo Set Parental Lock For The First TimeB, then press

ENTER.

When you enter the correct password, the Parental Lock is released and the unit starts playback.

If you enter a wrong password, AENTRY ERRORB appears on the TV screen. Enter the correct password.

If you have successively entered wrong password three times, AENTRY ERROR CAN NOT CHANGE PASSWORDB appears on the TV screen. In such a case, press ENTER. The disc will stop. Then play back the disc again, and try the procedure again from step 1.

NOTE:

If you forget your password, enter A8888B in step 3.

Page 31
Image 31
JVC SR-DVM70EU manual To Change The Settings, To Set Parental Lock For The First Time, To Temporarily Release Parental Lock

SR-DVM70EU specifications

The JVC SR-DVM70EU is a versatile and compact professional digital video recorder that has garnered attention in various video production fields, thanks to its remarkable blend of features, technologies, and user-centric design. Its primary function is to serve as both a mini-DV tape recorder and a DVD recorder, making it an essential tool for filmmakers, videographers, and archivists looking to migrate old content to modern formats.

One of the standout features of the SR-DVM70EU is its dual recording capabilities. The device is engineered to record directly onto mini-DV tapes while simultaneously creating a DVD of the same content. This dual functionality allows users to efficiently create backup copies or share media with clients and collaborators, enhancing workflow and productivity.

The SR-DVM70EU employs advanced digital processing technology to ensure high-quality video and audio playback. The integration of JVC’s proprietary digital signal processing ensures that recordings remain clear and free from distortion, crucial for preserving the integrity of audio and visual content. The unit supports a variety of media formats, including DVD-R, DVD-RW, and DVD+RW, expanding its versatility in content distribution.

Additionally, the recorder includes comprehensive connectivity options. Users can connect the device to various video sources including cameras, camcorders, and other playback devices via FireWire (I-Link) inputs and outputs, component video, and composite video inputs, ensuring compatibility with a wide range of equipment. This versatility makes it easy to integrate the SR-DVM70EU into existing production setups.

An intuitive control panel featuring a clear LCD display allows users to navigate through settings effortlessly. The control interface is designed to be user-friendly, ensuring that both seasoned professionals and newcomers can operate it with ease. The unit also features programmable functions, including customizable recording settings that allow for user-defined settings depending on the project requirements.

The JVC SR-DVM70EU is built with durability in mind, making it suitable for both studio and field use. Its robust construction helps withstand the rigors of professional environments, ensuring that it remains a reliable tool in any videographer's arsenal.

In conclusion, the JVC SR-DVM70EU is an exemplary device that embodies the essence of professional video recording. With its dual recording capabilities, advanced digital processing, flexible connectivity options, and user-friendly design, it remains a popular choice among professionals seeking quality and efficiency in their video production workflows.