SR-MV50U specifications
The JVC SR-MV50U is a versatile and innovative multimedia machine that has earned its reputation as a reliable option for both amateur and professional users. This unit combines the functionality of a video recording device with the convenience of a digital media player, making it an excellent addition to any home theater system or production setup.One of the standout features of the SR-MV50U is its dual-format recording capability. It supports both S-VHS and VHS formats, providing users with flexibility in terms of video quality and playback options. The S-VHS format, known for delivering superior image quality, is particularly advantageous for those looking to capture high-definition content. This dual functionality ensures that users can easily transition between formats as needed.
The SR-MV50U also comes equipped with a built-in MPEG-2 encoder, which enhances the unit’s digital recording capabilities. This technology allows for improved compression and better quality video playback when transferring to digital media. Users can record their favorite shows or home videos onto VHS tapes, while simultaneously creating digital copies for archiving or editing purposes. This makes it particularly useful for video enthusiasts and content creators.
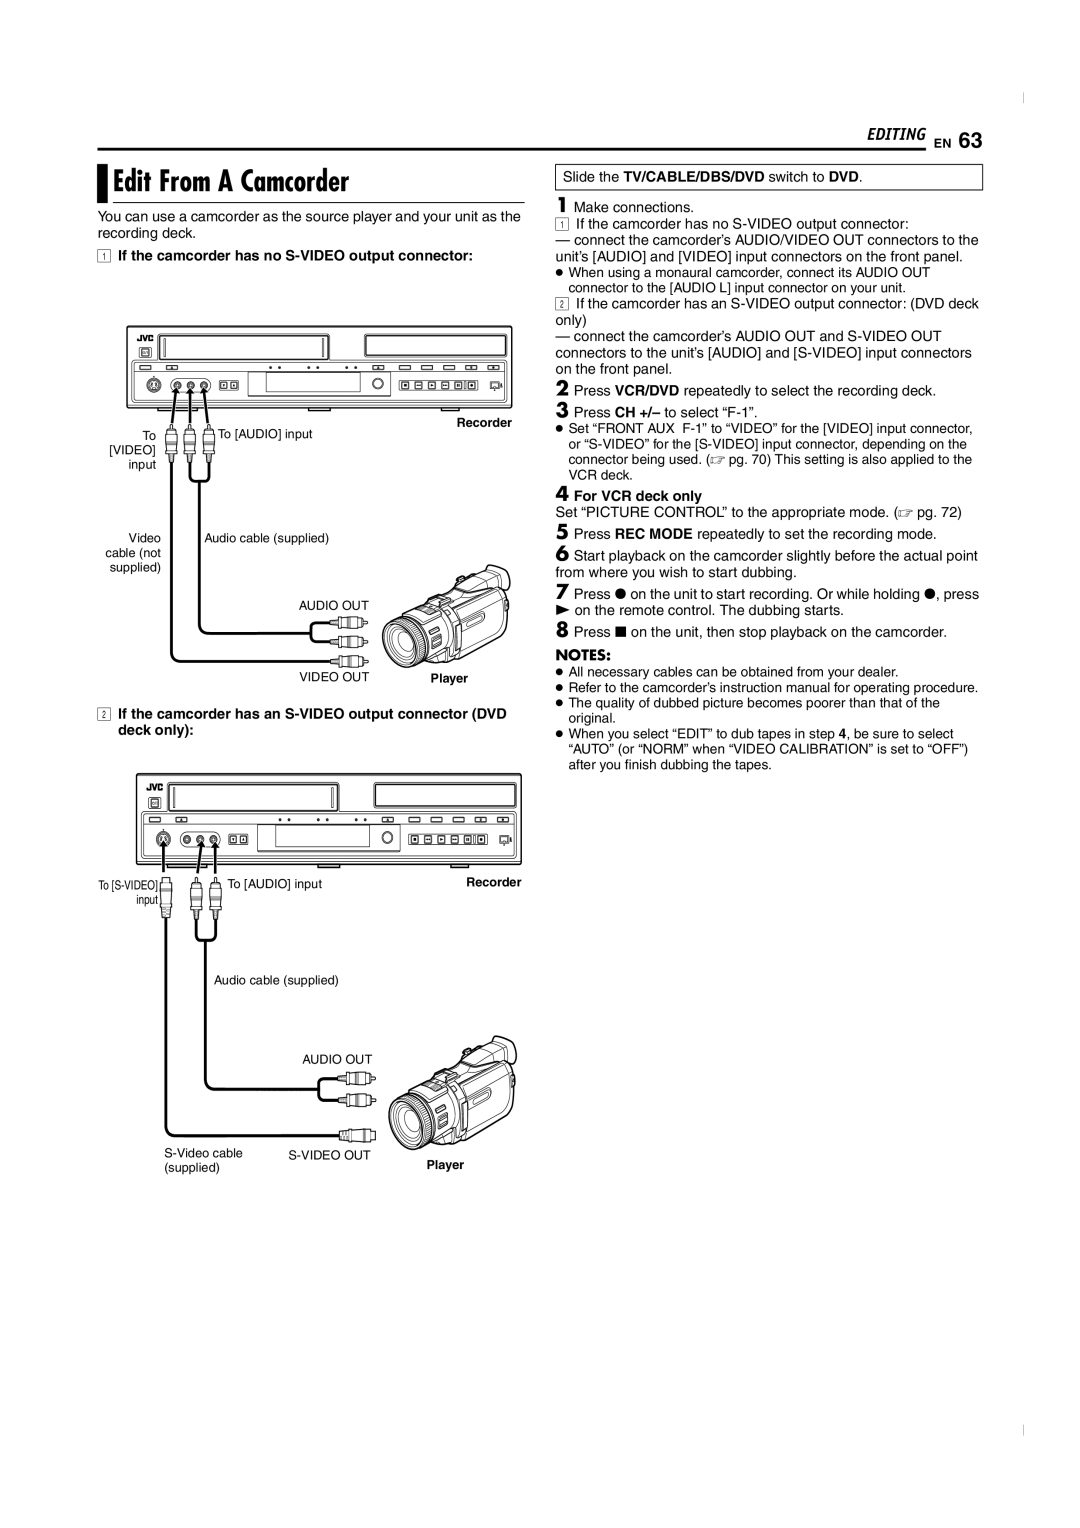
In terms of connectivity, the SR-MV50U is well-equipped, featuring a range of input and output options, including composite video, S-Video, and audio outputs. This extensive connectivity allows users to easily connect the device to televisions, external speakers, or video editing setups, ensuring a seamless workflow in both capture and playback situations.
The user interface of the SR-MV50U is designed to be intuitive, with accessible controls for navigating menus and settings. This makes the device suitable for users of varying experience levels, from beginners to seasoned videographers. Additionally, the remote control feature ensures that users can operate the machine from a distance, enhancing convenience, especially during recording sessions.
Moreover, the JVC SR-MV50U offers time-lapse recording capabilities, providing users with the option to capture long periods of activity in a shorter timeframe. This feature is particularly useful for timelapse projects, surveillance, or documenting events where extended recording is essential.
In summary, the JVC SR-MV50U is a multifunctional device that excels in both video recording and playback. With dual-format recording, built-in MPEG-2 encoding, versatile connectivity options, and user-friendly interface, it stands as a valuable tool for anyone looking to create and enjoy high-quality video content. Its blend of features makes it not only practical but also a durable and efficient choice for various video applications.

