Common Operations | Continued |
Setting the Clock
Before operating the unit any further, first set the unit’s clock. When you plug in the power cord, the CLOCK indicator and “0:00” start flashing on the display.
You can set the clock whether the unit is on or off.
•There is a time limit in doing the following steps. If the setting is canceled before you finish, start over from step 1.
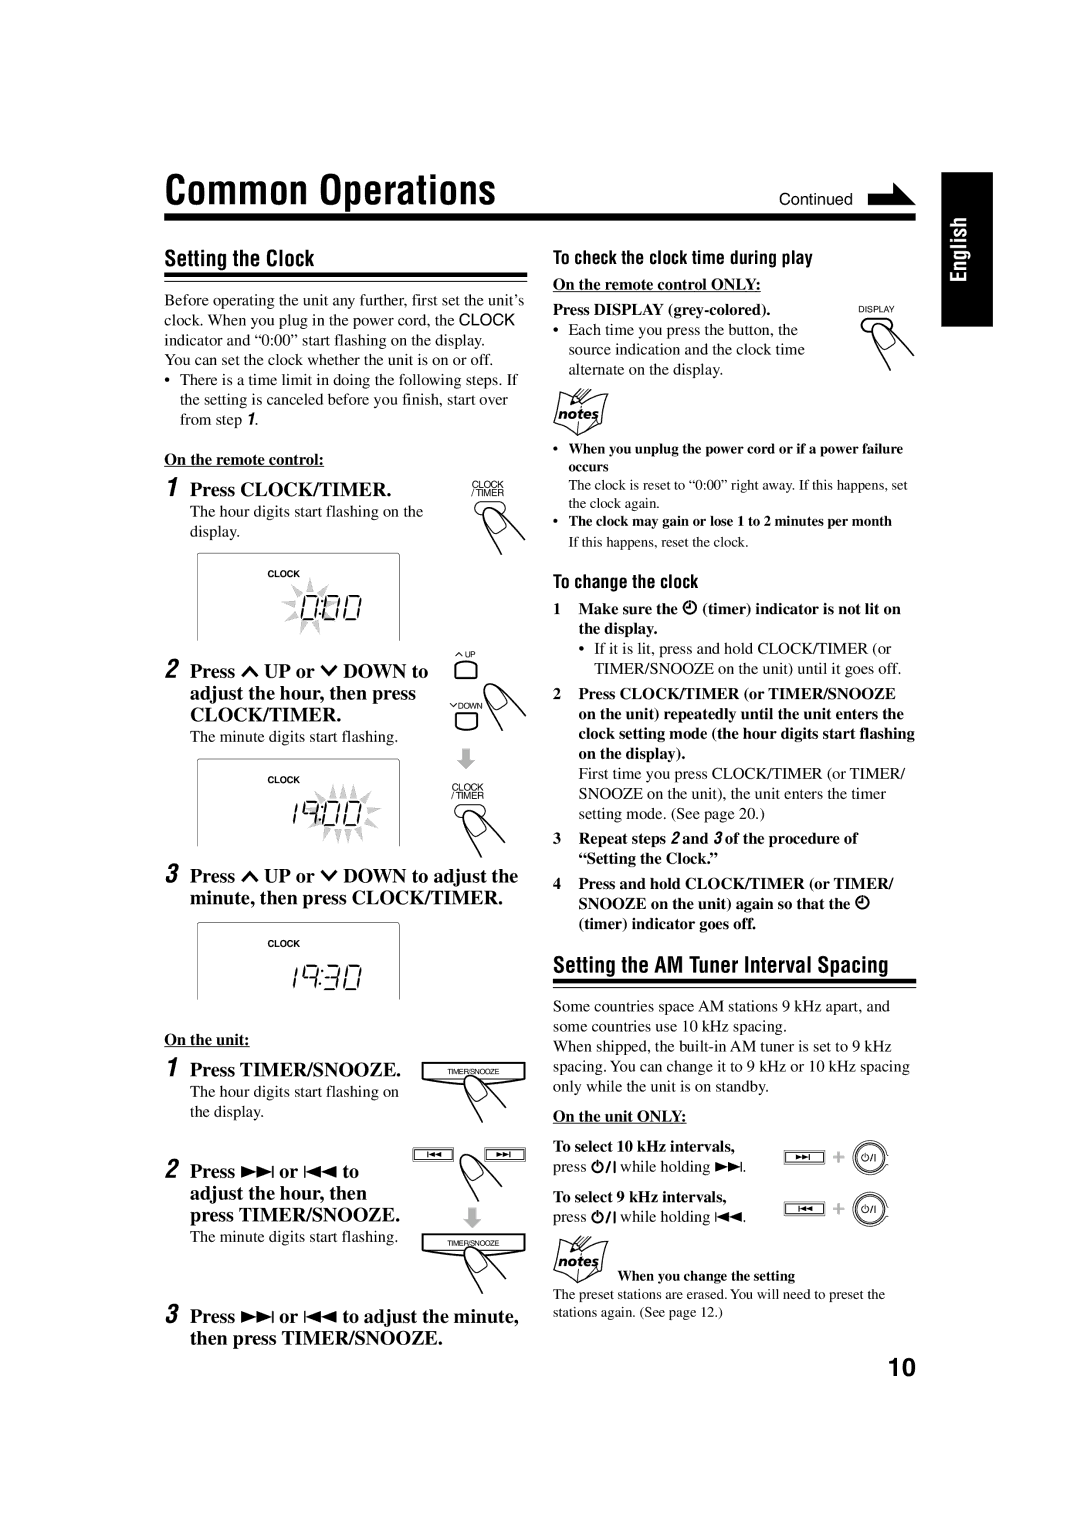
On the remote control:
1 Press CLOCK/TIMER. | CLOCK |
/ TIMER |
The hour digits start flashing on the display.
CLOCK
![]() UP
UP
2Press  UP or
UP or  DOWN to adjust the hour, then press
To check the clock time during play
On the remote control ONLY:
Press DISPLAY | DISPLAY |
• Each time you press the button, the source indication and the clock time alternate on the display.
•When you unplug the power cord or if a power failure occurs
The clock is reset to “0:00” right away. If this happens, set the clock again.
•The clock may gain or lose 1 to 2 minutes per month If this happens, reset the clock.
To change the clock
1 | Make sure the (timer) indicator is not lit on |
| the display. |
| • If it is lit, press and hold CLOCK/TIMER (or |
| TIMER/SNOOZE on the unit) until it goes off. |
2 | Press CLOCK/TIMER (or TIMER/SNOOZE |
English
CLOCK/TIMER.
DOWN
on the unit) repeatedly until the unit enters the |
The minute digits start flashing.
CLOCK
CLOCK / TIMER
3Press ![]() UP or
UP or ![]() DOWN to adjust the minute, then press CLOCK/TIMER.
DOWN to adjust the minute, then press CLOCK/TIMER.
CLOCK
clock setting mode (the hour digits start flashing |
on the display). |
First time you press CLOCK/TIMER (or TIMER/ |
SNOOZE on the unit), the unit enters the timer |
setting mode. (See page 20.) |
3 Repeat steps 2 and 3 of the procedure of |
“Setting the Clock.” |
4 Press and hold CLOCK/TIMER (or TIMER/ |
SNOOZE on the unit) again so that the |
(timer) indicator goes off. |
On the unit:
1Press TIMER/SNOOZE.
The hour digits start flashing on the display.
2Press ¢ or 4 to adjust the hour, then
press TIMER/SNOOZE.
The minute digits start flashing.
TIMER/SNOOZE
TIMER/SNOOZE
Setting the AM Tuner Interval Spacing
Some countries space AM stations 9 kHz apart, and some countries use 10 kHz spacing.
When shipped, the
On the unit ONLY:
To select 10 kHz intervals,
press ![]() while holding ¢.
while holding ¢.
To select 9 kHz intervals,
press ![]() while holding 4.
while holding 4.
When you change the setting
The preset stations are erased. You will need to preset the
3Press ¢ or 4 to adjust the minute, then press TIMER/SNOOZE.
stations again. (See page 12.)
10