English

5Select the volume level.

You can select the volume level (“VOL 0” to “VOL 50” and “VOL – –”).

If you select “VOL – –,” the volume is set to the last level when the unit has been turned off.

Once settings are complete, the Timer setting information appears in sequence.

For Recording Timer:

1Set the hour then the minute for on-time.

2 Set the hour then the minute for off-time.

3 Select the playback source—“TUNER FM,” “TUNER AM,” or “AUX.”

4 For “TUNER FM” and “TUNER AM”: Select a preset channel.

Once settings are complete, the Timer setting information appears in sequence.

3 Turn off the unit (on standby) if you have set the timer with the System turned on.

STANDBY/ON

How Daily Timer actually works

Once the Daily Timer has been set, the timer ( ) indicator and timer number indicator (1/2/3) are lit on the display. Daily Timer is activated at the same time everyday until the timer is turned off manually (see the next column) or another timer is activated.

When the on-time comes

The System turns on, starts playing the specified source (except “AUX”), and sets the volume level to the preset level.

While Daily Timer is working, the timer ( ) indicator and timer number indicator (1/2/3) flash on the display.

When the off-time comes

The System stops playback, and turns off (stands by) automatically.

The timer setting remains in memory until you change it.

How Recording Timer actually works

When Recording Timer has been set, Timer ( ) indicator and the REC indicator are lit on the display. Recording Timer works only once.

When the on-time comes

The System turns on, tunes in to the specified station or changes the source to “AUX”, sets the volume level to the preset level, and starts recording.

When the off-time comes

The System stops recording, and turns off (stands by).

The timer setting remains in memory until you change it.

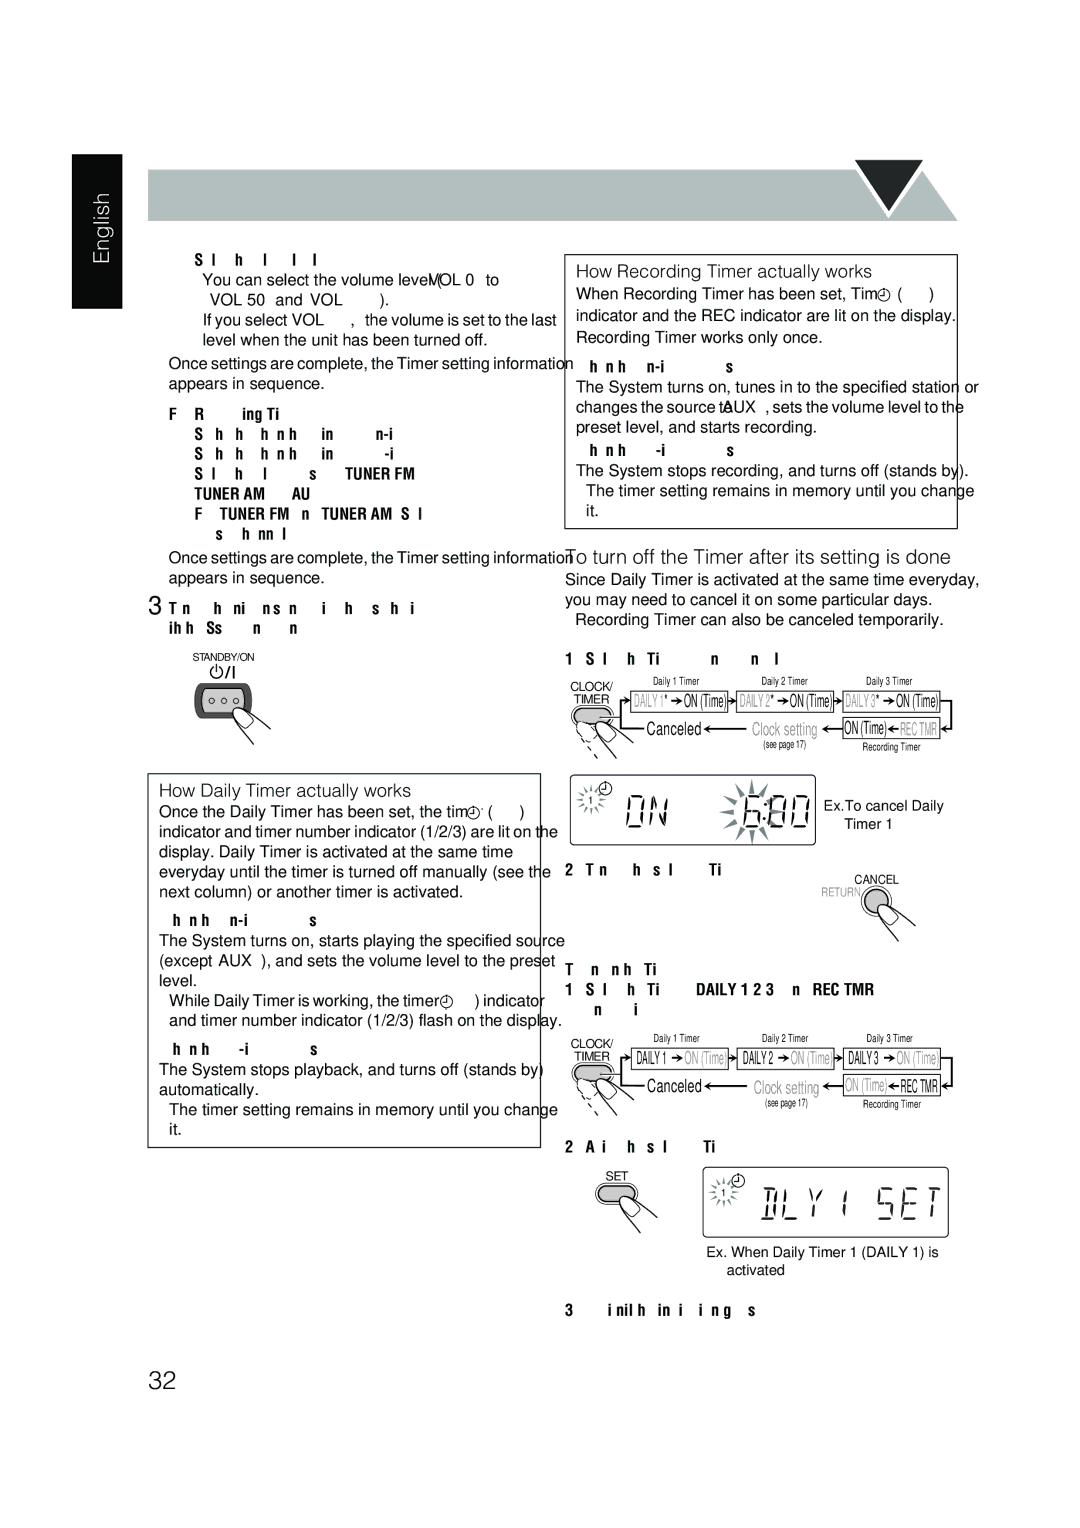
To turn off the Timer after its setting is done

Since Daily Timer is activated at the same time everyday, you may need to cancel it on some particular days.

Recording Timer can also be canceled temporarily.

1 Select the Timer you want to cancel.

CLOCK/


Daily 1 Timer


Daily 2 Timer


Daily 3 Timer

TIMER


DAILY 1*


ON (Time)


DAILY 2*


ON (Time)


DAILY 3*


ON (Time)


Canceled


Clock setting


ON (Time)


REC TMR


(see page 17)


Recording Timer

1

Ex.To cancel Daily


Timer 1

2 Turn off the selected Timer.

CANCEL

RETURN

To turn on the Timer

1Select the Timer (DAILY 1/2/3, and REC TMR) you want to activate.

CLOCK/


Daily 1 Timer


Daily 2 Timer


Daily 3 Timer

TIMER


DAILY 1


ON (Time)


DAILY 2


ON (Time)


DAILY 3


ON (Time)


Canceled


Clock setting


ON (Time)


REC TMR


(see page 17)


Recording Timer

2 Activate the selected Timer.

SET

1

Ex. When Daily Timer 1 (DAILY 1) is activated

3 Wait until the indication goes off.

32

Page 134
Image 134
JVC UX-P450 manual To turn off the Timer after its setting is done

UX-P450 specifications

The JVC UX-P450 is a compact stereo system that showcases an impressive blend of functionality and style, making it a popular choice for audiophiles and casual listeners alike. With its sleek design and powerful features, the UX-P450 stands out in any living space, offering versatility for a range of audio needs.

One of the main features of the JVC UX-P450 is its dual cassette deck capability, which allows users to play and record cassettes with ease. This touch of nostalgia caters to those who still cherish their analog music collections while also providing the digital connectivity needed for modern audio experiences. The system is equipped with a CD player that supports various formats, including CD-R and CD-RW, allowing for an extensive music library.

The UX-P450 further enhances its audio offering through its built-in AM/FM tuner, providing access to a wide array of radio stations. With preset memory options, users can save their favorite stations for quick access. This feature, combined with the system's digital signal processing technology, ensures clear sound quality across all audio sources.

Sound performance is a key characteristic of the JVC UX-P450, featuring a powerful amplifier that delivers rich, dynamic sound with impressive clarity. It incorporates advanced equalization options, allowing users to adjust bass, treble, and balance to suit their personal preferences. The dual speakers are designed to create an immersive soundstage, making it suitable for both music playback and home theater experiences.

Additionally, the compact nature of the UX-P450 makes it easy to integrate into any room, facilitating a clutter-free environment. The ability to connect external devices via an auxiliary input further enhances its functionality, allowing users to enjoy playlists from smartphones, tablets, or other audio devices.

The JVC UX-P450 also includes a remote control, providing convenience for users to operate the system from a distance. This feature greatly enhances the user experience, especially during social gatherings or relaxing evenings at home.

Overall, the JVC UX-P450 stands out for its combination of classic features and modern technology. Whether for enjoying favorite CDs, cassettes, or radio stations, it delivers an enjoyable and flexible listening experience that caters to all types of music lovers. Its design and sound quality make it a worthy addition to any audio setup.