Caller ID Speaker Phone w/SOS Remote Control V11M11_IM_EN_04222008
GETTING STARTED
Installing the Batteries
The
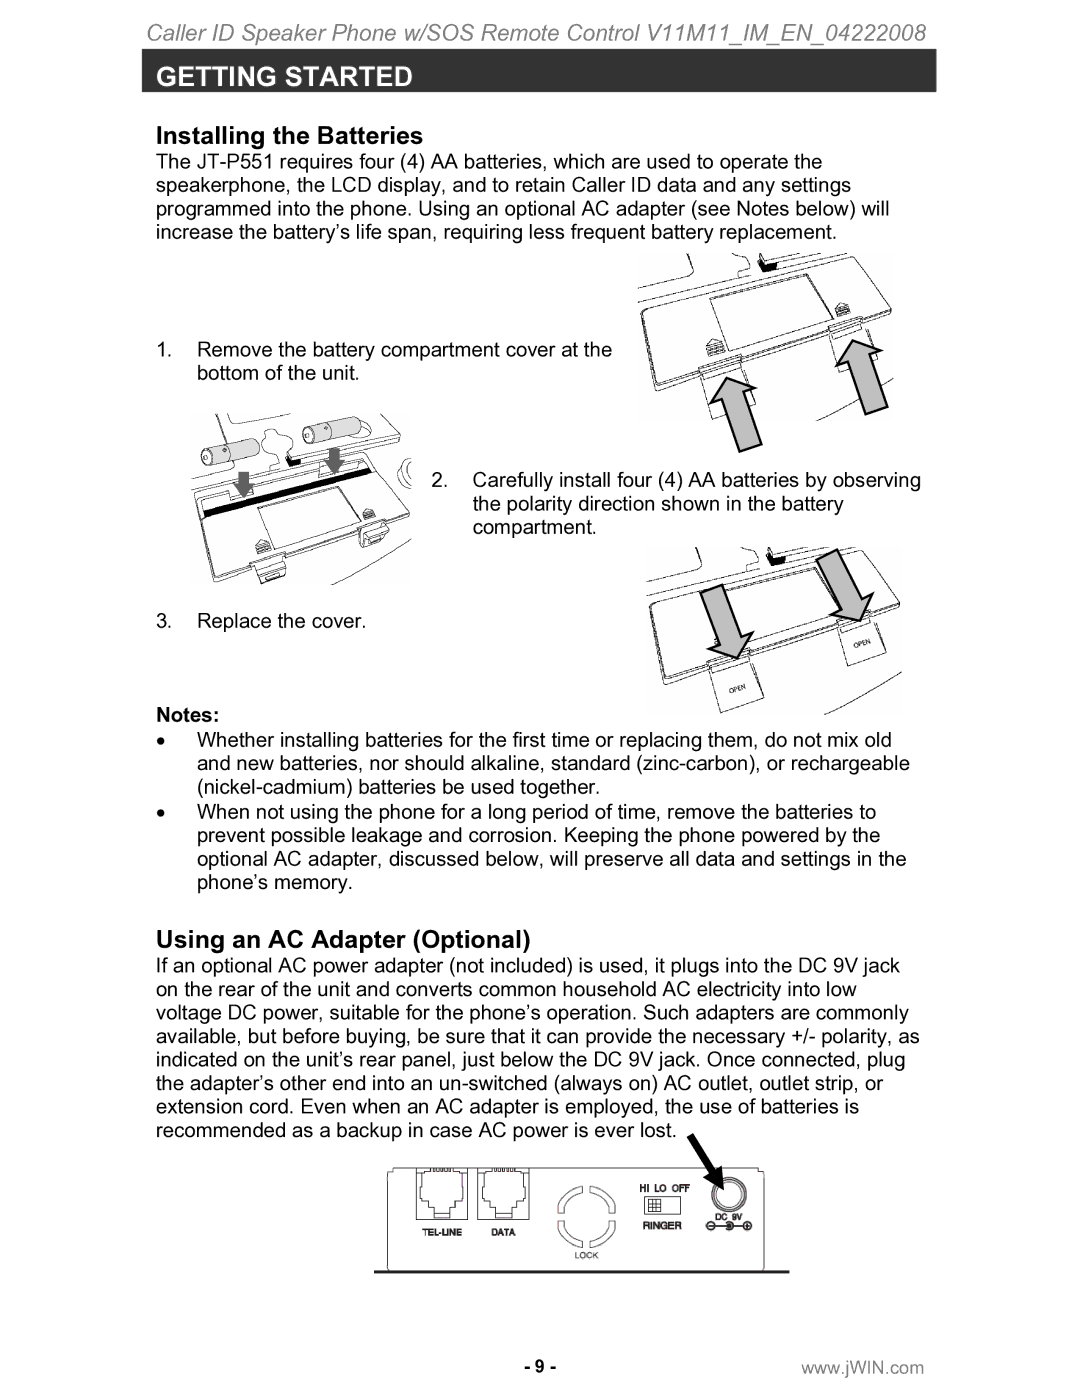
1.Remove the battery compartment cover at the bottom of the unit.
2.Carefully install four (4) AA batteries by observing the polarity direction shown in the battery compartment.
3.Replace the cover.
Notes:
•Whether installing batteries for the first time or replacing them, do not mix old and new batteries, nor should alkaline, standard
•When not using the phone for a long period of time, remove the batteries to prevent possible leakage and corrosion. Keeping the phone powered by the optional AC adapter, discussed below, will preserve all data and settings in the phone’s memory.
Using an AC Adapter (Optional)
If an optional AC power adapter (not included) is used, it plugs into the DC 9V jack on the rear of the unit and converts common household AC electricity into low voltage DC power, suitable for the phone’s operation. Such adapters are commonly available, but before buying, be sure that it can provide the necessary +/- polarity, as indicated on the unit’s rear panel, just below the DC 9V jack. Once connected, plug the adapter’s other end into an
- 9 - | www.jWIN.com |
