Installation and connection
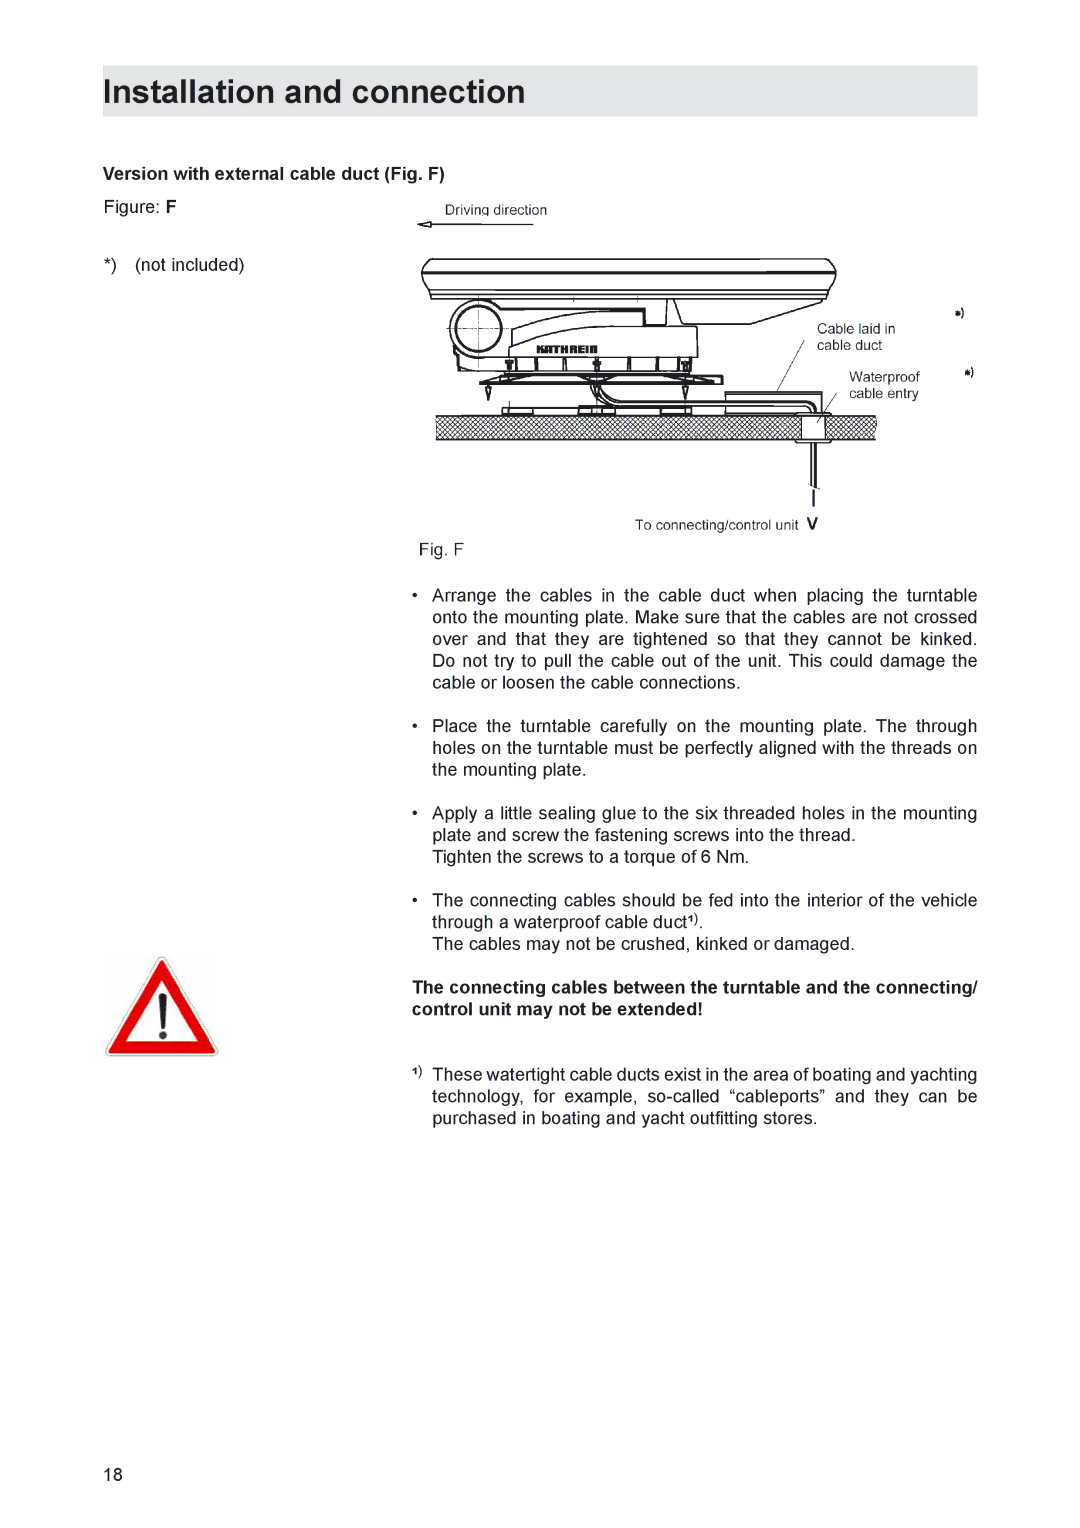
Version with external cable duct (Fig. F)
Figure: F
*) (not included)
•Arrange the cables in the cable duct when placing the turntable onto the mounting plate. Make sure that the cables are not crossed over and that they are tightened so that they cannot be kinked. Do not try to pull the cable out of the unit. This could damage the cable or loosen the cable connections.
•Place the turntable carefully on the mounting plate. The through holes on the turntable must be perfectly aligned with the threads on the mounting plate.
•Apply a little sealing glue to the six threaded holes in the mounting plate and screw the fastening screws into the thread.
Tighten the screws to a torque of 6 Nm.
•The connecting cables should be fed into the interior of the vehicle through a waterproof cable duct¹).
The cables may not be crushed, kinked or damaged.
The connecting cables between the turntable and the connecting/ control unit may not be extended!
¹) These watertight cable ducts exist in the area of boating and yachting technology, for example,
18
