Installation and connection
Installation of turntable
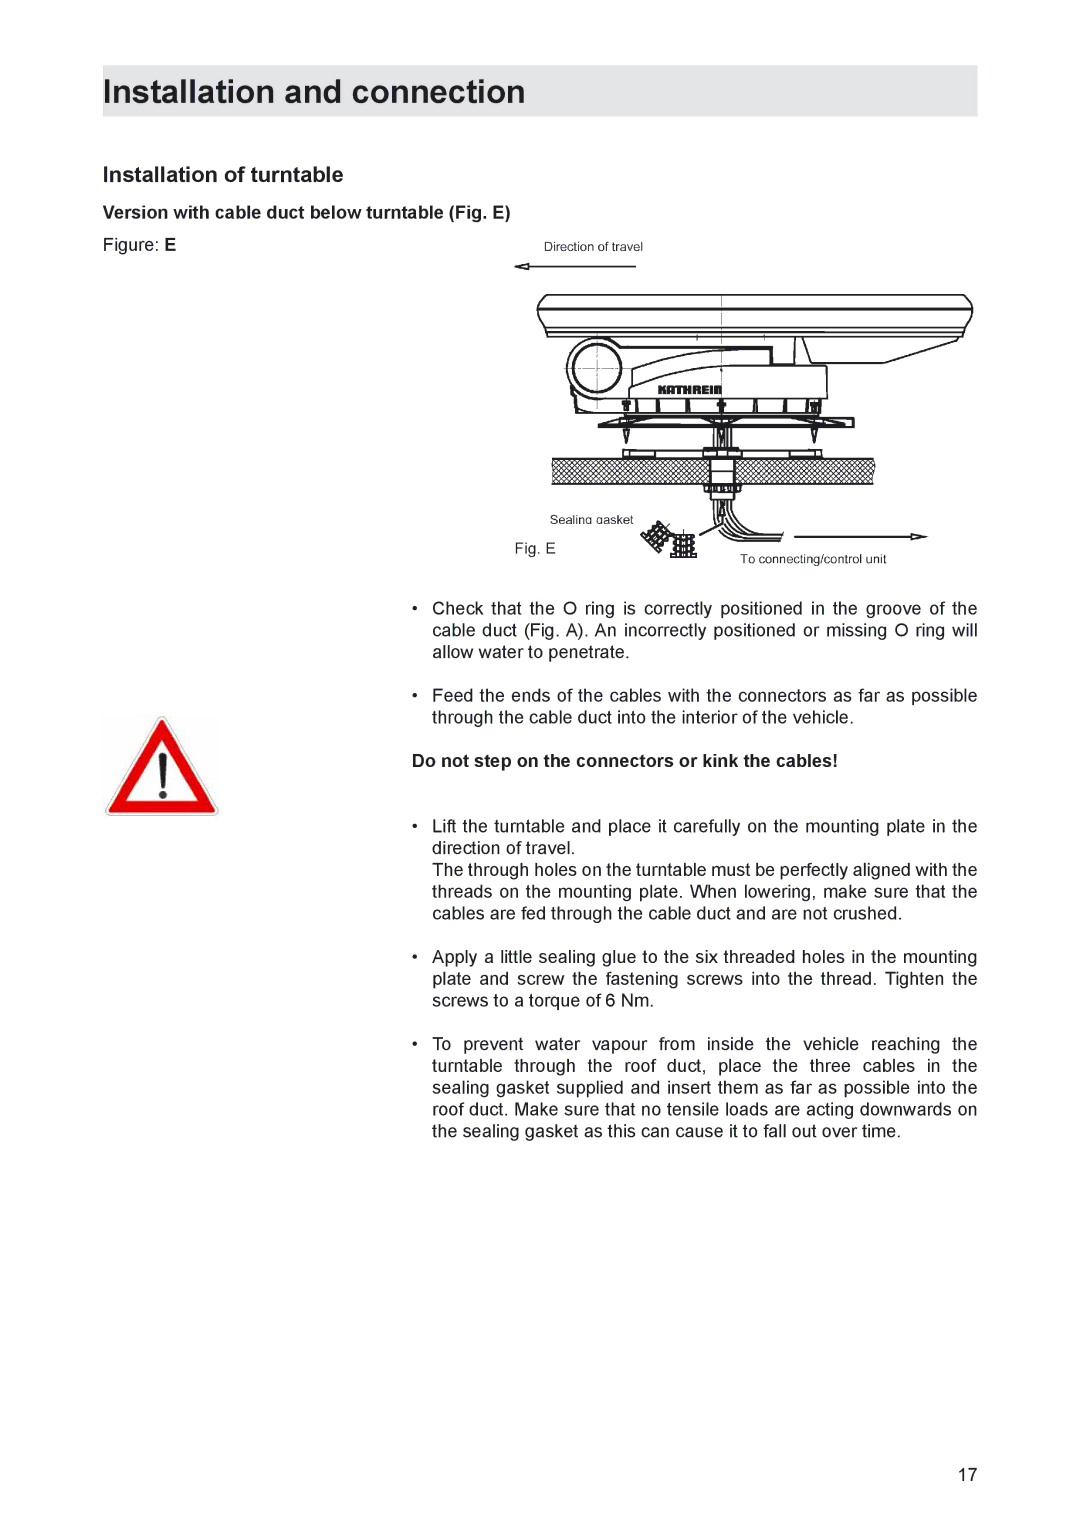
Version with cable duct below turntable (Fig. E)
Figure: E
•Check that the O ring is correctly positioned in the groove of the cable duct (Fig. A). An incorrectly positioned or missing O ring will allow water to penetrate.
•Feed the ends of the cables with the connectors as far as possible through the cable duct into the interior of the vehicle.
Do not step on the connectors or kink the cables!
•Lift the turntable and place it carefully on the mounting plate in the direction of travel.
The through holes on the turntable must be perfectly aligned with the threads on the mounting plate. When lowering, make sure that the cables are fed through the cable duct and are not crushed.
•Apply a little sealing glue to the six threaded holes in the mounting plate and screw the fastening screws into the thread. Tighten the screws to a torque of 6 Nm.
•To prevent water vapour from inside the vehicle reaching the turntable through the roof duct, place the three cables in the sealing gasket supplied and insert them as far as possible into the roof duct. Make sure that no tensile loads are acting downwards on the sealing gasket as this can cause it to fall out over time.
17