Installation and connection
Brief instructions for installing the HDP 171
The other detailed instructions in this operating manual must also be followed!
For ease of illustration, we have dismantled the BAS 60 on these photographs.
As supplied, the BAS 60 is
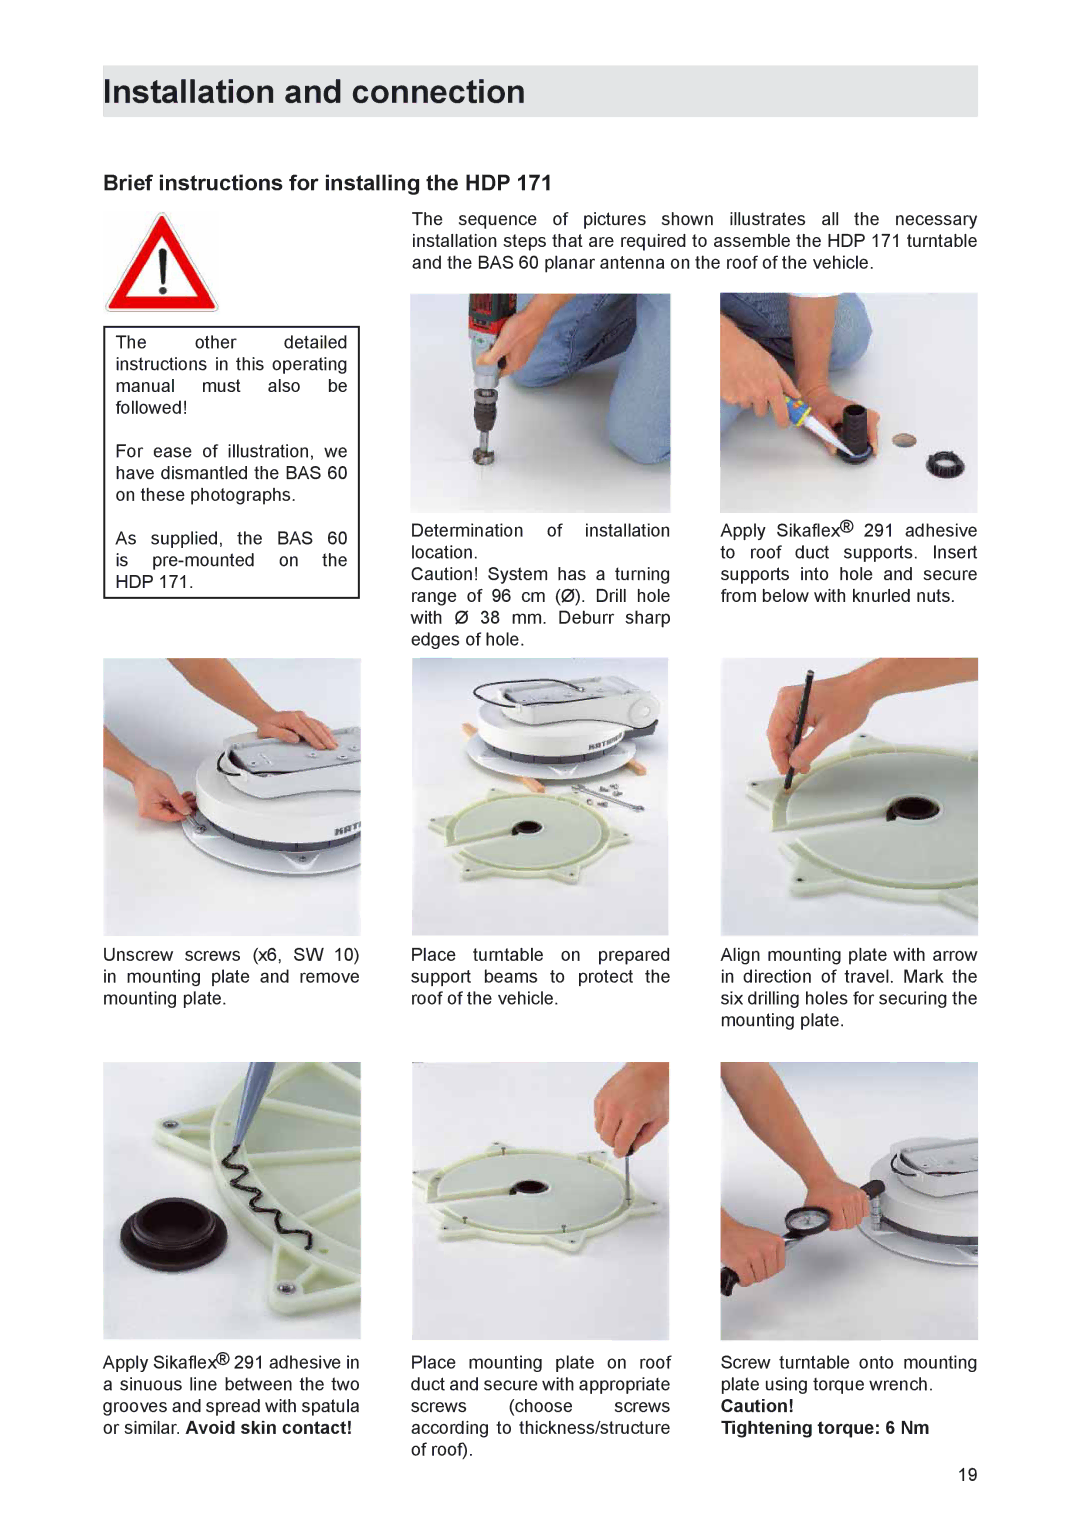
The sequence of pictures shown illustrates all the necessary installation steps that are required to assemble the HDP 171 turntable and the BAS 60 planar antenna on the roof of the vehicle.
Determination of installation | Apply Sikaflex® 291 adhesive |
location. | to roof duct supports. Insert |
Caution! System has a turning | supports into hole and secure |
range of 96 cm (Ø). Drill hole | from below with knurled nuts. |
with Ø 38 mm. Deburr sharp |
|
edges of hole. |
|
Unscrew screws (x6, SW 10) in mounting plate and remove mounting plate.
Place turntable on prepared support beams to protect the roof of the vehicle.
Align mounting plate with arrow in direction of travel. Mark the six drilling holes for securing the mounting plate.
Apply Sikaflex® 291 adhesive in a sinuous line between the two grooves and spread with spatula or similar. Avoid skin contact!
Place mounting plate on roof | Screw turntable onto mounting | ||
duct and secure with appropriate | plate using torque wrench. | ||
screws | (choose | screws | Caution! |
according to thickness/structure | Tightening torque: 6 Nm | ||
of roof). |
|
|
|
19