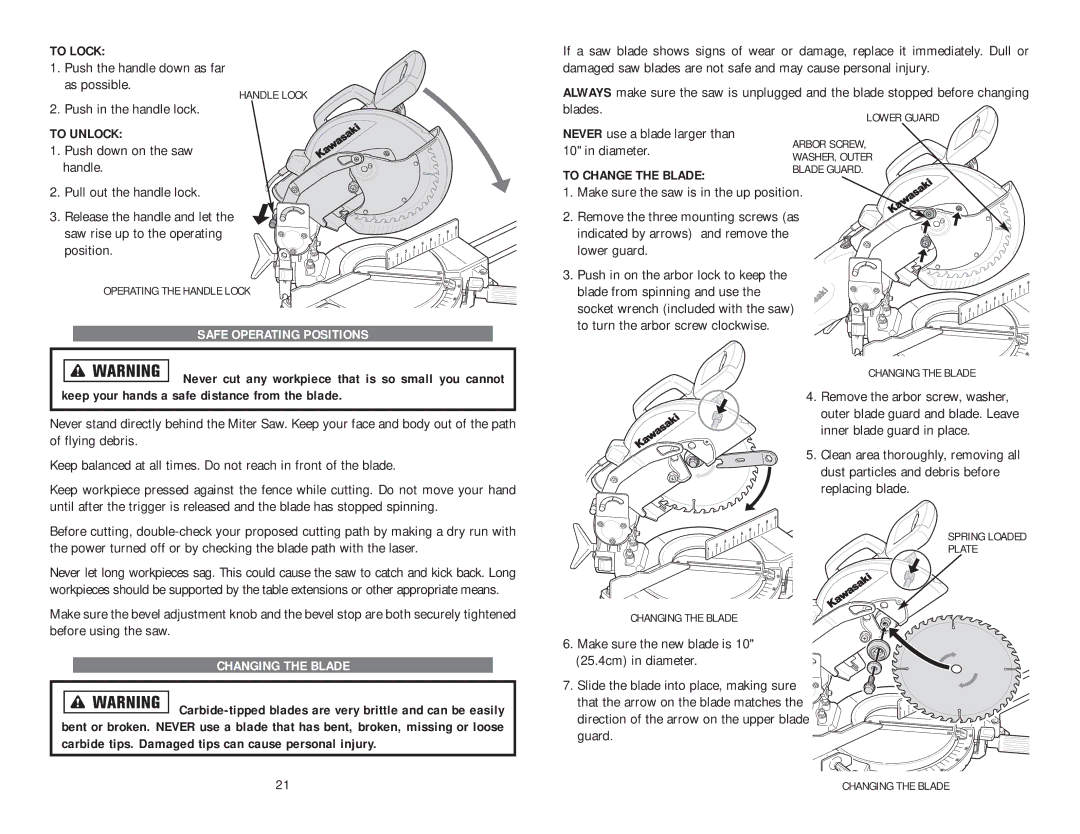
TO LOCK:
1.Push the handle down as far as possible.
HANDLE LOCK
2. Push in the handle lock.
TO UNLOCK:
1. Push down on the saw handle.
2. Pull out the handle lock.
3. Release the handle and let the saw rise up to the operating position.
OPERATING THE HANDLE LOCK
SAFE OPERATING POSITIONS
![]() Never cut any workpiece that is so small you cannot keep your hands a safe distance from the blade.
Never cut any workpiece that is so small you cannot keep your hands a safe distance from the blade.
Never stand directly behind the Miter Saw. Keep your face and body out of the path of flying debris.
Keep balanced at all times. Do not reach in front of the blade.
Keep workpiece pressed against the fence while cutting. Do not move your hand until after the trigger is released and the blade has stopped spinning.
Before cutting,
Never let long workpieces sag. This could cause the saw to catch and kick back. Long workpieces should be supported by the table extensions or other appropriate means.
Make sure the bevel adjustment knob and the bevel stop are both securely tightened before using the saw.
CHANGING THE BLADE
![]()
If a saw blade shows signs of wear or damage, replace it immediately. Dull or damaged saw blades are not safe and may cause personal injury.
ALWAYS make sure the saw is unplugged and the blade stopped before changing
blades.
LOWER GUARD
NEVER use a blade larger than 10" in diameter.
TO CHANGE THE BLADE:
1. Make sure the saw is in the up position.
2. Remove the three mounting screws (as indicated by arrows) and remove the lower guard.
3. Push in on the arbor lock to keep the blade from spinning and use the socket wrench (included with the saw) to turn the arbor screw clockwise.
CHANGING THE BLADE
4. Remove the arbor screw, washer, outer blade guard and blade. Leave inner blade guard in place.
5. Clean area thoroughly, removing all dust particles and debris before replacing blade.
SPRING LOADED
PLATE
CHANGING THE BLADE
6. Make sure the new blade is 10" (25.4cm) in diameter.
7. Slide the blade into place, making sure ![]() that the arrow on the blade matches the
that the arrow on the blade matches the ![]() direction of the arrow on the upper blade
direction of the arrow on the upper blade ![]()
![]() guard.
guard.
21 | CHANGING THE BLADE |