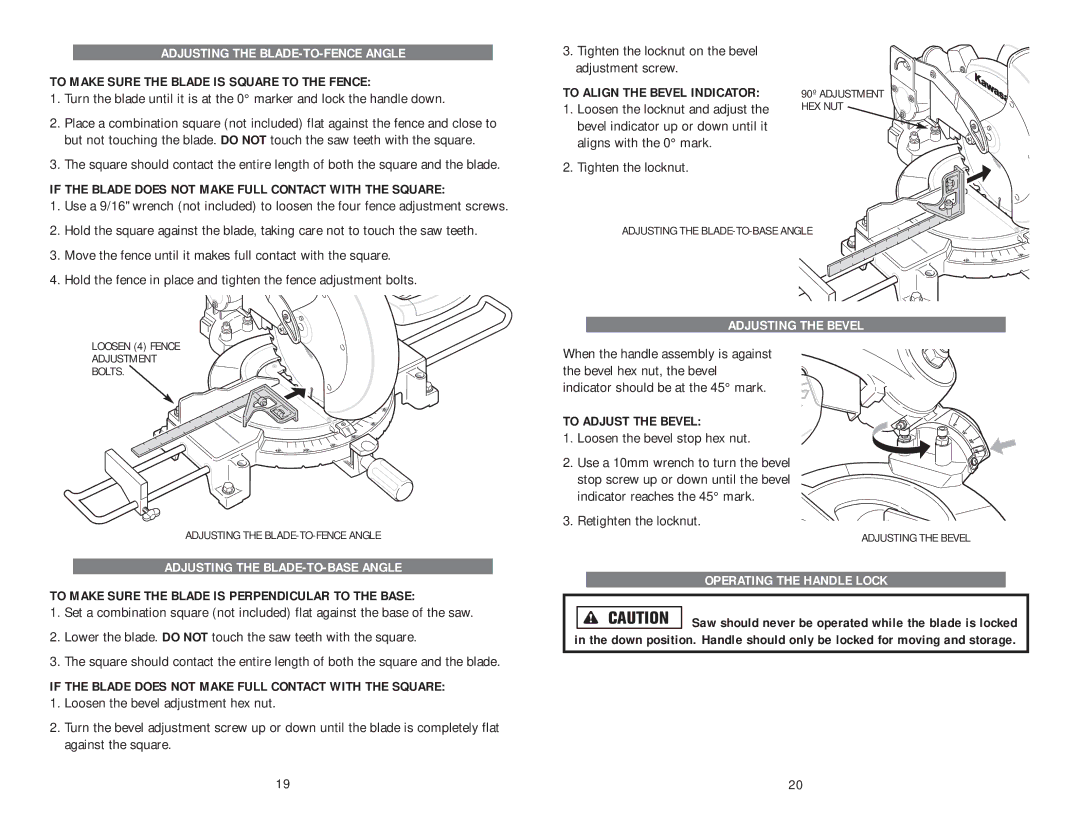
ADJUSTING THE BLADE-TO-FENCE ANGLE
TO MAKE SURE THE BLADE IS SQUARE TO THE FENCE:
1.Turn the blade until it is at the 0° marker and lock the handle down.
2.Place a combination square (not included) flat against the fence and close to but not touching the blade. DO NOT touch the saw teeth with the square.
3.The square should contact the entire length of both the square and the blade.
IF THE BLADE DOES NOT MAKE FULL CONTACT WITH THE SQUARE:
3.Tighten the locknut on the bevel adjustment screw.
TO ALIGN THE BEVEL INDICATOR:
1.Loosen the locknut and adjust the bevel indicator up or down until it aligns with the 0° mark.
2.Tighten the locknut.
90º ADJUSTMENT HEX NUT ![]()
1.Use a 9/16" wrench (not included) to loosen the four fence adjustment screws.
2.Hold the square against the blade, taking care not to touch the saw teeth.
3.Move the fence until it makes full contact with the square.
4.Hold the fence in place and tighten the fence adjustment bolts.
LOOSEN (4) FENCE
ADJUSTMENT
BOLTS.
ADJUSTING THE
ADJUSTING THE BLADE-TO-BASE ANGLE
TO MAKE SURE THE BLADE IS PERPENDICULAR TO THE BASE:
1.Set a combination square (not included) flat against the base of the saw.
2.Lower the blade. DO NOT touch the saw teeth with the square.
3.The square should contact the entire length of both the square and the blade.
IF THE BLADE DOES NOT MAKE FULL CONTACT WITH THE SQUARE:
1.Loosen the bevel adjustment hex nut.
2.Turn the bevel adjustment screw up or down until the blade is completely flat against the square.
ADJUSTING THE
ADJUSTING THE BEVEL
When the handle assembly is against the bevel hex nut, the bevel indicator should be at the 45° mark.
TO ADJUST THE BEVEL:
1. Loosen the bevel stop hex nut.
2. Use a 10mm wrench to turn the bevel stop screw up or down until the bevel indicator reaches the 45° mark.
3. Retighten the locknut.
ADJUSTING THE BEVEL
OPERATING THE HANDLE LOCK
![]()
![]()
![]()
![]()
![]()
![]()
![]() Saw should never be operated while the blade is locked in the down position. Handle should only be locked for moving and storage.
Saw should never be operated while the blade is locked in the down position. Handle should only be locked for moving and storage.
19 | 20 |
