After the basic construction of your garment is finished, there are still many finishing touches to be done. To aid your completion of your garment, the Kenmore has been
designed to do the following tasks that formerly had to be done by hand.
BUTTONHOLE MAKING
(Model 1625 only)
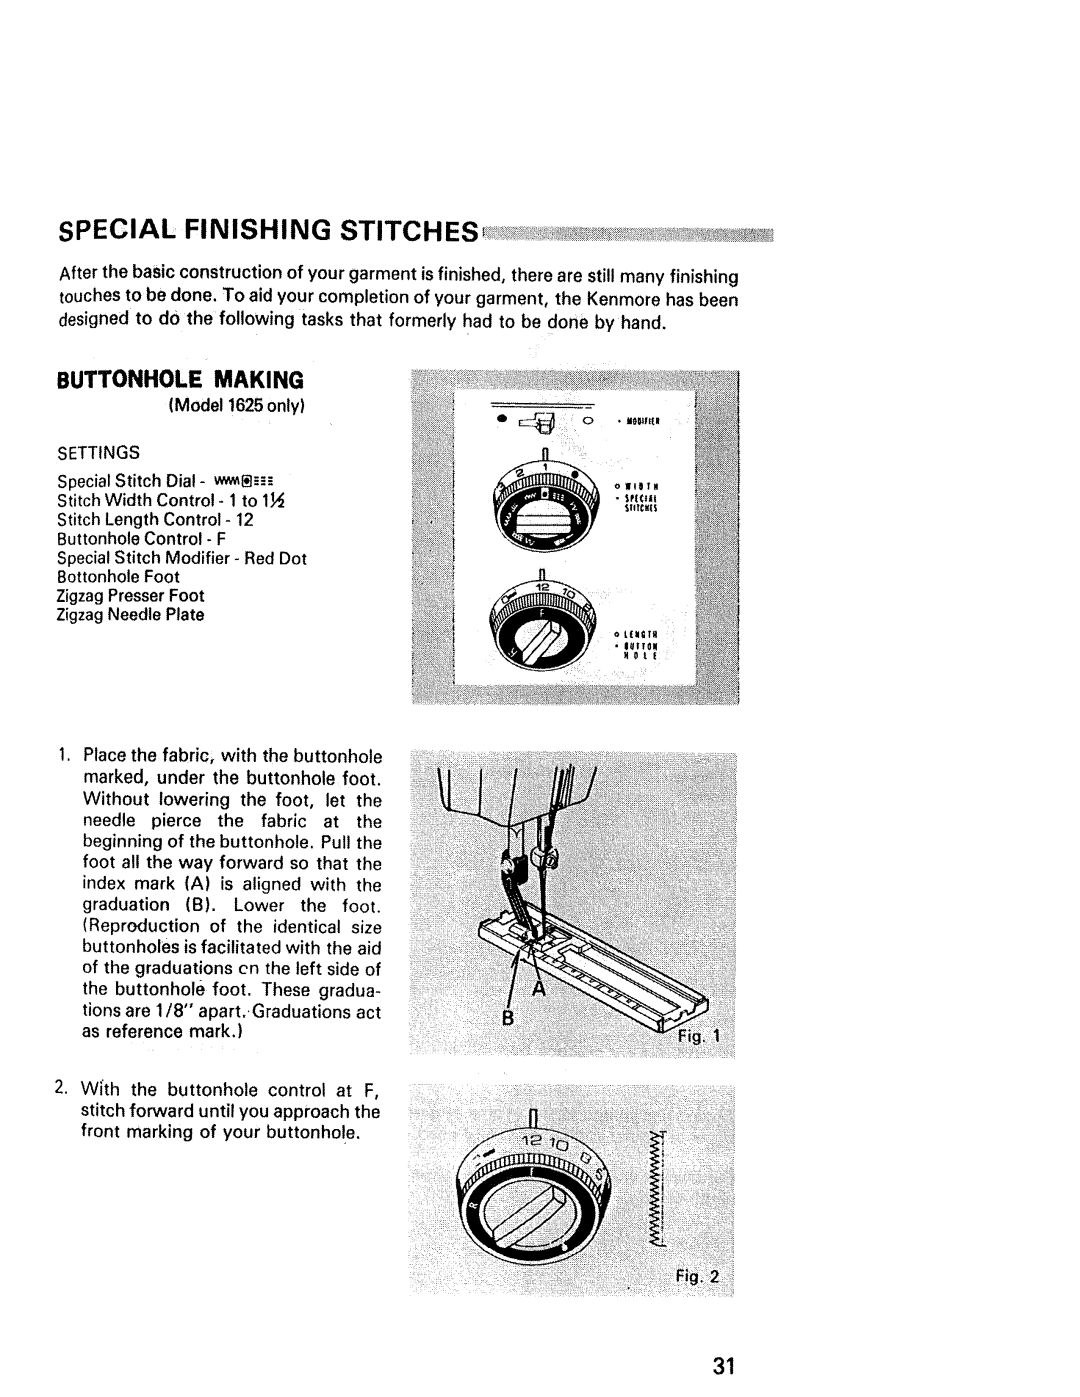
SETTINGS
Special Stitch Dia!-
Stitch Width Control - 1 to 1_
Stitch Length Control- 12
Buttonhole Control - F
Special Stitch Modifier- Red Dot
Bottonhole Foot
Zigzag Presser Foot
Zigzag Needle Plate
. Place the fabric, with the buttonhole
marked, under the buttonhole foot. Without lowering the foot, let the needle pierce the fabric at the beginning of the buttonhole. Pull the foot all the way forward so that the index mark (A) is aligned with the graduation (B). Lower the foot. (Reproduction of the identical size buttonholes is facilitated with the aid
of the graduations cn the left side of the buttonhole foot. These gradua- tions are 1/8" apart. Graduations act as reference mark.)
. W_th the buttonhole control at F, stitch forward until you approach the front marking of your buttonhole.
:
••: • •••••• i••_••i•••!•i_i:_••••'•:!••i:i•!•:•iii:•_
31
