TABLE

DES

MATIERES


PARTIE

I.

iDENTiFiCATiON

DES PIECES

DE


PARTIE ill. COUTURE AU POINT DROIT


LA MACHINE


Point

droit


35

Mallette et sac de transport


3


,, Debut d'unecouture


35

identification des pieces


3


............................................................


,, Finition

d'unecouture


35

Accessoires

et pieces disponibles


5


...........................................


Utilisation

des guides

de couture


35

PARTIE

II. PREPAREZ-VOUS

A COUDRE


Branchez

la macMne


7


Pour

coudre un

angle

droit

...................................

35

...............................................................


SurpiqOre


....................................

37

Les premieres

fois que vous utilisez

votre machine

7


...................................


Consignes de securite

.............................................................


7


Prise

polarisee


7


Contr61ez la vitesse

de couture


7


Pose

de la broche & bobine


9


Releve-pied

presseur

...............................................................


9


Coupe-fil

...................................................................................


9


Rallonge

de plateau

...............................................................


11


..............


.........................

41

,, Pour

retirer

la rallonge


111


E iV.


:


"ChangerP°Urfixerl,aiguillelarallonge


11

:::

: _ig _ag simple ...

.........................

.....................

43

Retrait et

installation

du support de

pied


11

::

_i_ilance

..........

..........................

....................

43


..... 1


,, Retrait


....M_ammes


....................

......................

45

,, Installa


.........................

............................

45

Changementdepied[


Bnd_

d

fo_ L


47

.

Pour


pr

_


.


Pose

_

_ons

..................................................................

47


retlrerle

pied


,, Pour

mettre

le pied presseur en

place ..

...................

1_


:Surfllag_


:


49

Differents pie ds presse urs

.............

.................

1


Po n! z,g-z_

I

.............................................................


49

_ r_:_.J_:


....


o FlnltlOn

de_ #_a_Stes

............................................................


49

,, P.......ed a bo uto nn ere


........

:;:

: :


. mepr ser


49


...............................................................................


, ....


.......


,lea

b,rermeture _ _

i_re

.....................

.....

13

,, P ed d'ouret rou


Choix

de

I'aiguille _t _i_u

_

.......................

16

Remp

r

a canette

....

19-23


:.......;

.........................

19

,, Retralt de la porte-caaet_e

,, Be bin age d'une ca n


:i

..................... 19-21

,, Insertion de

la canette


...............................

23

Enfilage

de la machine


25

,, Enfilage de la machine

........................................................


25

Enfile-aiguille

(Exclusivite

de

modele 15343)

........................

27

,, Comment faire monter le fil de la canette

27

Reglage

de la tension

du fil de I'aiguille pour le point droit

.... 29

,, Tension

correcte

29

,, Si

la tension

est trop

elevee

29

,, Si

la tension

est trop

faible

29

,, Reglage de la tension

de la bobine

29

Reglage de la tension du fil de I'aiguille pour le point zig-zag ... 31

,, Tension correcte

31

,, Si

la tension

est trop

elevee

31

,, Si

la tension

est trop

faible

31

Selecteur de point

33

Bouton de marche arriere

33

....PARTIE V, POINTS UTILITAIRES ET POINTS


DCCOR/_,:rFS


Ourlet

invisible

51

uente

e


..................................................................................


51

Aiguilles

umelees

(Faclutatif)

53

PAR T I E V l. BO UTO N N I ER E


Boutonniere


55-57

,, Commencer

une couture

55-57

PARTIE Vii. ENTRETIEN DE VOTRE MACHINE


Remplacement

de I'ampoule

59

Nettoyage

du porte-canette

59

Nettoyage

de la coursiere

61

,, Nettoyage de la navette

61

,, Remontage

de la navette

61

Lubrification de la machine

63

, Lubrifiez

derriere

le couvercle de facade

63

,, Lubrifiez

autour

de la navette

63

En cas de probleme

66

*Veuillez noter que certaines des sections enumerees au-dessus de non-connexe au operations fondamentales ont ete omises de ce manual

XII

Page 13
Image 13
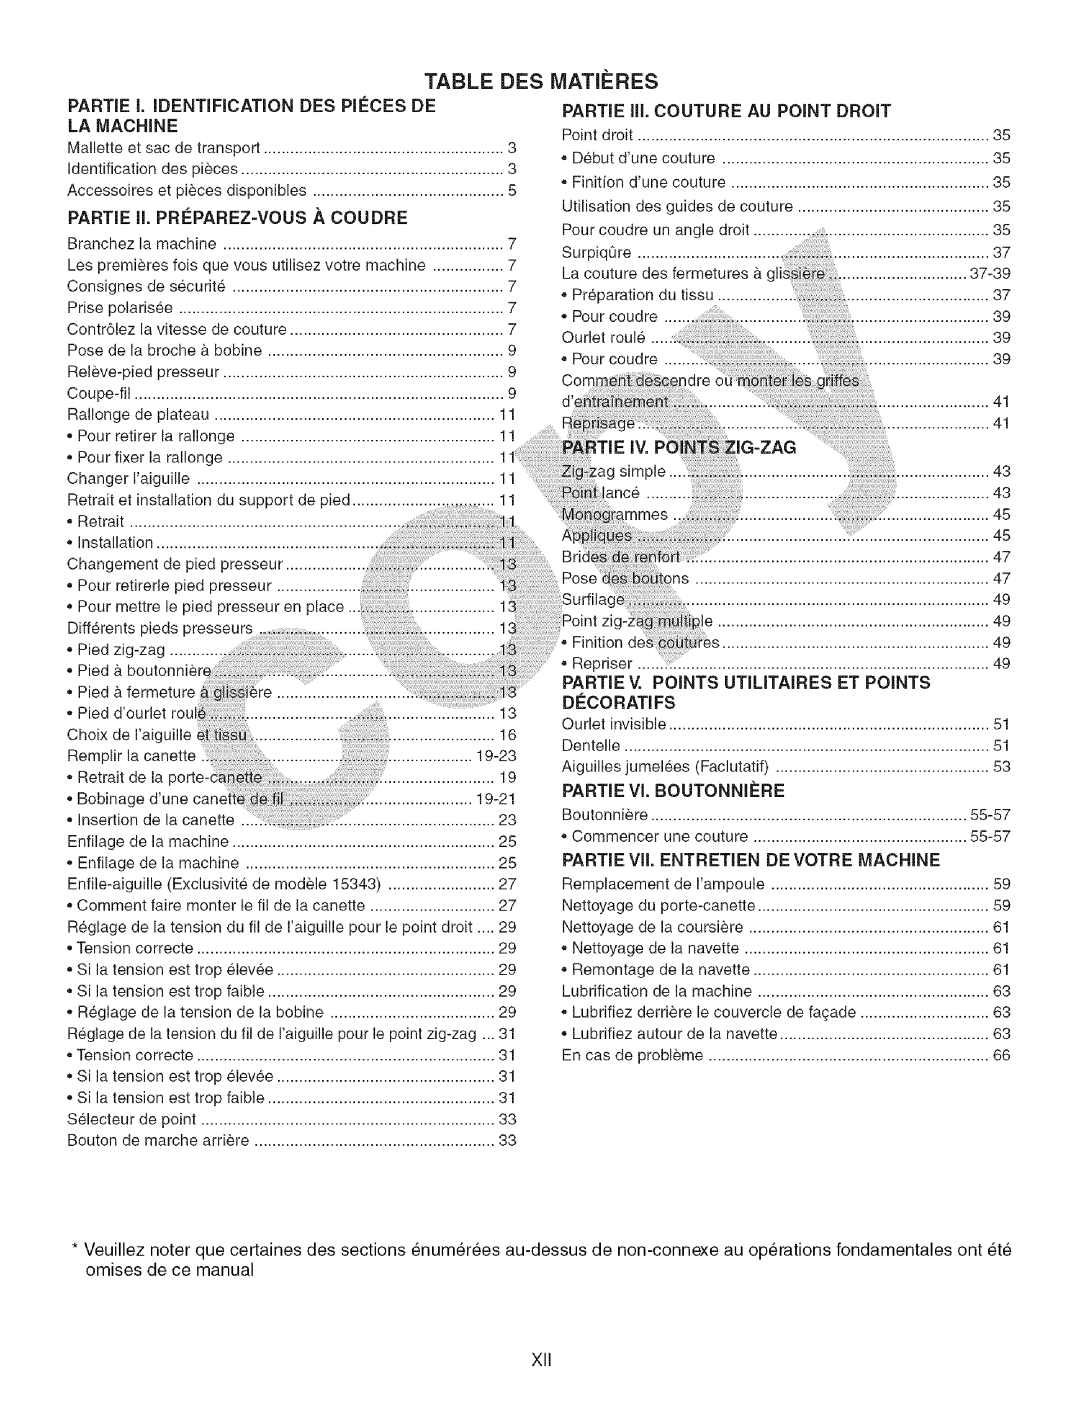
Kenmore 385.15343, 385.15243 owner manual Matieres, DCCOR/,rFS

15243, 15343, 385.15343, 385.15243 specifications

The Kenmore 385.15243, 385.15343, 15343, and 15243 are part of Kenmore’s renowned sewing machine lineup, designed to cater to both novice and experienced sewists. These models are celebrated for their versatility, ease of use, and robust feature set, making them a favorite in homes and sewing studios alike.

One of the standout features of these Kenmore models is their wide range of built-in stitch options. With up to 50 different stitches, including utility stitches, decorative stitches, and stretch stitches, users have the flexibility to tackle various projects, from simple hems to intricate quilts. The stitch selection is easily navigable through a user-friendly dial, which enhances the sewing experience for beginners and seasoned sewers alike.

Kenmore sewing machines are also equipped with a powerful motor that ensures smooth operation, even when sewing through multiple layers of fabric. This feature significantly reduces the risk of jams and improves overall sewing efficiency. The machines provide adjustable speed control, allowing users to set the pace based on their skill level and project requirements.

Another highlight of the Kenmore 385 series is its drop-in bobbin system. This design simplifies the bobbin-loading process, making it quicker and more convenient. The transparent bobbin cover allows for easy monitoring of the thread supply, preventing surprises in the middle of a project. Additionally, twin needle capability adds another layer of versatility, enabling users to achieve professional-looking results with ease.

The Kenmore 385 models are also designed with user comfort in mind. Their lightweight build and ergonomic handles make them easy to transport, while the inclusion of several accessories—such as an all-purpose foot, zipper foot, and buttonhole foot—enhances their functionality. The extension table provided with select models offers additional work surface area, ideal for larger projects.

Moreover, these sewing machines feature adjustable presser foot pressure, allowing users to customize the amount of pressure applied to different types of fabric. This is crucial when working with various materials, ensuring optimal results across the board.

With solid construction and reliable performance, the Kenmore 385.15243, 385.15343, 15343, and 15243 models have earned a reputation for durability. They offer an excellent combination of technology, features, and ease of use, making them a valuable addition to any sewing enthusiast’s toolkit. Whether crafting clothing, home décor, or quilting projects, these machines deliver exceptional results every time.