-STEP 3: INSTALL
B.ASSEMBLE FAUCET
ULTRAFILTER 350
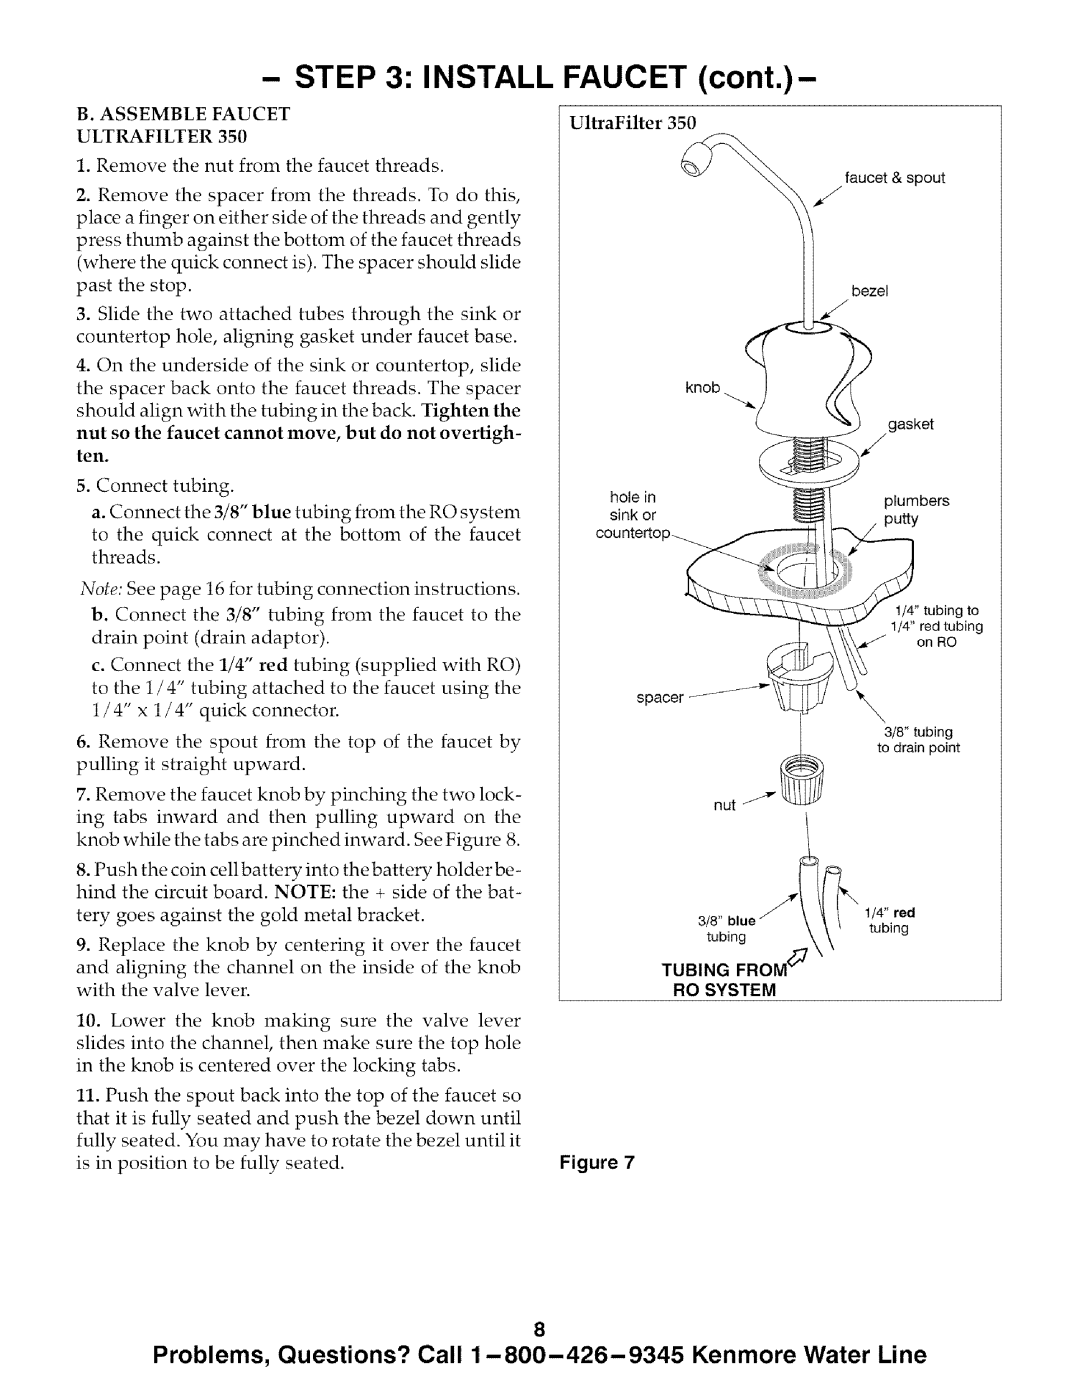
1.Remove the nut from the faucet threads.
2.Remove the spacer from the threads. To do this, place a finger on either side of the threads and gently press thumb against the bottom of the faucet threads (where the quick connect is). The spacer should slide past the stop.
3.Slide the two attached tubes through the sink or
countertop hole, aligning gasket under faucet base.
4.On the underside of the sink or countertop, slide
the spacer back onto the faucet threads. The spacer should align with the tubing in the back. Tighten the
nut so the faucet cannot move, but do not overtigh- ten.
5. Connect tubing.
a. Connect the 3/8" blue tubing from the RO system
to the quick connect at the bottom of the faucet threads.
Note: See page 16 for tubing connection instructions.
b. Connect the 3/8" tubing from the faucet to the drain point (drain adaptor).
c. Connect the 1/4" red tubing (supplied with RO)
to the 1/4" tubing attached to the faucet using the 1 / 4" x 1 / 4" quick connector.
6.Remove the spout from the top of the faucet by
pulling it straight upward.
7.Remove the faucet knob by pinching the two lock-
ing tabs inward and then pulling upward on the knob while the tabs are pinched inward. See Figure 8.
8.Push the coin cell battery into the battery holder be- hind the circuit board. NOTE: the + side of the bat-
tery goes against the gold metal bracket.
9. Replace the knob by centering it over the faucet
and aligning the channel on the inside of the knob with the valve lever.
10. Lower the knob making sure the valve lever
slides into the channel then make sure the top hole in the knob is centered over the locking tabs.
11.Push the spout back into the top of the faucet so that it is fully seated and push the bezel down until fully seated. You may have to rotate the bezel until it is in position to be fully seated.
FAUCET (cont.)-
UltraFilter 350
hole in sink or
coun
spacer J
nut
3/8" tubing
TUBING
RO SYSTEM
Figure 7
faucet & spout
bezel
gasket
plumbers putty
1/4" tubing to 1/4" red tubing on RO
3/8" tubing to drain point
1/4" red tubing
8
Problems, Questions? Call