
KN-COB-IC, P/N 900-0120 specifications
The Kidde P/N 900-0120, also known as the KN-COB-IC, is a pivotal component in home safety technology. This carbon monoxide (CO) and natural gas alarm integrates advanced capabilities, designed to protect families from the dangers associated with these hazardous gases.One of the key features of the Kidde KN-COB-IC is its dual sensing technology. It is engineered to detect both carbon monoxide and natural gas, ensuring comprehensive monitoring of potential threats in the home. This dual functionality allows families to have peace of mind, knowing that they are protected against two of the most dangerous types of gas exposure.
The device utilizes an electrochemical sensor for carbon monoxide detection. This technology is recognized for its accuracy and reliability in identifying harmful levels of CO in the atmosphere. The alarm is programmed to trigger at low levels, allowing for early warning and reducing the risk of serious health issues. Equally, the natural gas sensor functions effectively to detect the presence of methane and propane, facilitating prompt action if dangerous gas is present.
User-friendly features are abundant in the KN-COB-IC model. It is equipped with a test/reset button, allowing users to easily check the functionality of the device. The unit’s digital display is a standout characteristic, providing real-time readings of carbon monoxide levels, which helps users assess their environment quickly. Additionally, the display includes notification indicators that alert users to any gas detection or battery failures, ensuring that the device remains operational.
The Kidde KN-COB-IC is designed for easy installation and maintenance. It is battery-operated and features an easy-to-replace battery design, making it a convenient option for households. The unit comes with a 10-year life span, which is advantageous for homeowners, eliminating the frequent replacements required for some older models.
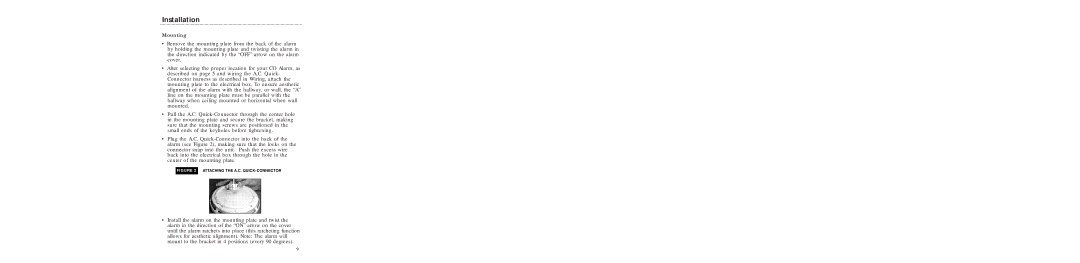
Incorporating sleek and compact design elements, the Kidde KN-COB-IC can seamlessly blend into any home interior. Its aesthetic appeal combined with high-performance technology makes it a practical safety choice.
In conclusion, the Kidde P/N 900-0120, KN-COB-IC is an essential safety device that combines advanced sensor technology, user-friendly features, and reliable performance. Its capability to detect both carbon monoxide and natural gas ensures comprehensive monitoring, giving consumers the confidence they need to protect their homes and families.