Getting started
Wall Installation
Your telephone base is ready for tabletop use. If you want to mount your telephone on a wall, use the provided wall mount bracket to connect with a standard
Tabletop to wall installation
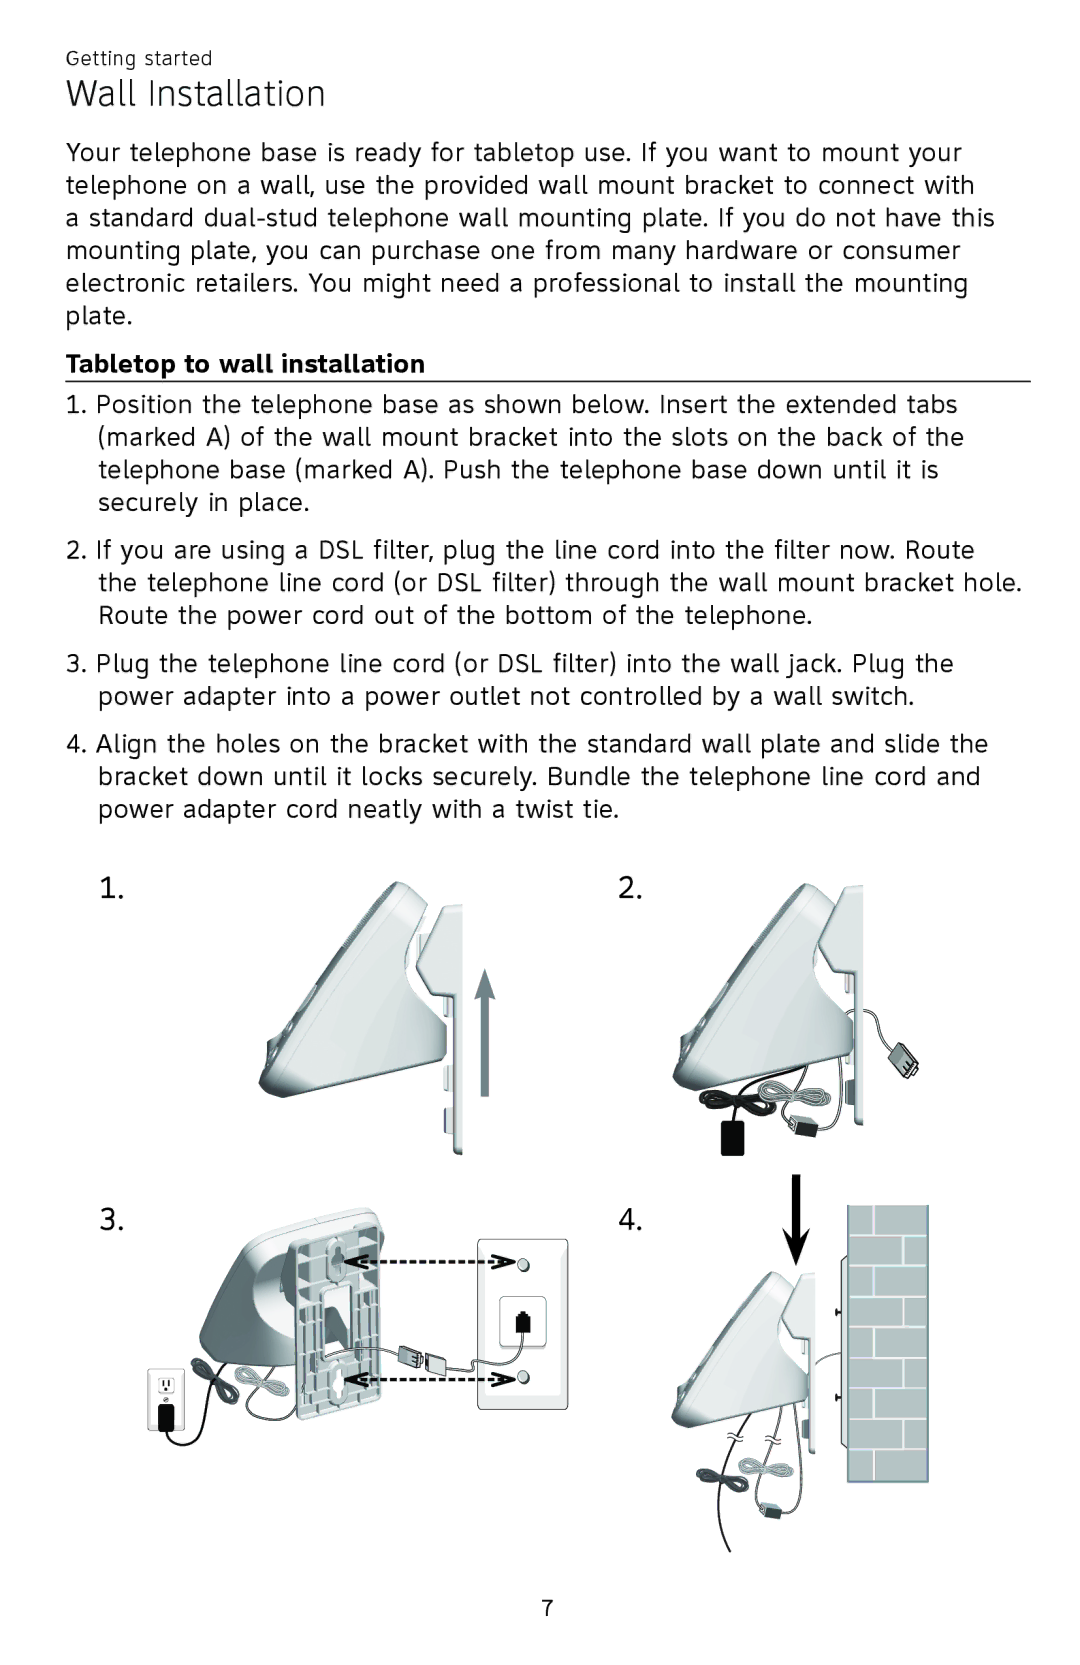
1.Position the telephone base as shown below. Insert the extended tabs (marked A) of the wall mount bracket into the slots on the back of the telephone base (marked A). Push the telephone base down until it is securely in place.
2.If you are using a DSL filter, plug the line cord into the filter now. Route the telephone line cord (or DSL filter) through the wall mount bracket hole. Route the power cord out of the bottom of the telephone.
3.Plug the telephone line cord (or DSL filter) into the wall jack. Plug the power adapter into a power outlet not controlled by a wall switch.
4.Align the holes on the bracket with the standard wall plate and slide the bracket down until it locks securely. Bundle the telephone line cord and power adapter cord neatly with a twist tie.
1.2.
3.4.