Installation
Instructions —
Portable Outdoor
Grill
![]() WARNING
WARNING
Excessive Weight Hazard
Use two or more people to move and install grill.
Failure to do so can result in back or other injury.
1. Move grill into desired outdoor location.
2. Open the hood.
3. For models equipped with rotisserie, remove the rotisserie’s skewer from the grill.
4. For models with side burners:
Remove side burner cover from the top of the carton that is located on the grill grate. Remove bubble wrap from side burner cover and set aside.
Open carton located on the grill grate. Remove side burner grate, unwrap and set aside.
Remove burners and burner caps from carton and unwrap. Install each set of burners and caps inside the side burner cavity as shown.
notch
burner
cap
burner
![]() alignment tab
alignment tab
Install side | cover | |
burner grate | ||
and cover | extension | |
| ||
(with extension |
| |
toward grill) | burner | |
as shown. | ||
grate | ||
Properly dispose |
| |
of all packing |
| |
material. |
|
5. Carefully lift off grill grates and set aside.
6. Remove sear plates and set aside.
sear plate
7. Remove tiedowns from burners and warming shelf.
warming
shelf
remove ![]() tiedowns
tiedowns
remove
tiedowns
burner
8. Reinstall sear plates. Make sure sear plates are resting on pins.
pins
![]() WARNING
WARNING
Explosion Hazard
Securely tighten all gas connections.
If connected to LP, have a qualified person make sure gas pressure does not exceed 11” (28 cm) water column.
Examples of a qualified person include:
licensed heating personnel, authorized gas company personnel, and
authorized service personnel.
Failure to do so can result in death, explosion, or fire.
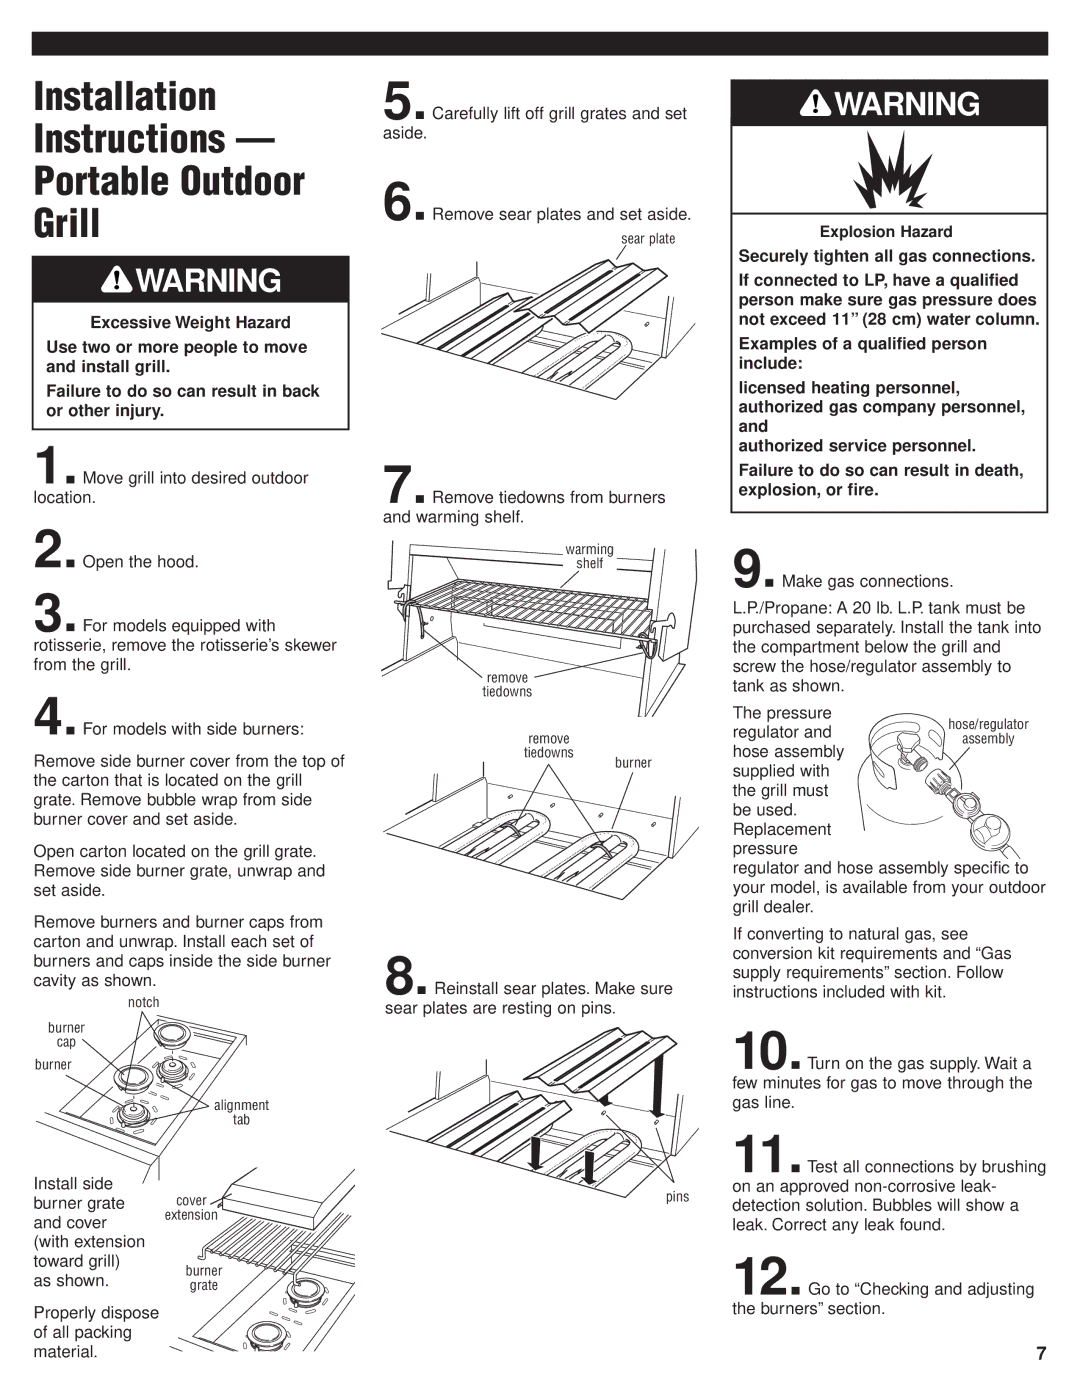
9. Make gas connections.
L.P./Propane: A 20 lb. L.P. tank must be purchased separately. Install the tank into the compartment below the grill and screw the hose/regulator assembly to tank as shown.
The pressure regulator and hose assembly supplied with the grill must be used. Replacement pressure
regulator and hose assembly specific to your model, is available from your outdoor grill dealer.
If converting to natural gas, see conversion kit requirements and “Gas supply requirements” section. Follow instructions included with kit.
10.Turn on the gas supply. Wait a few minutes for gas to move through the gas line.
11.Test all connections by brushing on an approved
12. Go to “Checking and adjusting the burners” section.
7