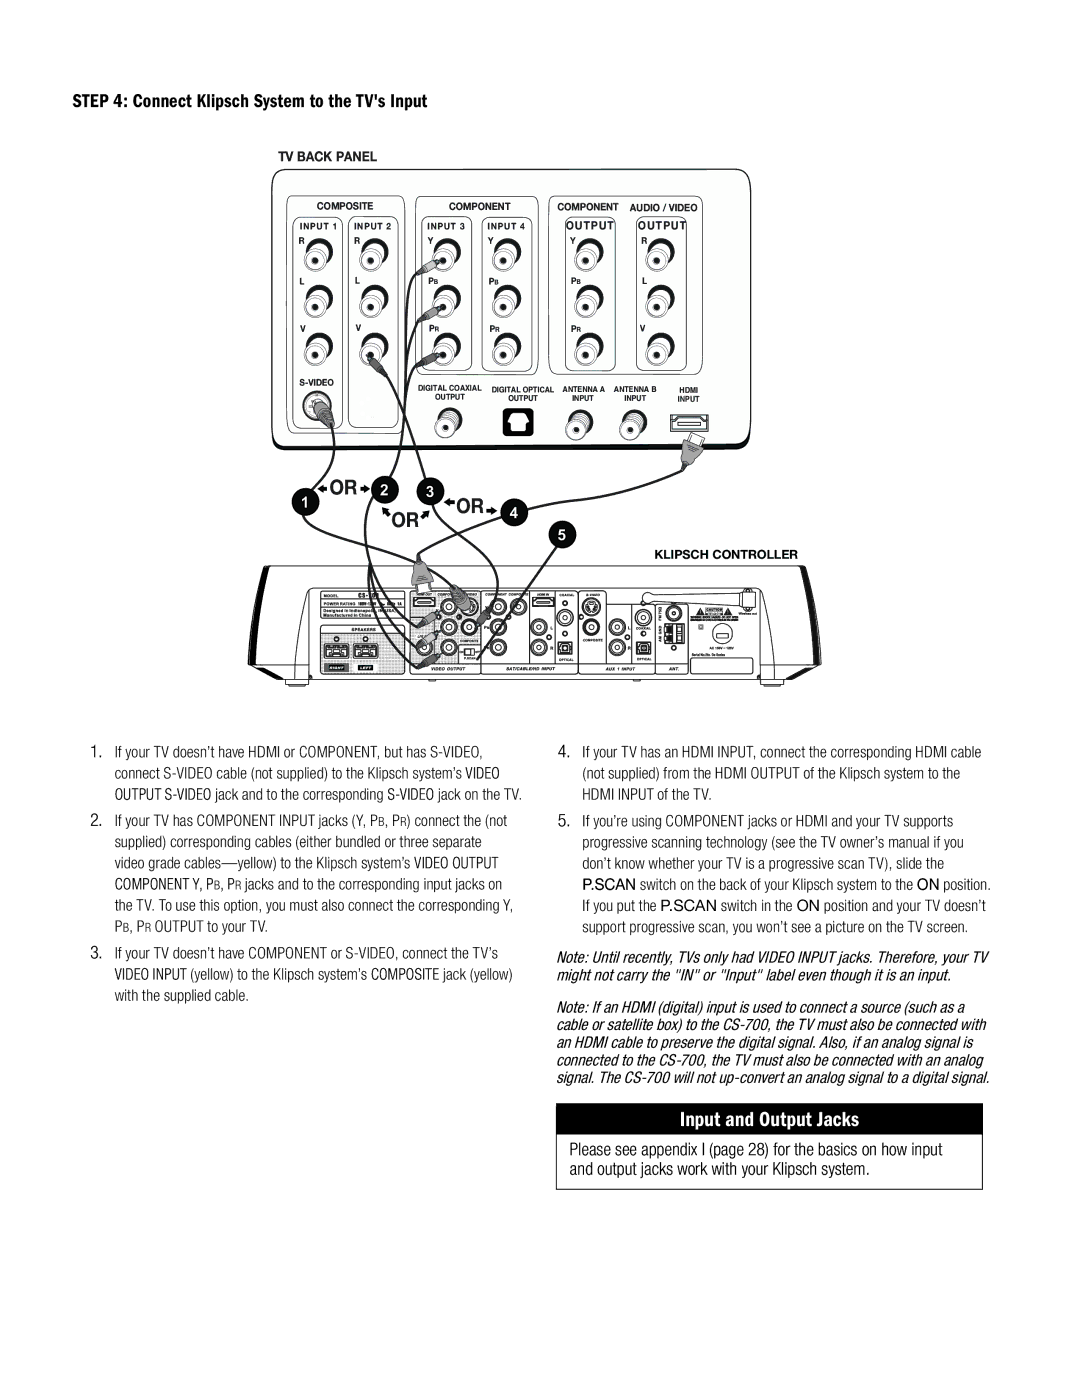
STEP 4: Connect Klipsch System to the TV's Input
TV BACK PANEL
COMPOSITE | COMPONENT | COMPONENT | AUDIO / VIDEO | |||
INPUT 1 | INPUT 2 | INPUT 3 | INPUT 4 | OUTPUT | OUTPUT | |
R | R | Y | Y | Y | R |
|
L | L | PB | PB | PB | L |
|
V | V | PR | PR | PR | V |
|
| DIGITAL COAXIAL | DIGITAL OPTICAL | ANTENNA A ANTENNA B | HDMI | ||
|
| |||||
|
| OUTPUT | OUTPUT | INPUT | INPUT | INPUT |
1 - OR - 2 3 OR 4
OR
5
KLIPSCH CONTROLLER
1.If your TV doesn’t have HDMI or Component, but has
2.If your TV has CoMPONENT INPUT jacks (Y, PB, PR) connect the (not supplied) corresponding cables (either bundled or three separate video grade
3.If your TV doesn’t have CoMPONENT or
4.If your TV has an HDMI INPUT, connect the corresponding HDMI cable (not supplied) from the HDMI output of the Klipsch system to the HDMI input of the TV.
5.If you’re using component jacks or HDMI and your TV supports progressive scanning technology (see the TV owner’s manual if you don’t know whether your TV is a progressive scan TV), slide the P.Scan switch on the back of your Klipsch system to the ON position. If you put the P.SCAN switch in the ON position and your TV doesn’t support progressive scan, you won’t see a picture on the TV screen.
Note: Until recently, TVs only had video input jacks. Therefore, your TV might not carry the "IN" or "Input" label even though it is an input.
Note: If an HDMI (digital) input is used to connect a source (such as a cable or satellite box) to the
Input and Output Jacks
Please see appendix I (page 28) for the basics on how input and output jacks work with your Klipsch system.
