16
Using the remote control
The remote uses two provided AA batteries. They are easily installed by sliding the cover off the remote’s back, aligning the + and - ends of the batteries, sliding them into place, and then replacing the cover. ![]()
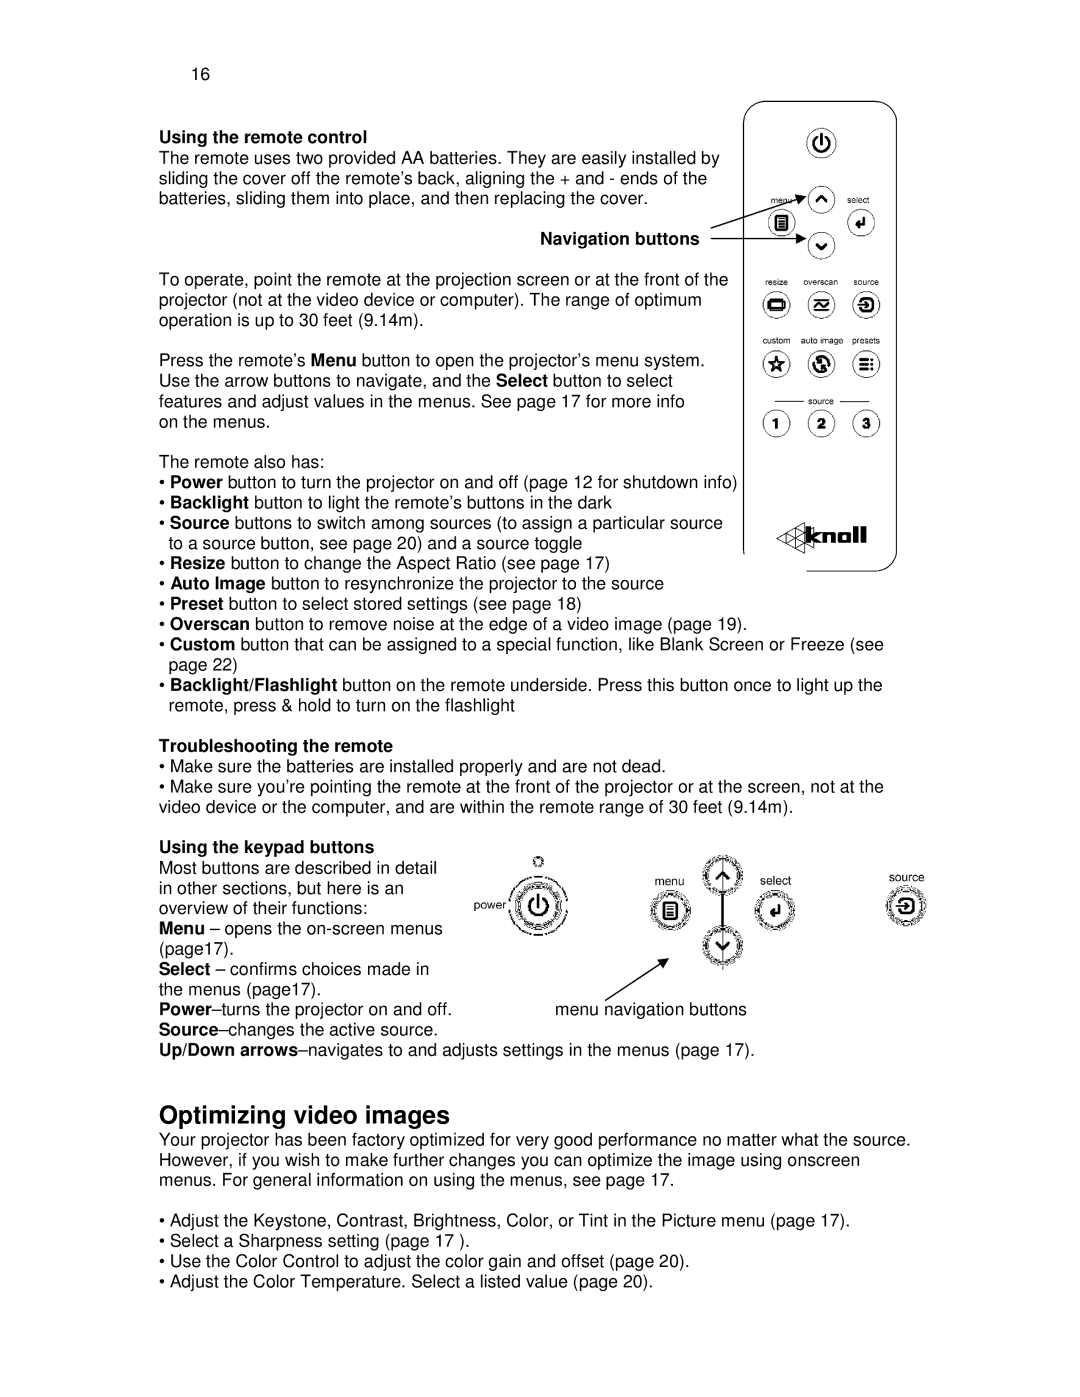
Navigation buttons
To operate, point the remote at the projection screen or at the front of the projector (not at the video device or computer). The range of optimum operation is up to 30 feet (9.14m).
Press the remote’s Menu button to open the projector’s menu system. Use the arrow buttons to navigate, and the Select button to select features and adjust values in the menus. See page 17 for more info on the menus.
The remote also has:
•Power button to turn the projector on and off (page 12 for shutdown info)
•Backlight button to light the remote’s buttons in the dark
•Source buttons to switch among sources (to assign a particular source to a source button, see page 20) and a source toggle
•Resize button to change the Aspect Ratio (see page 17)
•Auto Image button to resynchronize the projector to the source
•Preset button to select stored settings (see page 18)
•Overscan button to remove noise at the edge of a video image (page 19).
•Custom button that can be assigned to a special function, like Blank Screen or Freeze (see page 22)
•Backlight/Flashlight button on the remote underside. Press this button once to light up the remote, press & hold to turn on the flashlight
Troubleshooting the remote
•Make sure the batteries are installed properly and are not dead.
•Make sure you’re pointing the remote at the front of the projector or at the screen, not at the video device or the computer, and are within the remote range of 30 feet (9.14m).
Using the keypad buttons
Most buttons are described in detail in other sections, but here is an overview of their functions:
Menu – opens the
Select – confirms choices made in the menus (page17).
Up/Down
Optimizing video images
Your projector has been factory optimized for very good performance no matter what the source. However, if you wish to make further changes you can optimize the image using onscreen menus. For general information on using the menus, see page 17.
•Adjust the Keystone, Contrast, Brightness, Color, or Tint in the Picture menu (page 17).
•Select a Sharpness setting (page 17 ).
•Use the Color Control to adjust the color gain and offset (page 20).
•Adjust the Color Temperature. Select a listed value (page 20).