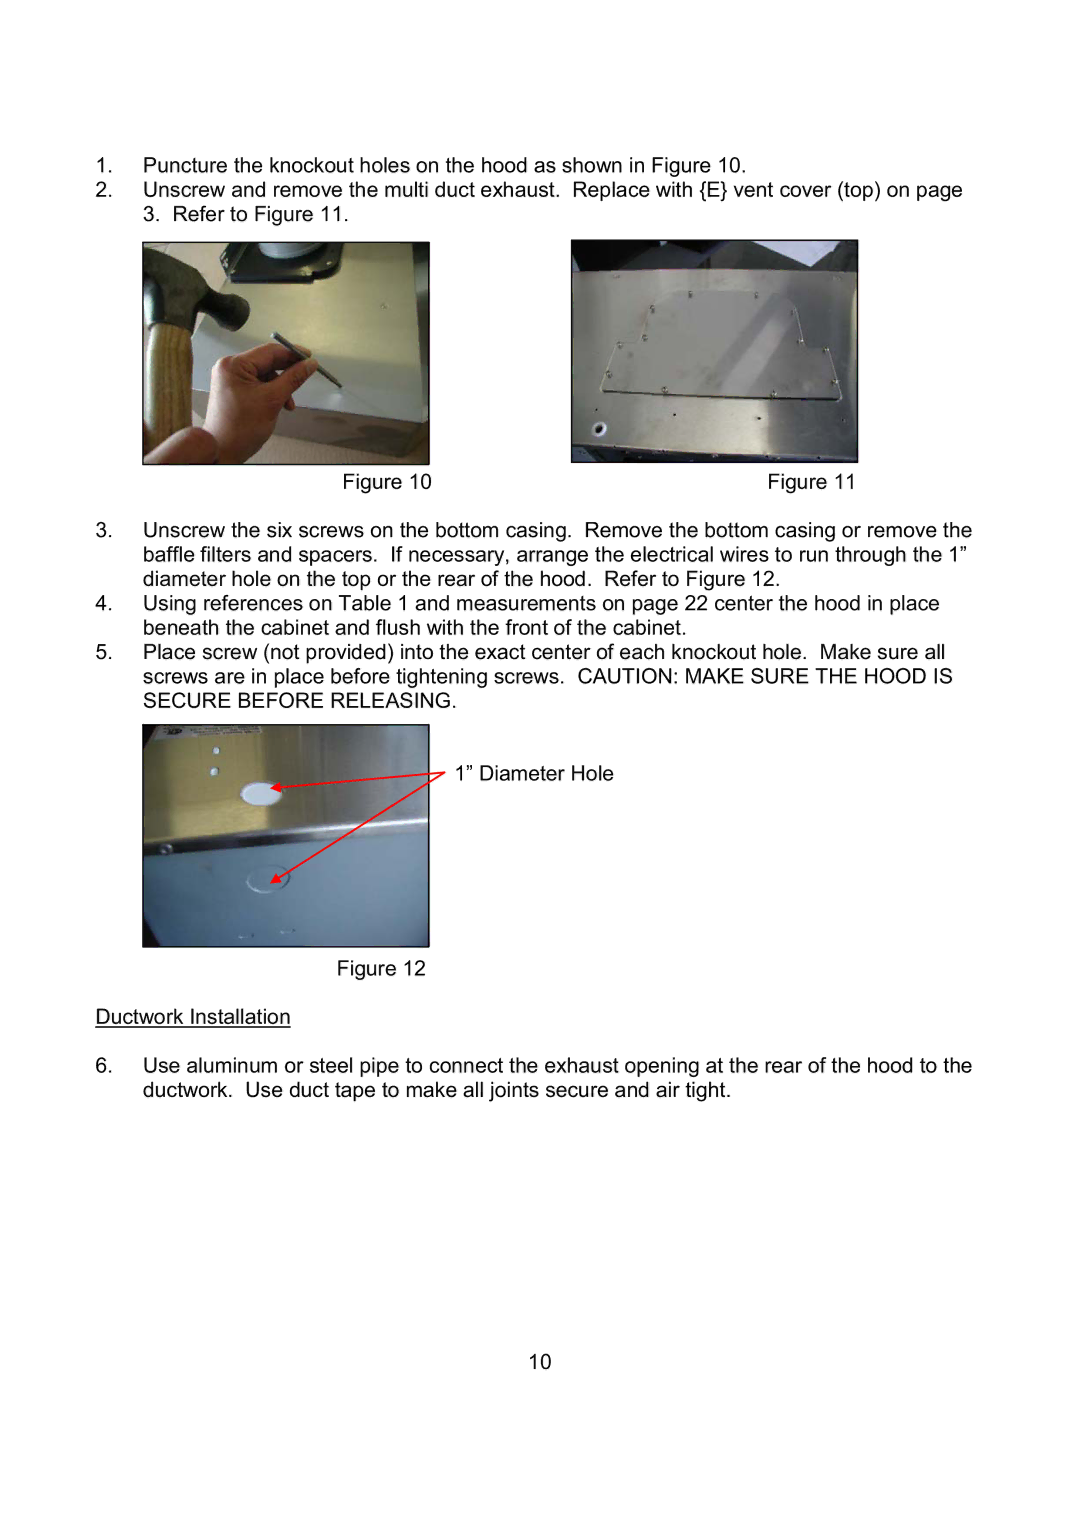
1.Puncture the knockout holes on the hood as shown in Figure 10.
2.Unscrew and remove the multi duct exhaust. Replace with {E} vent cover (top) on page 3. Refer to Figure 11.
Figure 10 | Figure 11 |
3.Unscrew the six screws on the bottom casing. Remove the bottom casing or remove the baffle filters and spacers. If necessary, arrange the electrical wires to run through the 1” diameter hole on the top or the rear of the hood. Refer to Figure 12.
4.Using references on Table 1 and measurements on page 22 center the hood in place beneath the cabinet and flush with the front of the cabinet.
5.Place screw (not provided) into the exact center of each knockout hole. Make sure all screws are in place before tightening screws. CAUTION: MAKE SURE THE HOOD IS SECURE BEFORE RELEASING.
![]() 1” Diameter Hole
1” Diameter Hole
Figure 12
Ductwork Installation
6.Use aluminum or steel pipe to connect the exhaust opening at the rear of the hood to the ductwork. Use duct tape to make all joints secure and air tight.
10
