Moving Pictures from the DC25 to the Picture Card
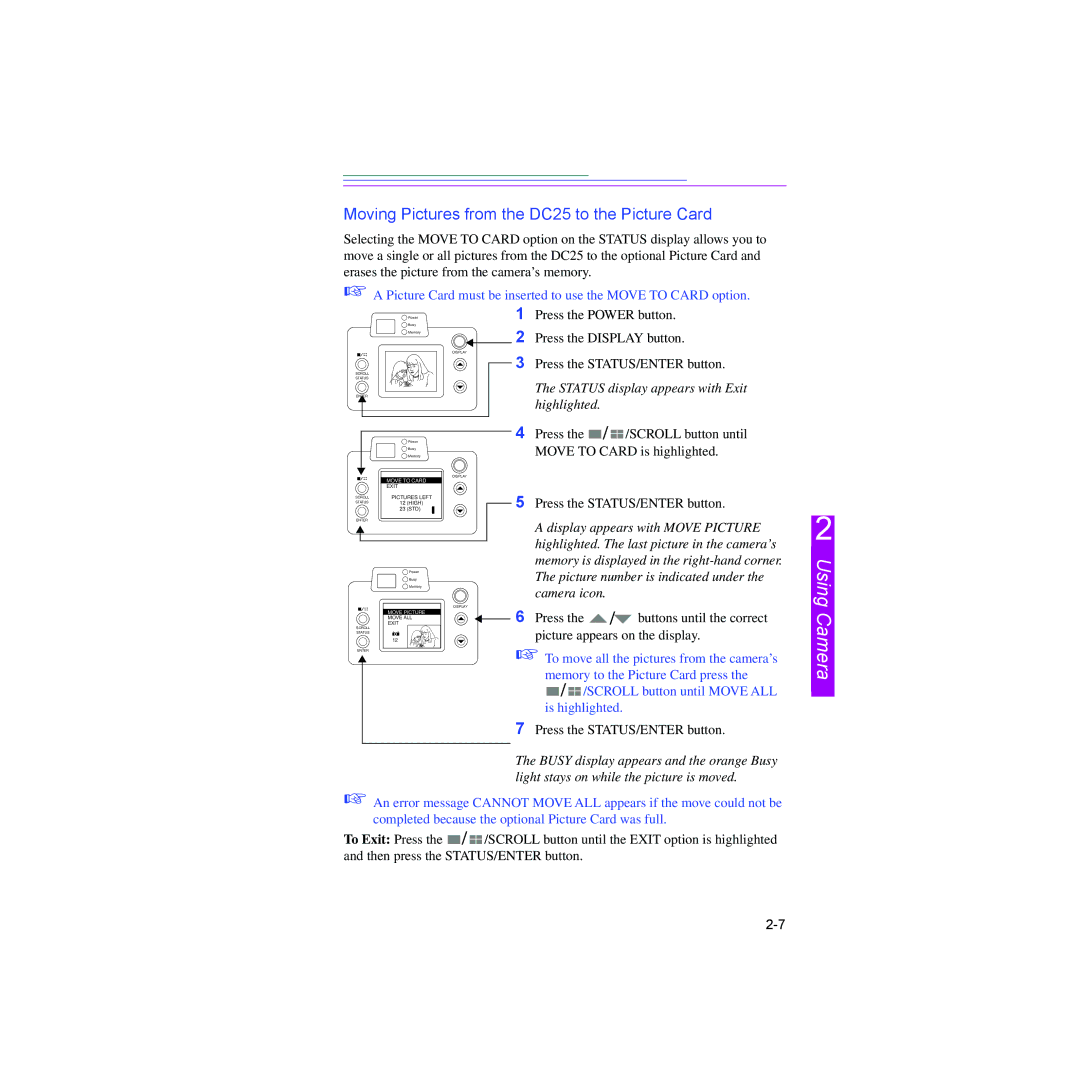
Selecting the MOVE TO CARD option on the STATUS display allows you to move a single or all pictures from the DC25 to the optional Picture Card and erases the picture from the camera’s memory.
☞A Picture Card must be inserted to use the MOVE TO CARD option.
| Power | 1 Press the POWER button. | |||
| Busy | ||||
| Memory | 2 Press the DISPLAY button. | |||
|
| ||||
|
| DISPLAY |
|
|
|
SCROLL |
| 3 Press the STATUS/ENTER button. | |||
|
|
|
|
| |
STATUS |
|
|
|
|
|
ENTER |
|
| The STATUS display appears with Exit | ||
|
| highlighted. |
|
| |
|
|
|
|
| |
| Power | 4 | Press the | / | /SCROLL button until |
| Busy |
| MOVE TO CARD is highlighted. | ||
| Memory |
| |||
| MOVE TO CARD | DISPLAY |
|
|
|
|
|
|
|
| |
| EXIT |
|
|
|
|
SCROLL | PICTURES LEFT | 5 Press the STATUS/ENTER button. | |||
STATUS | 12 (HIGH) | ||||
| 23 (STD) | ||||
ENTER |
|
| A display appears with MOVE PICTURE | ||
|
|
| |||
|
|
| highlighted. The last picture in the camera’s | ||
|
|
| memory is displayed in the | ||
| Power |
| The picture number is indicated under the | ||
| Busy |
| |||
|
|
| |||
| Memory |
| camera icon. |
| |
|
|
|
| ||
|
| DISPLAY |
| / |
|
| MOVE PICTURE | 6 | Press the | buttons until the correct | |
| MOVE ALL | ||||
| EXIT | ||||
picture appears on the display.
☞ To move all the pictures from the camera’s
memory to the Picture Card press the
![]() /
/ ![]() /SCROLL button until MOVE ALL is highlighted.
/SCROLL button until MOVE ALL is highlighted.
7Press the STATUS/ENTER button.
The BUSY display appears and the orange Busy light stays on while the picture is moved.
☞An error message CANNOT MOVE ALL appears if the move could not be completed because the optional Picture Card was full.
To Exit: Press the ![]() /
/ ![]() /SCROLL button until the EXIT option is highlighted and then press the STATUS/ENTER button.
/SCROLL button until the EXIT option is highlighted and then press the STATUS/ENTER button.
2
