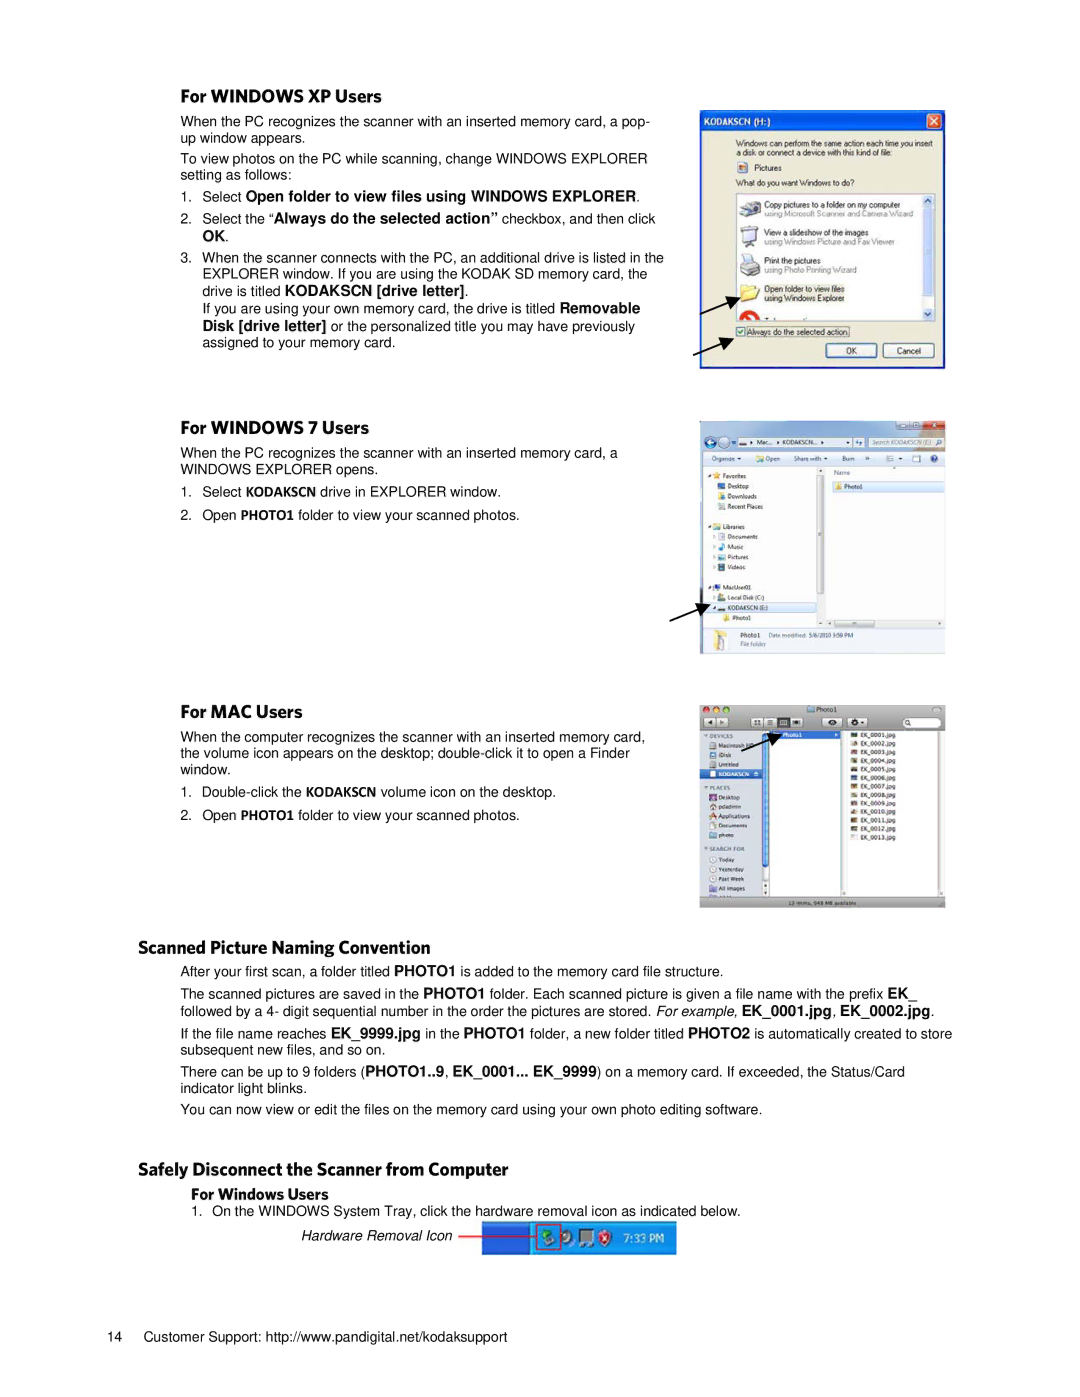
For WINDOWS XP Users
When the PC recognizes the scanner with an inserted memory card, a pop- up window appears.
To view photos on the PC while scanning, change WINDOWS EXPLORER setting as follows:
1.Select Open folder to view files using WINDOWS EXPLORER.
2.Select the “Always do the selected action” checkbox, and then click
OK.
3.When the scanner connects with the PC, an additional drive is listed in the EXPLORER window. If you are using the KODAK SD memory card, the
drive is titled KODAKSCN [drive letter].
If you are using your own memory card, the drive is titled Removable Disk [drive letter] or the personalized title you may have previously assigned to your memory card.
For WINDOWS 7 Users
When the PC recognizes the scanner with an inserted memory card, a
WINDOWS EXPLORER opens.
1.Select KODAKSCN drive in EXPLORER window.
2.Open PHOTO1 folder to view your scanned photos.
For MAC Users
When the computer recognizes the scanner with an inserted memory card, the volume icon appears on the desktop;
1.
2.Open PHOTO1 folder to view your scanned photos.
Scanned Picture Naming Convention
After your first scan, a folder titled PHOTO1 is added to the memory card file structure.
The scanned pictures are saved in the PHOTO1 folder. Each scanned picture is given a file name with the prefix EK_ followed by a 4- digit sequential number in the order the pictures are stored. For example, EK_0001.jpg, EK_0002.jpg.
If the file name reaches EK_9999.jpg in the PHOTO1 folder, a new folder titled PHOTO2 is automatically created to store subsequent new files, and so on.
There can be up to 9 folders (PHOTO1..9, EK_0001... EK_9999) on a memory card. If exceeded, the Status/Card indicator light blinks.
You can now view or edit the files on the memory card using your own photo editing software.
Safely Disconnect the Scanner from Computer
For Windows Users
1.On the WINDOWS System Tray, click the hardware removal icon as indicated below. Hardware Removal Icon ![]()
14 Customer Support: http://www.pandigital.net/kodaksupport