b)Make a hole of 5 1/8” diameter in your wall.
c)Position the portable air conditioner near the hole.
d)Feed as much exhaust hose as is needed through the hole.
Notes:
Be sure to cover the hole when it is not being used by the portable air conditioner.
Be sure to have a qualified person make the hole to avoid the possibility of injury or of unintended damage to your room.
Operation
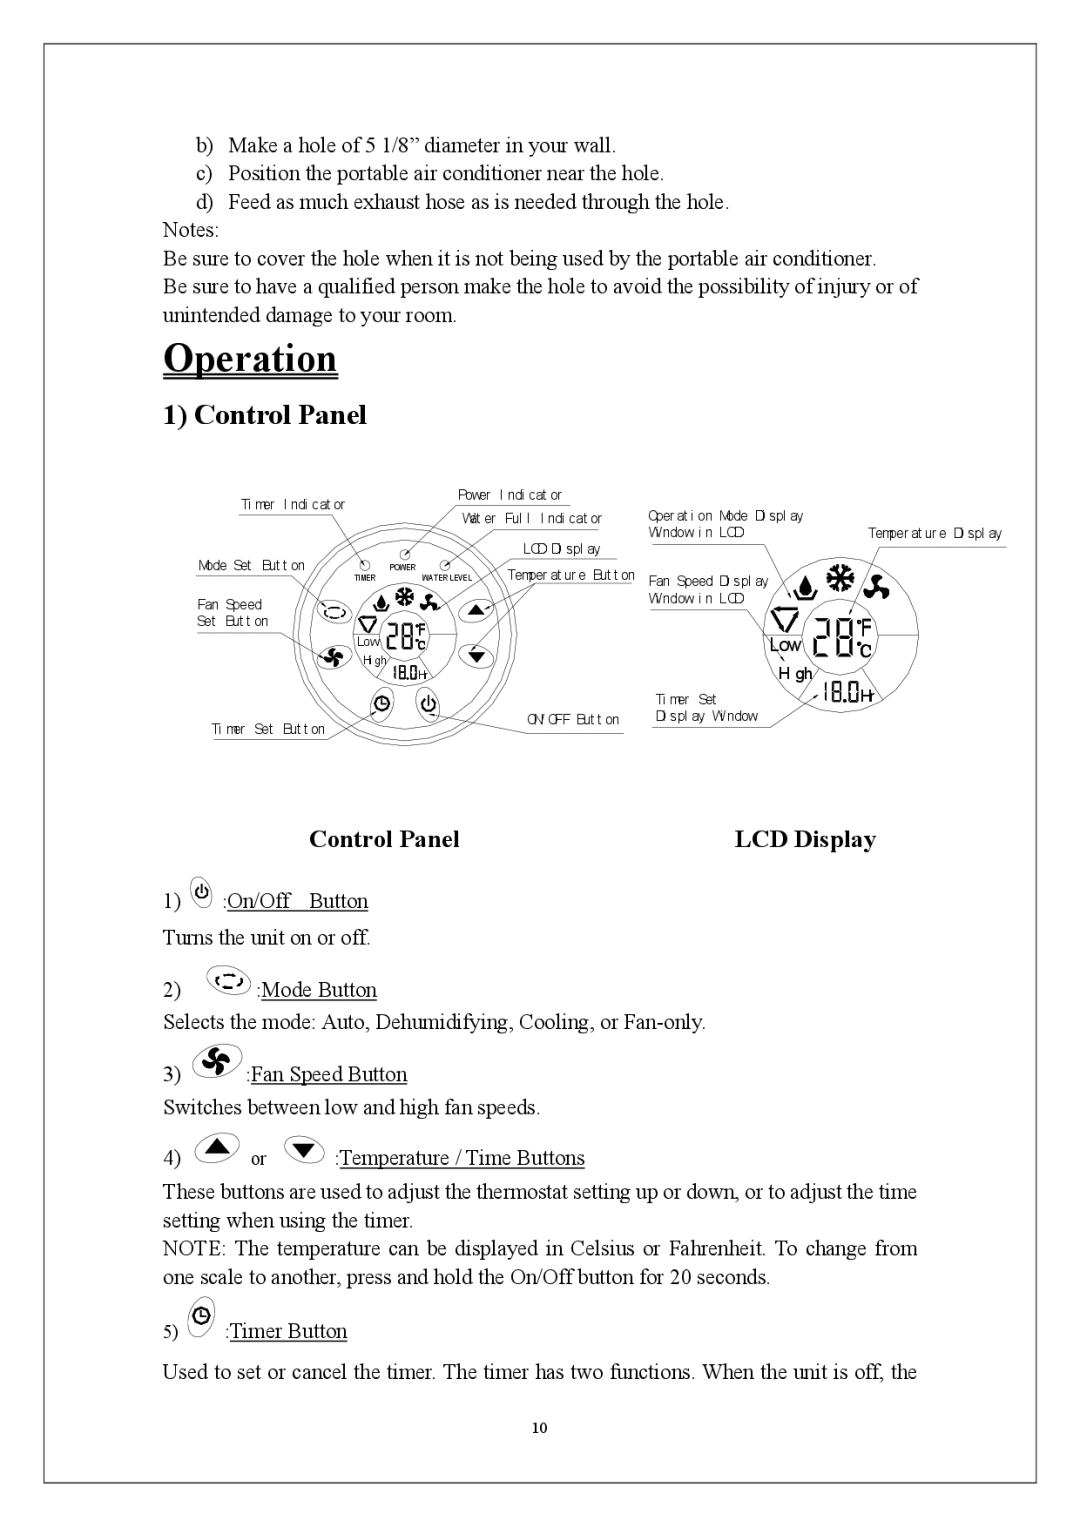
1) Control Panel
Ti mer I ndi cat or | Power | I ndi cat or | |
Wat er | Ful l I ndi cat or | ||
| |||
Mode Set But t on |
| LCD Di spl ay | |
POWER | Temper at ur e But t on | ||
TIMER | WATER LEVEL |
Fan Speed
Set But t on
Low
Hi gh
![]() Hr
Hr
Oper at i on Mode Di spl ay |
|
Wi ndow i n LCD | Temper at ur e Di spl ay |
Fan Speed Di spl ay |
|
Wi ndow i n LCD |
|
Low |
|
Hi gh | Hr |
Ti mer Set |
Ti mer Set But t on
ON/ OFF But t on
Di spl ay Wi ndow |
Control Panel | LCD Display |
1)![]()
![]()
![]()
![]() :On/Off Button Turns the unit on or off.
:On/Off Button Turns the unit on or off.
2)![]() :Mode Button
:Mode Button
Selects the mode: Auto, Dehumidifying, Cooling, or
3)![]() :Fan Speed Button
:Fan Speed Button
Switches between low and high fan speeds.
4) | or | :Temperature / Time Buttons |
These buttons are used to adjust the thermostat setting up or down, or to adjust the time setting when using the timer.
NOTE: The temperature can be displayed in Celsius or Fahrenheit. To change from one scale to another, press and hold the On/Off button for 20 seconds.
5)![]() :Timer Button
:Timer Button
Used to set or cancel the timer. The timer has two functions. When the unit is off, the
10