Kramer Electronics rk-1utb user manual Mounting Units that do not have Underside Screw Holes

Models: rk-1utb t

1 14
Download 14 pages 25.13 Kb
Page 11
Image 11

Install the Kramer RK-1UTB/T Under the Table Enclosure

5.4Mounting Units that do not have Underside Screw Holes

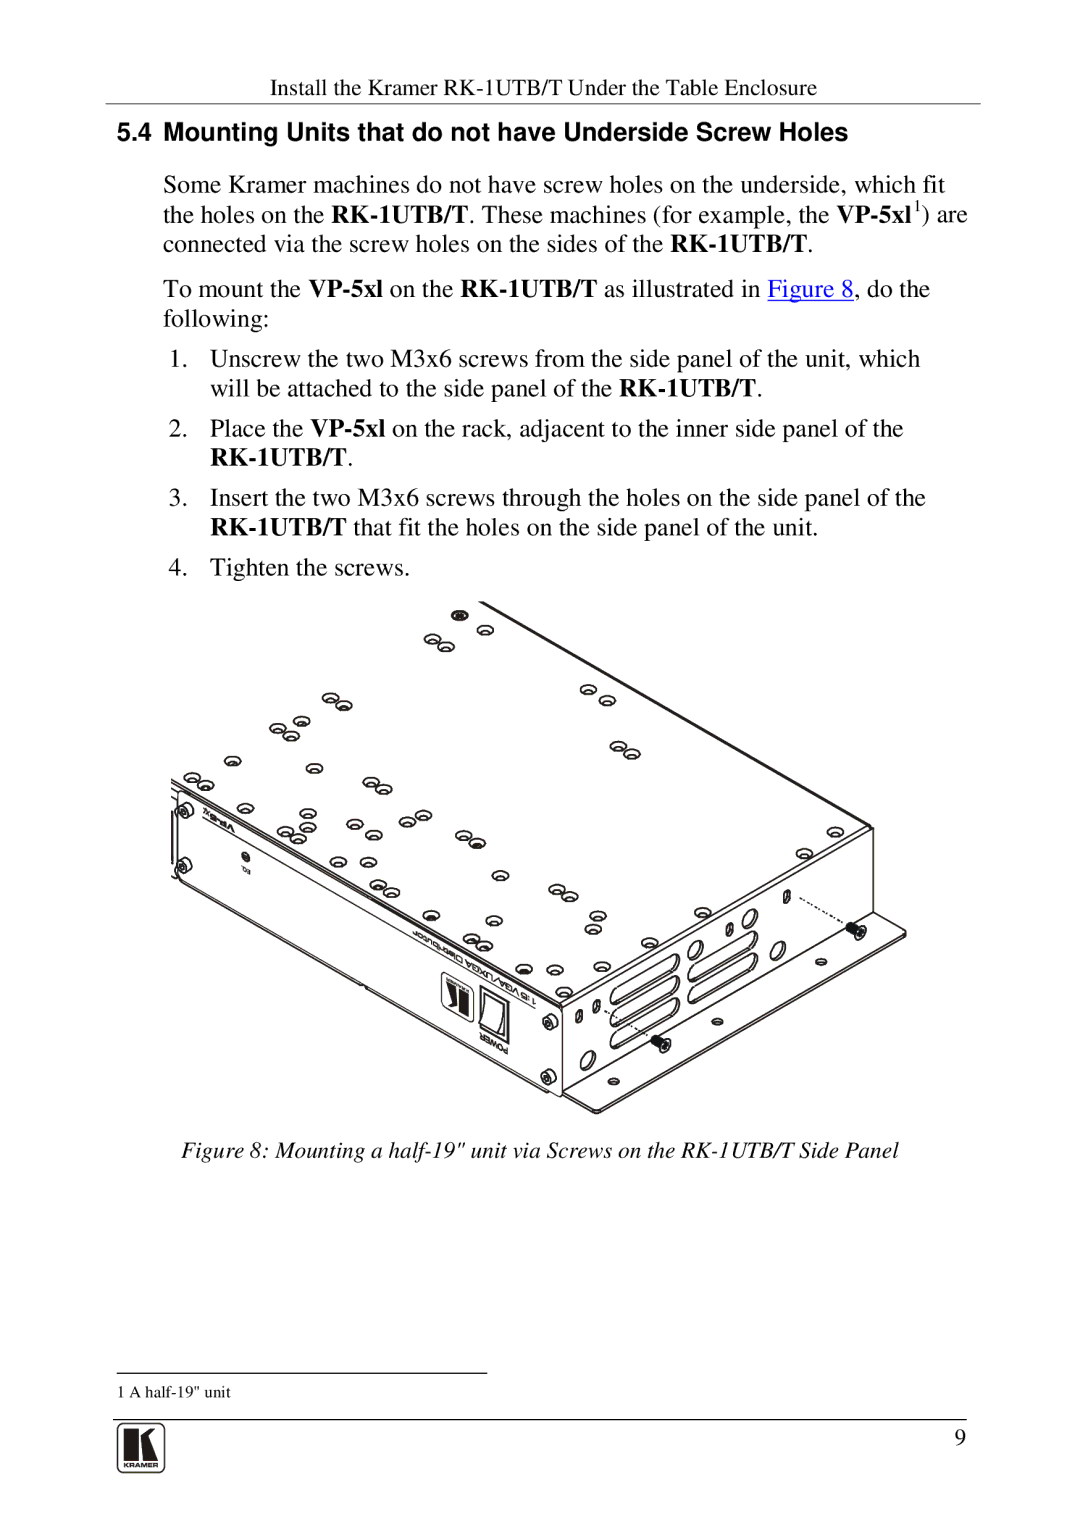
Some Kramer machines do not have screw holes on the underside, which fit the holes on the RK-1UTB/T. These machines (for example, the VP-5xl1) are connected via the screw holes on the sides of the RK-1UTB/T.

To mount the VP-5xlon the RK-1UTB/Tas illustrated in Figure 8, do the following:

1.Unscrew the two M3x6 screws from the side panel of the unit, which will be attached to the side panel of the RK-1UTB/T.

2.Place the VP-5xlon the rack, adjacent to the inner side panel of the RK-1UTB/T.

3.Insert the two M3x6 screws through the holes on the side panel of the RK-1UTB/Tthat fit the holes on the side panel of the unit.

4.Tighten the screws.

Figure 8: Mounting a half-19" unit via Screws on the RK-1UTB/T Side Panel

1 A half-19" unit

9

Page 11
Image 11
Kramer Electronics rk-1utb user manual Mounting Units that do not have Underside Screw Holes