Install the Kramer
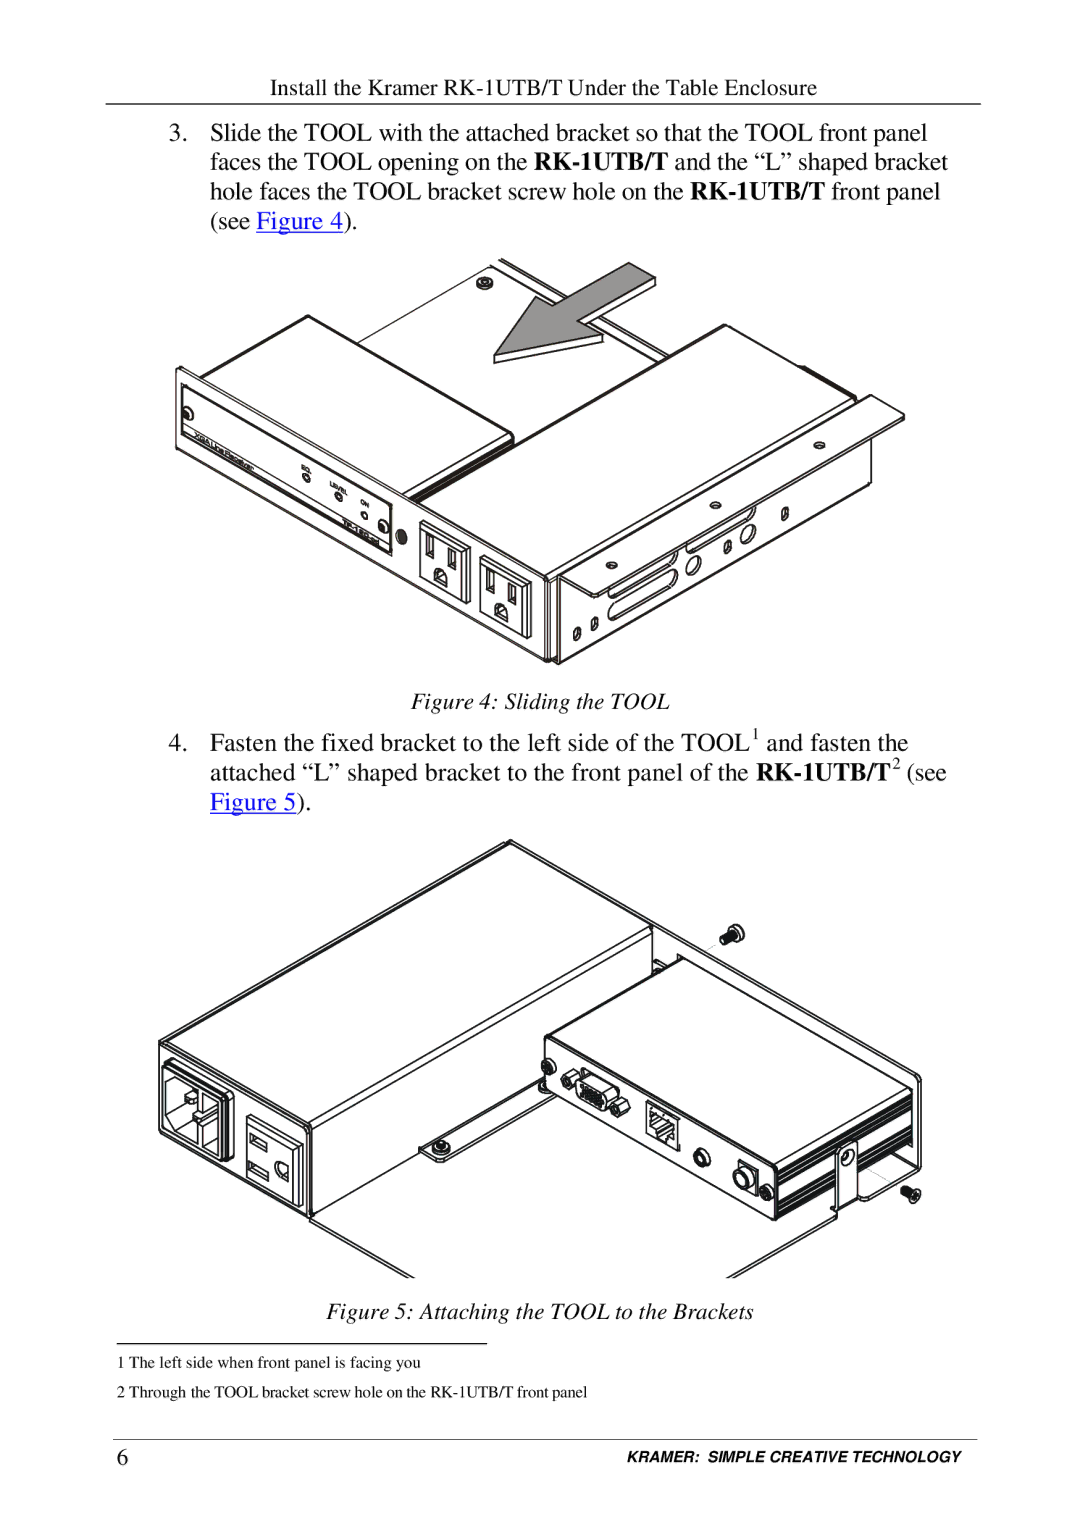
3.Slide the TOOL with the attached bracket so that the TOOL front panel faces the TOOL opening on the
Figure 4: Sliding the TOOL
4.Fasten the fixed bracket to the left side of the TOOL1 and fasten the attached “L” shaped bracket to the front panel of the
Figure 5: Attaching the TOOL to the Brackets
1 The left side when front panel is facing you
2 Through the TOOL bracket screw hole on the
6 | KRAMER: SIMPLE CREATIVE TECHNOLOGY |
