Kramer Electronics rk-1utb user manual Mounting a Kramer Machine

Models: rk-1utb t

1 14
Download 14 pages 25.13 Kb
Page 9
Image 9

Install the Kramer RK-1UTB/T Under the Table Enclosure

5.1.2Mounting a Kramer Machine

The RK-1UTB/Tunderside mounting area includes a set of screw holes that are suitable for any combination of units to be mounted.

To mount a unit on the RK-1UTB/T(for example, the Kramer TP-953MultiTOOL1), as illustrated in Figure 2, do the following:

1.Place the TP-953on the rack.

2.Hold both the TP-953and the RK-1UTB/Twith your hands and turn them upside down.

3.Insert the appropriate amount of screws2 through the holes on the RK-1UTB/Tthat fit the holes on the underside of the TP-953, using the M3x6 screws supplied with the unit (as illustrated in Figure 6).

4.Tighten the screws.

5.Rotate the RK-1UTB/Thorizontally with the unit connected3.

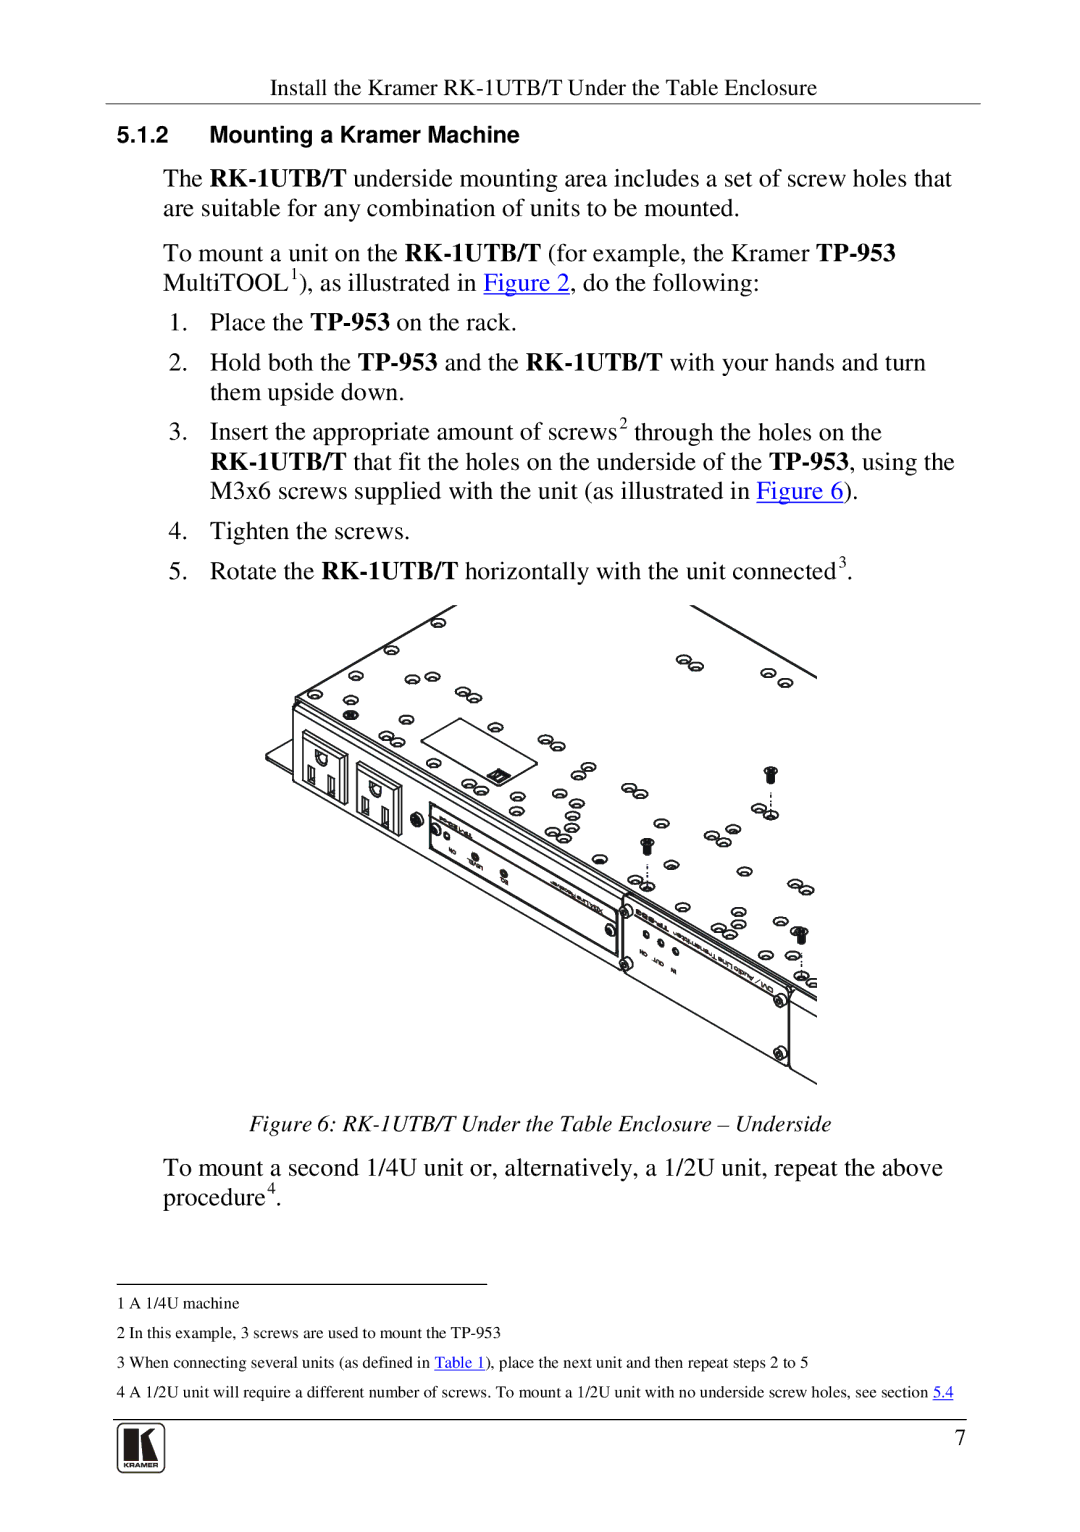
Figure 6: RK-1UTB/T Under the Table Enclosure – Underside

To mount a second 1/4U unit or, alternatively, a 1/2U unit, repeat the above procedure4.

1 A 1/4U machine

2 In this example, 3 screws are used to mount the TP-953

3 When connecting several units (as defined in Table 1), place the next unit and then repeat steps 2 to 5

4 A 1/2U unit will require a different number of screws. To mount a 1/2U unit with no underside screw holes, see section 5.4

7

Page 9
Image 9
Kramer Electronics rk-1utb user manual Mounting a Kramer Machine