Kramer Electronics user manual Connecting the VA-2002 Multistandard Logo Generator

Models: VA-2002

1 33
Download 33 pages 48.57 Kb
Page 10
Image 10

Connecting the VA-2002 Multistandard Logo Generator

6Connecting the VA-2002 Multistandard Logo Generator
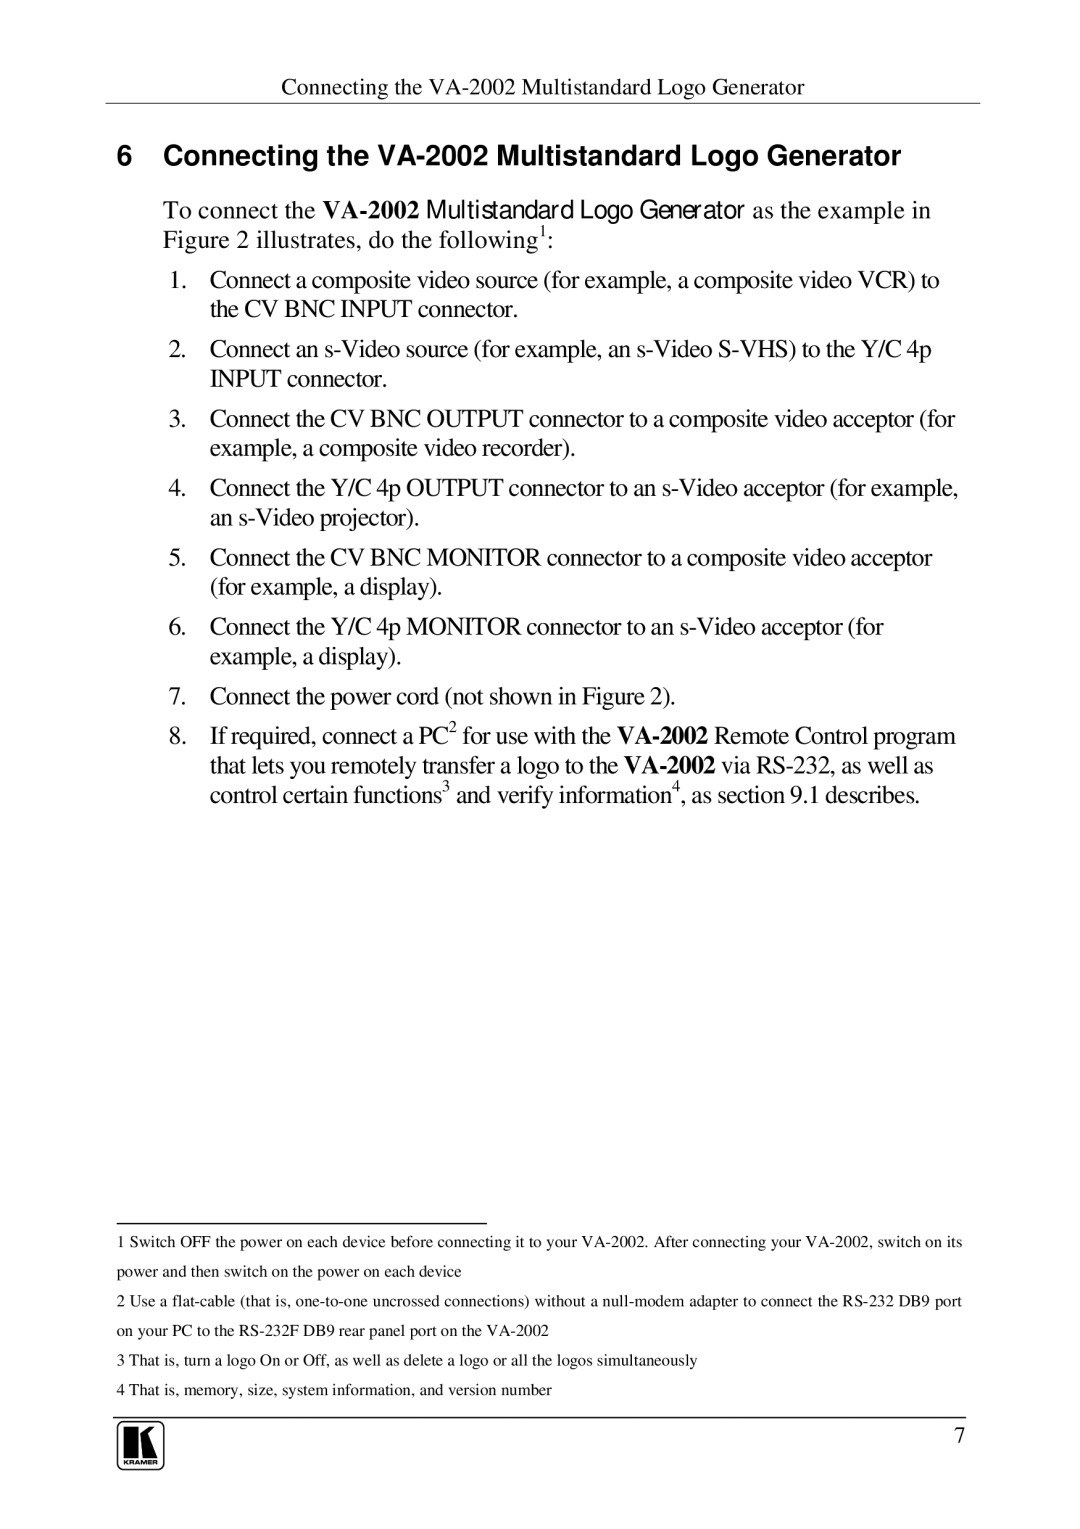
To connect the VA-2002Multistandard Logo Generator as the example in Figure 2 illustrates, do the following1:

1.Connect a composite video source (for example, a composite video VCR) to the CV BNC INPUT connector.

2.Connect an s-Video source (for example, an s-Video S-VHS) to the Y/C 4p INPUT connector.

3.Connect the CV BNC OUTPUT connector to a composite video acceptor (for example, a composite video recorder).

4.Connect the Y/C 4p OUTPUT connector to an s-Video acceptor (for example, an s-Video projector).

5.Connect the CV BNC MONITOR connector to a composite video acceptor (for example, a display).

6.Connect the Y/C 4p MONITOR connector to an s-Video acceptor (for example, a display).

7.Connect the power cord (not shown in Figure 2).

8.If required, connect a PC2 for use with the VA-2002Remote Control program that lets you remotely transfer a logo to the VA-2002via RS-232, as well as control certain functions3 and verify information4, as section 9￿ .1 describes.

1 Switch OFF the power on each device before connecting it to your VA-2002. After connecting your VA-2002, switch on its power and then switch on the power on each device

2 Use a flat-cable (that is, one-to-one uncrossed connections) without a null-modem adapter to connect the RS-232 DB9 port on your PC to the RS-232F DB9 rear panel port on the VA-2002

3 That is, turn a logo On or Off, as well as delete a logo or all the logos simultaneously 4 That is, memory, size, system information, and version number

7

Page 10
Image 10
Kramer Electronics user manual Connecting the VA-2002 Multistandard Logo Generator