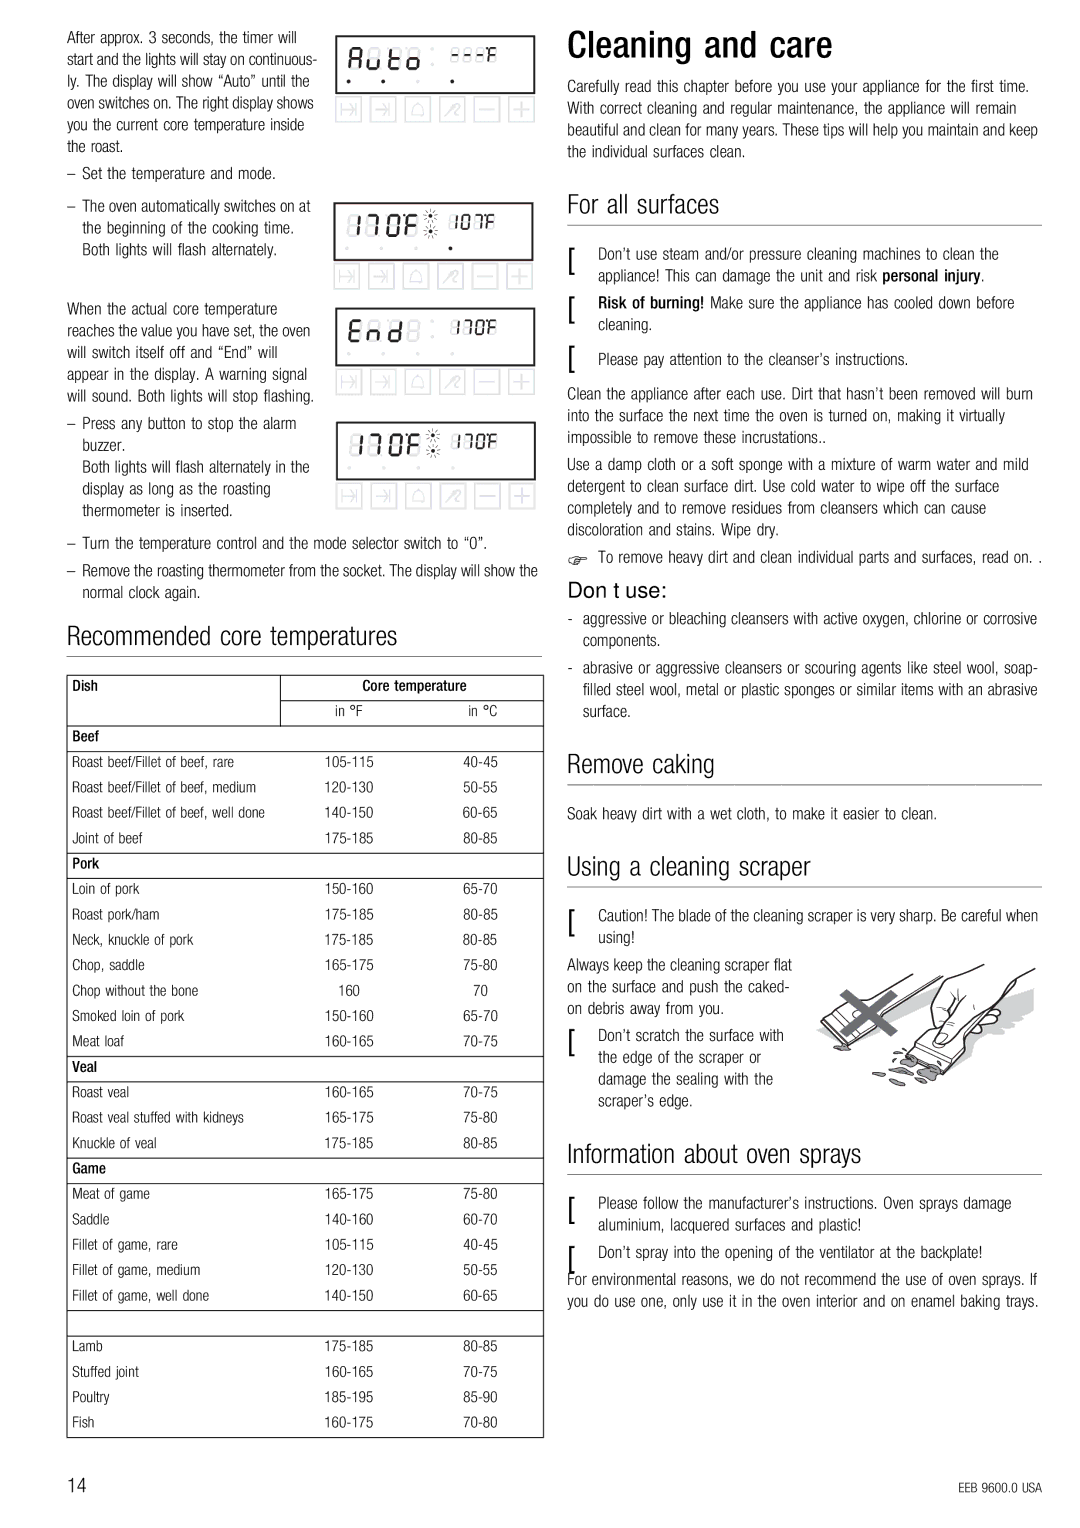
After approx. 3 seconds, the timer will start and the lights will stay on continuous- ly. The display will show “Auto” until the oven switches on. The right display shows you the current core temperature inside the roast.
–Set the temperature and mode.
–The oven automatically switches on at
the beginning of the cooking time. Both lights will flash alternately.
When the actual core temperature reaches the value you have set, the oven will switch itself off and “End” will appear in the display. A warning signal will sound. Both lights will stop flashing.
– Press any button to stop the alarm buzzer.
Both lights will flash alternately in the display as long as the roasting thermometer is inserted.
–Turn the temperature control and the mode selector switch to “0”.
–Remove the roasting thermometer from the socket. The display will show the normal clock again.
Recommended core temperatures
Dish | Core temperature | |
|
|
|
| in °F | in °C |
|
|
|
Beef |
|
|
|
|
|
Roast beef/Fillet of beef, rare | ||
Roast beef/Fillet of beef, medium | ||
Roast beef/Fillet of beef, well done | ||
Joint of beef | ||
|
|
|
Pork |
|
|
|
|
|
Loin of pork | ||
Roast pork/ham | ||
Neck, knuckle of pork | ||
Chop, saddle | ||
Chop without the bone | 160 | 70 |
Smoked loin of pork | ||
Meat loaf | ||
|
|
|
Veal |
|
|
|
|
|
Roast veal | ||
Roast veal stuffed with kidneys | ||
Knuckle of veal | ||
|
|
|
Game |
|
|
|
|
|
Meat of game | ||
Saddle | ||
Fillet of game, rare | ||
Fillet of game, medium | ||
Fillet of game, well done | ||
|
|
|
|
|
|
Lamb | ||
Stuffed joint | ||
Poultry | ||
Fish | ||
|
|
|
Cleaning and care
Carefully read this chapter before you use your appliance for the first time. With correct cleaning and regular maintenance, the appliance will remain beautiful and clean for many years. These tips will help you maintain and keep the individual surfaces clean.
For all surfaces
[Don’t use steam and/or pressure cleaning machines to clean the appliance! This can damage the unit and risk personal injury.
[Risk of burning! Make sure the appliance has cooled down before cleaning.
[Please pay attention to the cleanser’s instructions.
Clean the appliance after each use. Dirt that hasn’t been removed will burn into the surface the next time the oven is turned on, making it virtually impossible to remove these incrustations..
Use a damp cloth or a soft sponge with a mixture of warm water and mild detergent to clean surface dirt. Use cold water to wipe off the surface completely and to remove residues from cleansers which can cause discoloration and stains. Wipe dry.
ΦTo remove heavy dirt and clean individual parts and surfaces, read on. .
Don’t use:
-aggressive or bleaching cleansers with active oxygen, chlorine or corrosive components.
-abrasive or aggressive cleansers or scouring agents like steel wool, soap- filled steel wool, metal or plastic sponges or similar items with an abrasive surface.
Remove caking
Soak heavy dirt with a wet cloth, to make it easier to clean.
Using a cleaning scraper
[Caution! The blade of the cleaning scraper is very sharp. Be careful when using!
Always keep the cleaning scraper flat on the surface and push the caked- on debris away from you.
[ Don’t scratch the surface with the edge of the scraper or damage the sealing with the scraper’s edge.
Information about oven sprays
[Please follow the manufacturer’s instructions. Oven sprays damage aluminium, lacquered surfaces and plastic!
[Don’t spray into the opening of the ventilator at the backplate!
For environmental reasons, we do not recommend the use of oven sprays. If you do use one, only use it in the oven interior and on enamel baking trays.
14 | EEB 9600.0 USA |
