Land PrideTable of Contents
Section 5: Maintenance & Lubrication
Refer to Figure 5-4:
Remove the cover over the fuse to access the fuse.
Uncovered
20 Amp Fuse
23809
20amp Fuse W/Cover Removed
Figure
Before attempting any diagnosis of electrical system, use a test light or voltmeter to check battery voltage. If battery voltage is satisfactory, check cleanliness and tightness of terminals and ground connections. A general understanding of electrical servicing and use of basic test equipment is necessary for troubleshooting and repair.
Major overhaul or repair of starting motor or alternator should be performed by trained technicians only.
Hydrostatic Drive System
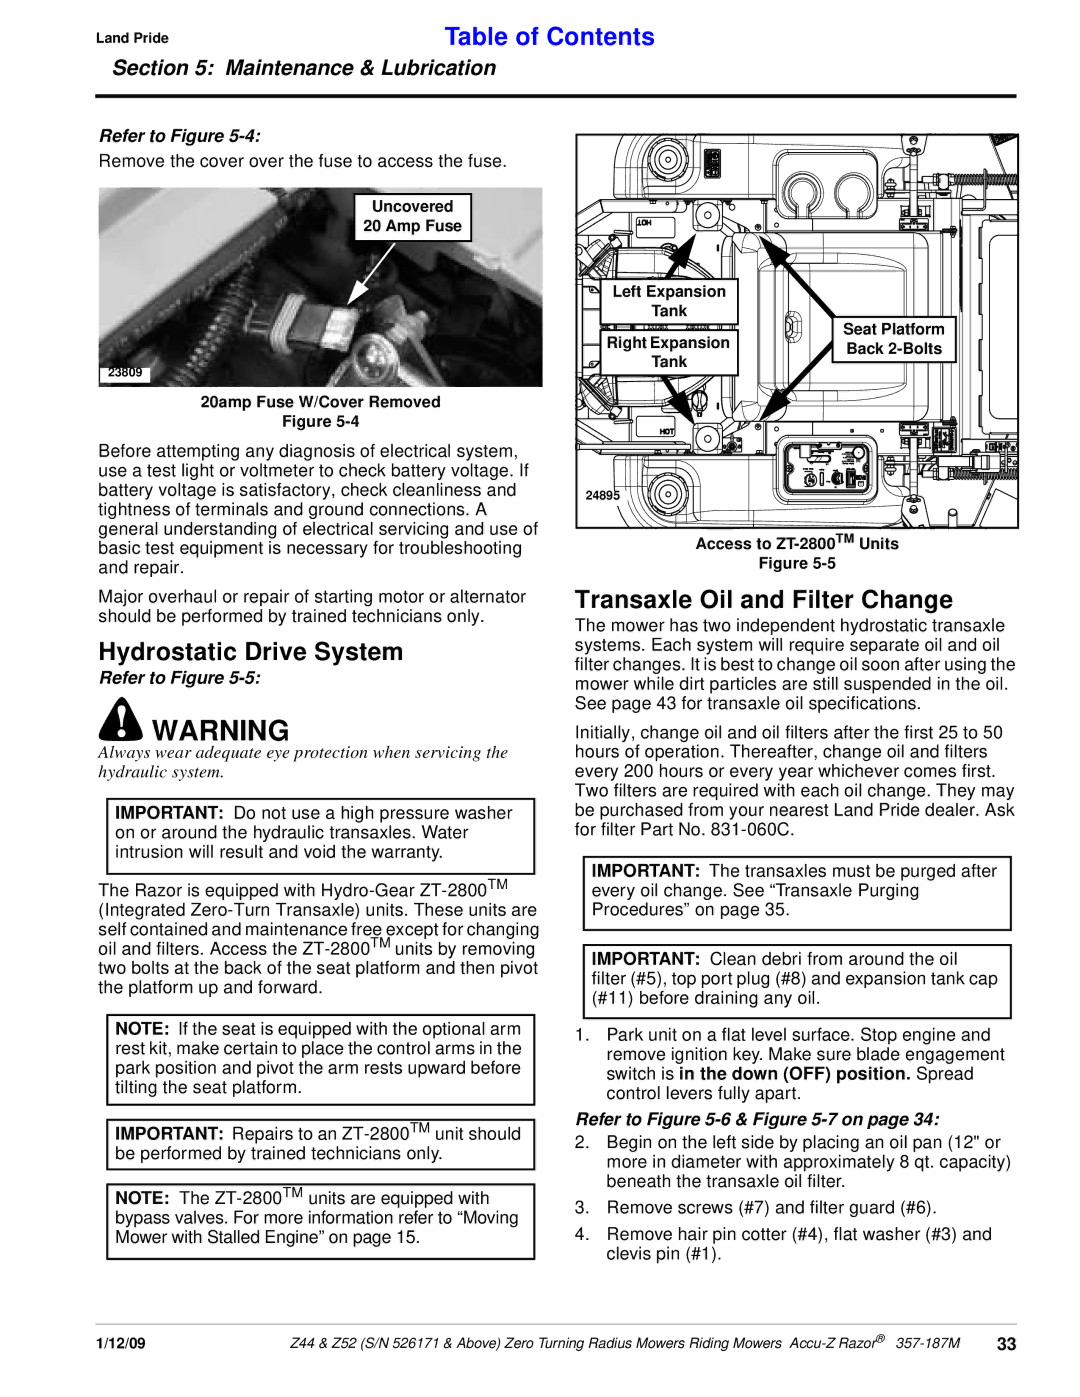
Refer to Figure 5-5:
!WARNING
Always wear adequate eye protection when servicing the hydraulic system.
IMPORTANT: Do not use a high pressure washer on or around the hydraulic transaxles. Water intrusion will result and void the warranty.
The Razor is equipped with
NOTE: If the seat is equipped with the optional arm rest kit, make certain to place the control arms in the park position and pivot the arm rests upward before tilting the seat platform.
IMPORTANT: Repairs to an
NOTE: The
Left Expansion |
| |
Tank | Seat Platform | |
Right Expansion | ||
Back | ||
Tank | ||
| ||
24895 |
|
Access to
Figure
Transaxle Oil and Filter Change
The mower has two independent hydrostatic transaxle systems. Each system will require separate oil and oil filter changes. It is best to change oil soon after using the mower while dirt particles are still suspended in the oil. See page 43 for transaxle oil specifications.
Initially, change oil and oil filters after the first 25 to 50 hours of operation. Thereafter, change oil and filters every 200 hours or every year whichever comes first. Two filters are required with each oil change. They may be purchased from your nearest Land Pride dealer. Ask for filter Part No.
IMPORTANT: The transaxles must be purged after every oil change. See “Transaxle Purging Procedures” on page 35.
IMPORTANT: Clean debri from around the oil filter (#5), top port plug (#8) and expansion tank cap (#11) before draining any oil.
1.Park unit on a flat level surface. Stop engine and remove ignition key. Make sure blade engagement switch is in the down (OFF) position. Spread control levers fully apart.
Refer to Figure 5-6 & Figure 5-7 on page 34:
2.Begin on the left side by placing an oil pan (12" or more in diameter with approximately 8 qt. capacity) beneath the transaxle oil filter.
3.Remove screws (#7) and filter guard (#6).
4.Remove hair pin cotter (#4), flat washer (#3) and clevis pin (#1).
1/12/09 | Z44 & Z52 (S/N 526171 & Above) Zero Turning Radius Mowers Riding Mowers | 33 |