Table of Contents
Section 1: Assembly and Set-Up
Land Pride
Front Roller
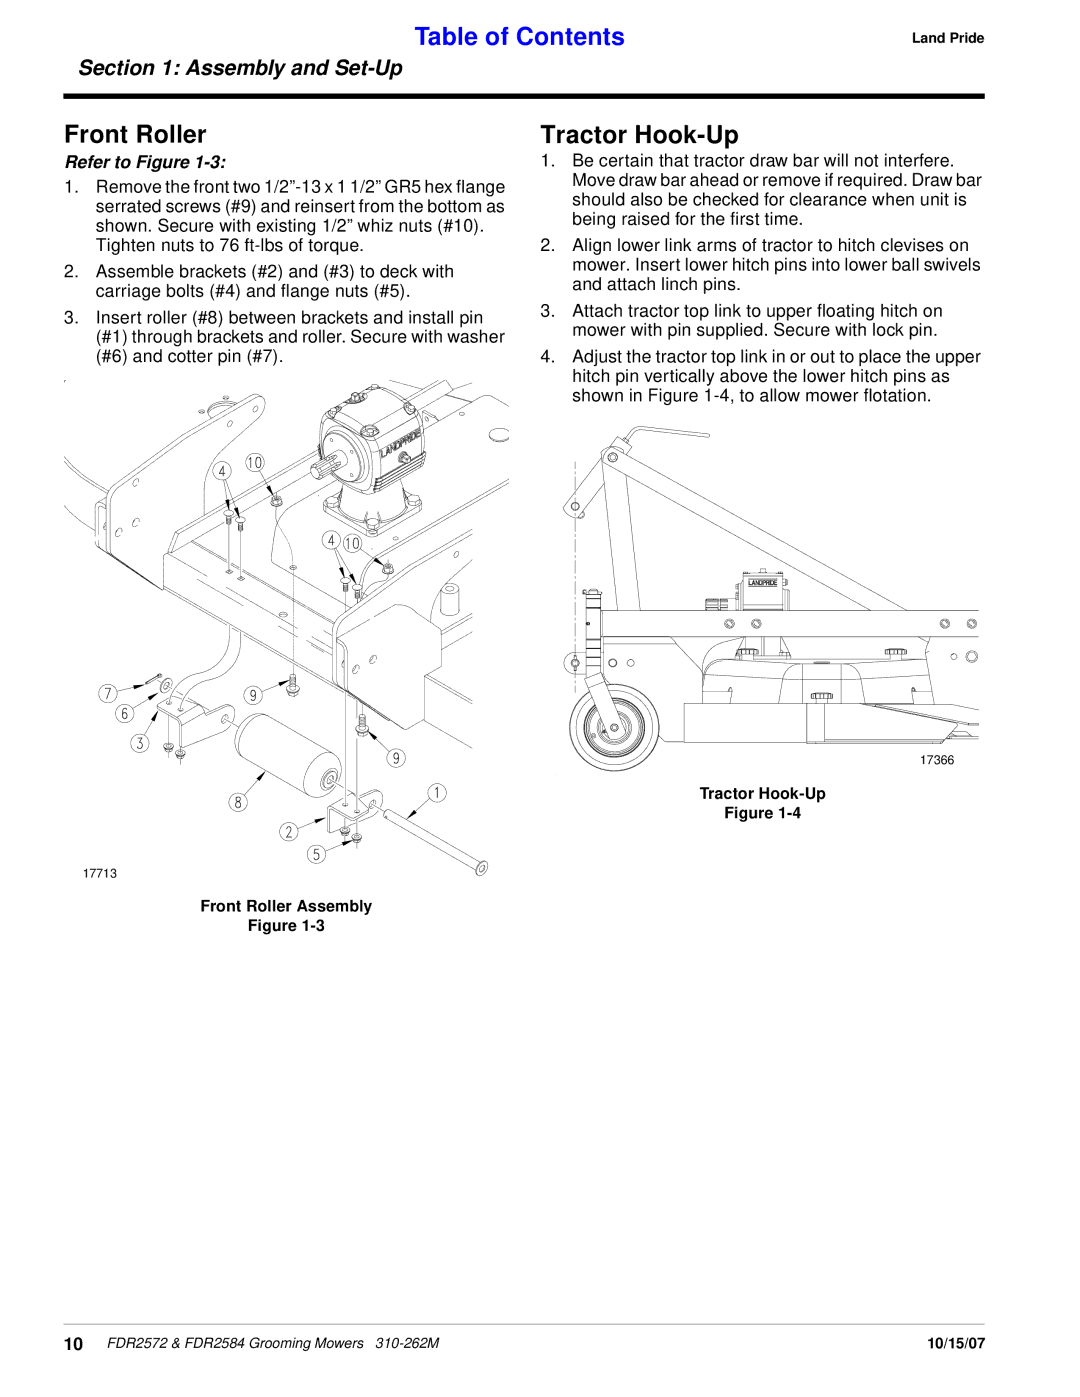
Refer to Figure 1-3:
1.Remove the front two
Tighten nuts to 76
2.Assemble brackets (#2) and (#3) to deck with carriage bolts (#4) and flange nuts (#5).
3.Insert roller (#8) between brackets and install pin (#1) through brackets and roller. Secure with washer
(#6) and cotter pin (#7).
Tractor Hook-Up
1.Be certain that tractor draw bar will not interfere. Move draw bar ahead or remove if required. Draw bar should also be checked for clearance when unit is being raised for the first time.
2.Align lower link arms of tractor to hitch clevises on mower. Insert lower hitch pins into lower ball swivels and attach linch pins.
3.Attach tractor top link to upper floating hitch on mower with pin supplied. Secure with lock pin.
4.Adjust the tractor top link in or out to place the upper hitch pin vertically above the lower hitch pins as shown in Figure
17366
Tractor
Figure
17713
Front Roller Assembly
Figure
10 FDR2572 & FDR2584 Grooming Mowers | 10/15/07 |
