Table of Contents
Section 4: Maintenance and Lubrication
Land Pride
Blade Sharpening or Replacement
IMPORTANT: Replace blades with Land Pride blades only.
!CAUTION
ALWAYS wear eye protection and gloves when sharpening a blade.
1.If the blade cutting edge is dull or nicked, it should be replaced or sharpened. Remove blades for replacing or sharpening by grasping the end of the blade using a rag or a thick, padded glove, while loosening and removing the bolt/bolts that mount the blade.
2.Clean blade, blade washer and mounting surface of all debris before replacing or sharpening. Grind cutting edge at the same bevel as the original. See Figure
19327
Blade Sharpening
Figure
HORIZONTAL
19046 | NAIL OR SHAFT |
Blade Balancing
Figure
NOTE: Care should be taken in order not to remove any more material than necessary to sharpen blade.
3.Check blade balance by positioning the blade horizontally on a nail or shaft through the center hole. See Figure
IMPORTANT: Always install blade with the cutting edge facing direction of rotation.
4.Mount blade with wing tips pointing up towards bottom of deck. Reinstall blade, blade washer and bolt. Care should be taken when installing blade bolt not to get it cross threaded. Do not exceed 55
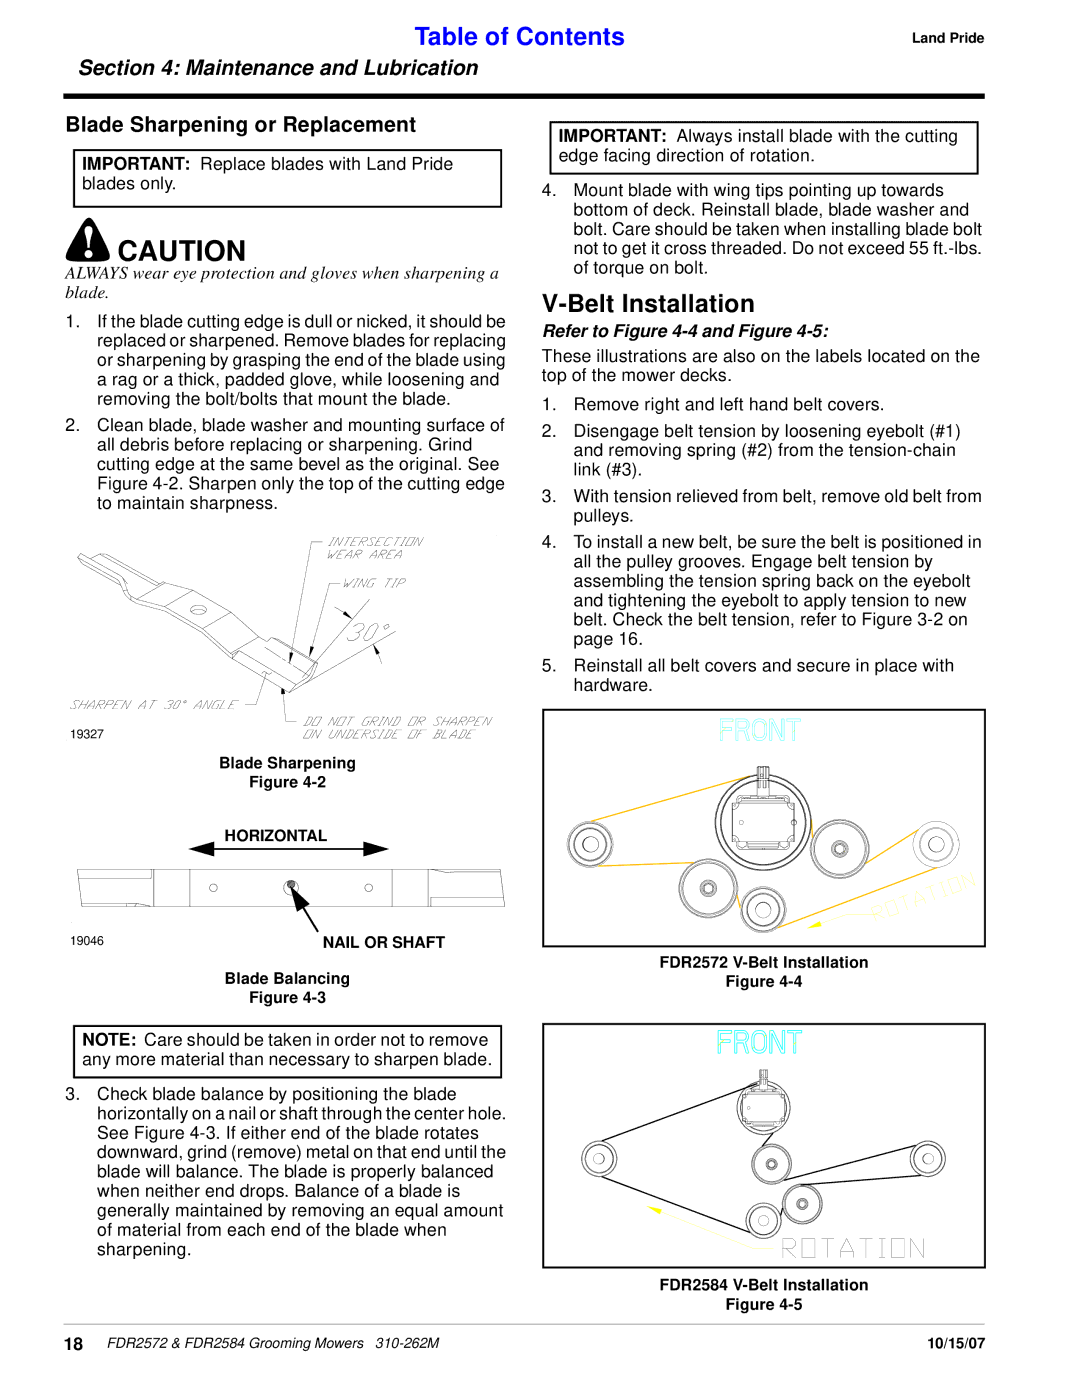
V-Belt Installation
Refer to Figure 4-4 and Figure 4-5:
These illustrations are also on the labels located on the top of the mower decks.
1.Remove right and left hand belt covers.
2.Disengage belt tension by loosening eyebolt (#1) and removing spring (#2) from the
3.With tension relieved from belt, remove old belt from pulleys.
4.To install a new belt, be sure the belt is positioned in all the pulley grooves. Engage belt tension by assembling the tension spring back on the eyebolt and tightening the eyebolt to apply tension to new belt. Check the belt tension, refer to Figure
5.Reinstall all belt covers and secure in place with hardware.
FDR2572 |
Figure |
FDR2584 |
Figure |
18 FDR2572 & FDR2584 Grooming Mowers | 10/15/07 |