Land Pride | Table of Contents |
Section 1: Assembly and
Tractor Hook-Up
Refer to Figure 1-2:
1.Be certain tractor draw bar will not interfere. Move draw bar ahead or remove if required. Draw bar should also be checked for clearance when unit is being raised for the first time.
2.Align lower link arms of tractor to the hitch clevises on the mower. Insert lower hitch pins into lower ball swivels and attach linchpins.
15948 |
Upper Floating Hitch |
Lower Hitch Clevis |
Gauge Wheel |
Tractor
Figure
3.Attach tractor top link to upper floating hitch on mower with pin supplied. Secure with hairpin cotter.
4.To allow mower flotation, adjust tractor top link in or out to place upper hitch pin vertically above the lower hitch pins as shown in Figure
PTO Hookup
If the Grooming Mower is to be used on more than one tractor, an additional driveline may be required.
!WARNING
Do not operate a damaged driveline. Damaged drivelines can cause serious injury or death.
!CAUTION
Tractor PTO shield and all Grooming Mower guards must be in place at all times during operation!
IMPORTANT: Some tractors are equipped with
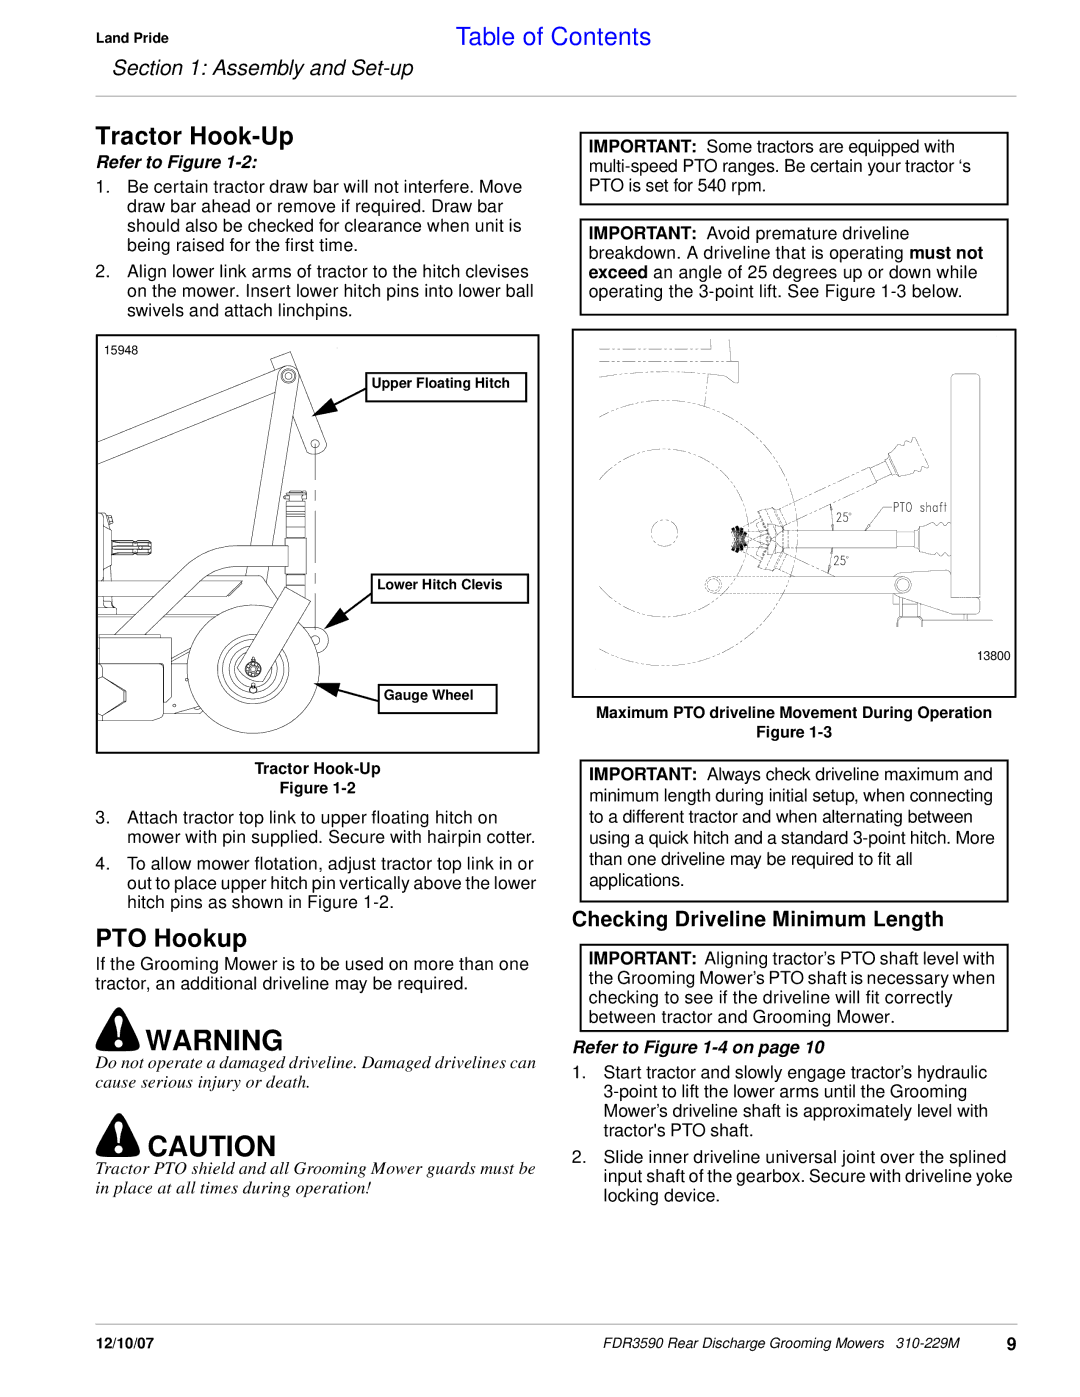
IMPORTANT: Avoid premature driveline breakdown. A driveline that is operating must not exceed an angle of 25 degrees up or down while operating the
13800 |
Maximum PTO driveline Movement During Operation
Figure
IMPORTANT: Always check driveline maximum and minimum length during initial setup, when connecting to a different tractor and when alternating between using a quick hitch and a standard
Checking Driveline Minimum Length
IMPORTANT: Aligning tractor’s PTO shaft level with the Grooming Mower’s PTO shaft is necessary when checking to see if the driveline will fit correctly between tractor and Grooming Mower.
Refer to Figure 1-4 on page 10
1.Start tractor and slowly engage tractor’s hydraulic
2.Slide inner driveline universal joint over the splined input shaft of the gearbox. Secure with driveline yoke locking device.
12/10/07 | FDR3590 Rear Discharge Grooming Mowers | 9 |
