
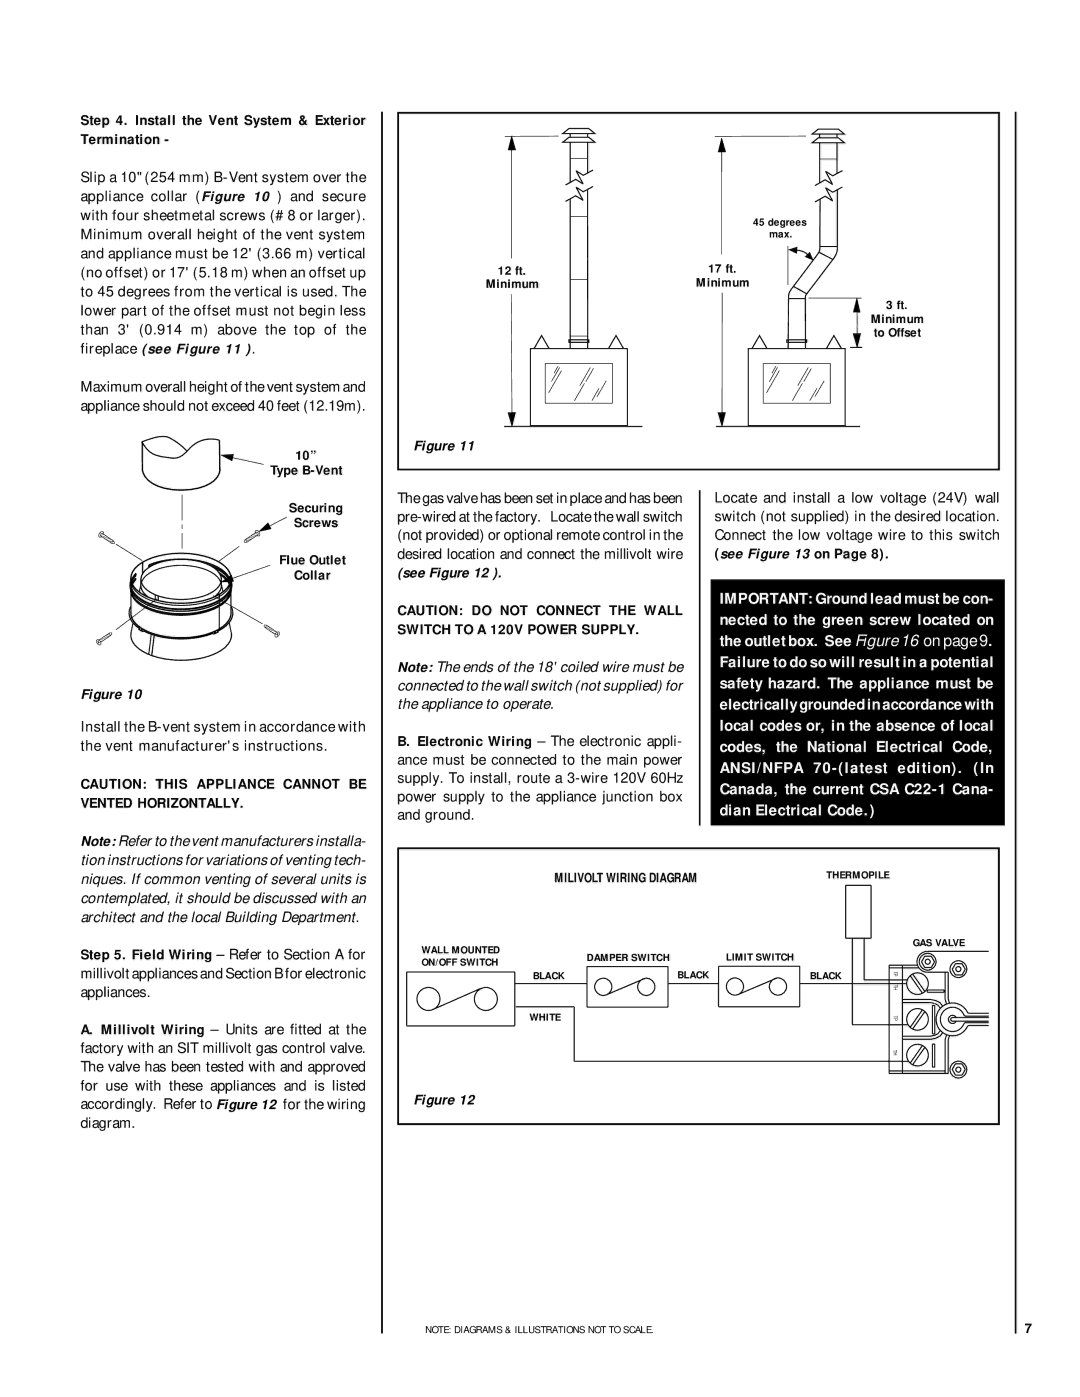
LSBV-3628MP-H, LSBV-4228EN-H, LSBV-3628MN-H, LSBV-3628MN, LSBV-4228EN specifications
Lennox Hearth is renowned for its commitment to quality and innovation in the hearth industry, and their line of direct vent gas fireplaces, including the LSBV-3628EN, LSBV-4228EN, LSBV-4228MN-H, LSBV-3628MP, and LSBV-4228MP models, reflects this dedication. These contemporary fireplaces blend advanced technology with aesthetic appeal, providing a warm ambiance while enhancing the decor of any living space.One of the standout features of these Lennox models is their direct vent capability, ensuring safe and efficient venting of combustion gases outside. This design not only provides peace of mind but also maximizes heating efficiency by utilizing fresh air from the outdoors for combustion. This unique venting system allows for versatile installation options, making them suitable for a variety of room configurations.
In terms of design, the LSBV series offers customizable options with various façade and media choices. Homeowners can choose from different trim styles, firebox sizes, and interior media such as decorative rocks or glass crystals. This versatility ensures that each fireplace can be tailored to fit individual tastes and home aesthetics.
The models are equipped with advanced burner technology, which provides a realistic flame presentation and efficient heat output. The multi-function remote control featured in many of these units allows users to easily adjust flame height, turn the fireplace on or off, and control the temperature all from the comfort of their couch. Meanwhile, the electronic ignition system ensures effortless lighting, even during winter power outages.
Safety is a top priority in Lennox Hearth designs. Each model is incorporated with safety screens and features such as automatic shut-off, ensuring that peace of mind is at the forefront of their functionality. Furthermore, the innovative use of high-grade materials ensures durability and longevity, making these fireplaces a worthwhile investment for any homeowner.
With heating capacities that can efficiently warm spaces ranging from small to larger living areas, the LSBV-3628 and LSBV-4228 models are perfectly suited for various home sizes. The stylish design, coupled with sophisticated technology, makes Lennox Hearth’s direct vent gas fireplaces not just a source of heat, but a stunning focal point that enhances any home environment.
Each model in this series embodies the Lennox commitment to energy efficiency and eco-consciousness, aligning with the growing demand for sustainable living solutions. By combining functionality, aesthetic flexibility, and cutting-edge technology, Lennox Hearth continues to lead the way in the fireplace industry, proving that comfort and elegance can coexist harmoniously.