Lennox Hearth LSM40ST-N-PV Fire Hazard. Risk of severe injury, Remote Control System

Models: LSM40ST-N-PV

1 28
Download 28 pages 43.19 Kb
Page 9
Image 9
Fire Hazard. Risk of severe injury

LENNOX HEARTH PRODUCTS • MONTEBELLO® SEE-THROUGH POWER VENT DV GAS FIREPLACES (LSM40ST-N-PV) • CARE AND OPERATION INSTRUCTIONS

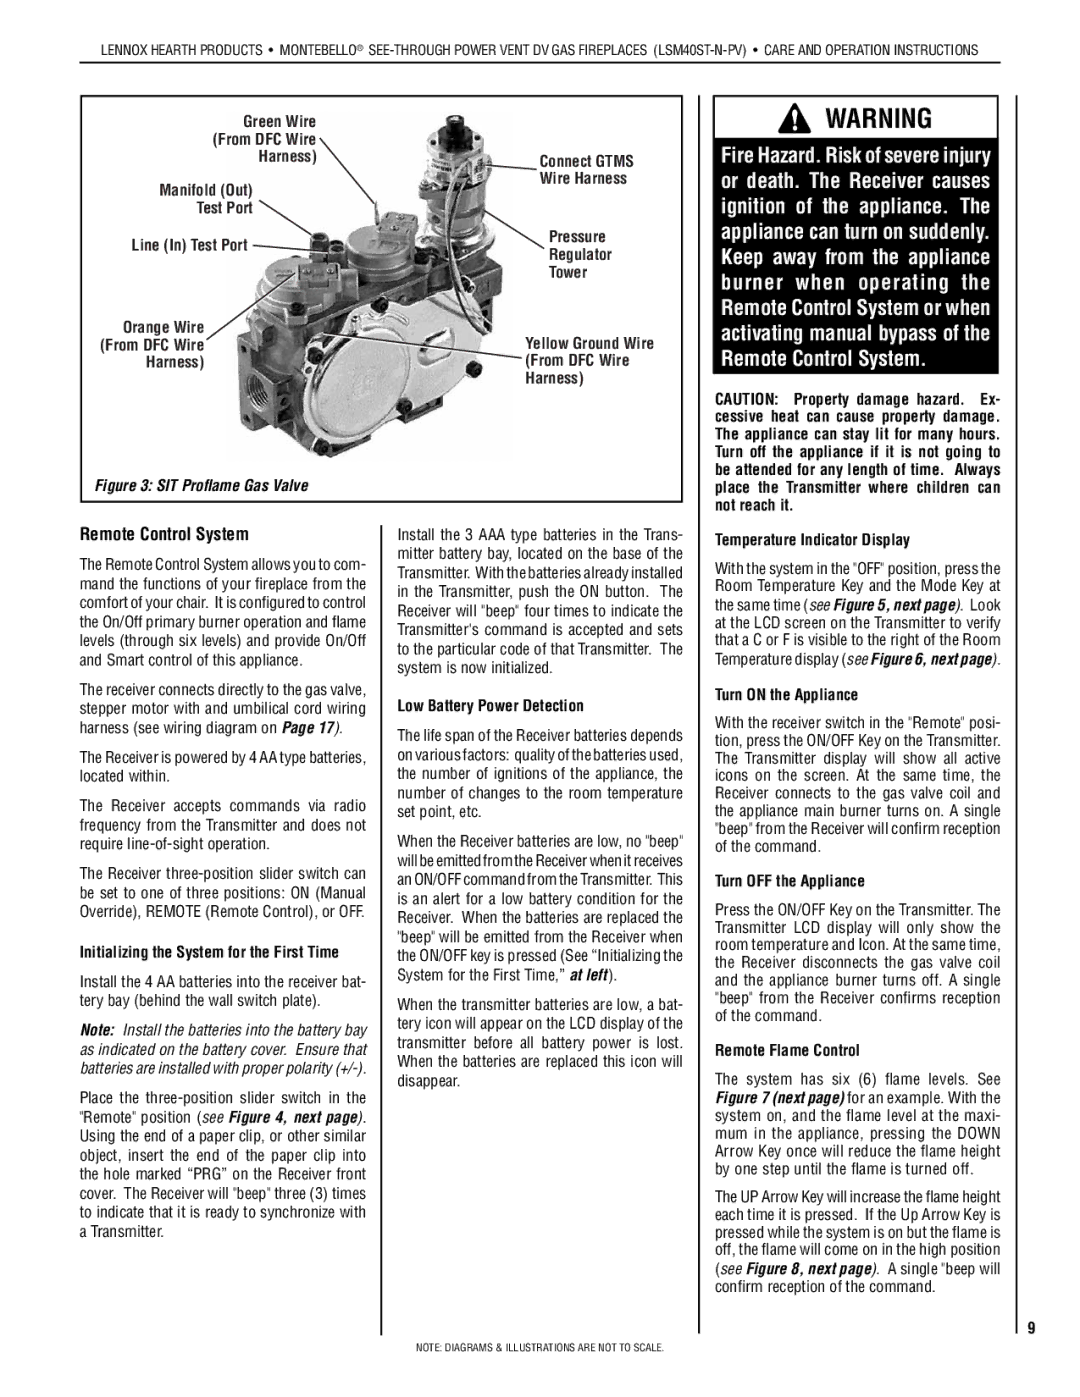
Green Wire

(From DFC Wire

Harness)Connect GTMS

Remote Control System WARNING

Fire Hazard. Risk of severe injury

Manifold (Out) Test Port

Manual background Wire Harness

or death. The Receiver causes ignition of the appliance. The

Line (In) Test Port

Pressure

Regulator


Tower

Orange Wire

Yellow Ground Wire

(From DFC Wire

Harness)

(From DFC Wire


Harness)

Figure 3: SIT Proflame Gas Valve

appliance can turn on suddenly. Keep away from the appliance burner when operating the Remote Control System or when activating manual bypass of the Remote Control System.

CAUTION: Property damage hazard. Ex- cessive heat can cause property damage. The appliance can stay lit for many hours. Turn off the appliance if it is not going to be attended for any length of time. Always place the Transmitter where children can not reach it.

Remote Control System

The Remote Control System allows you to com- mand the functions of your fireplace from the comfort of your chair. It is configured to control the On/Off primary burner operation and flame levels (through six levels) and provide On/Off and Smart control of this appliance.

The receiver connects directly to the gas valve, stepper motor with and umbilical cord wiring harness (see wiring diagram on Page 17).

The Receiver is powered by 4 AA type batteries, located within.

The Receiver accepts commands via radio frequency from the Transmitter and does not require line-of-sight operation.

The Receiver three-position slider switch can be set to one of three positions: ON (Manual Override), REMOTE (Remote Control), or OFF.

Initializing the System for the First Time

Install the 4 AA batteries into the receiver bat- tery bay (behind the wall switch plate).

Note: Install the batteries into the battery bay as indicated on the battery cover. Ensure that batteries are installed with proper polarity (+/-).

Place the three-position slider switch in the "Remote" position (see Figure 4, next page). Using the end of a paper clip, or other similar object, insert the end of the paper clip into the hole marked “PRG” on the Receiver front cover. The Receiver will "beep" three (3) times to indicate that it is ready to synchronize with a Transmitter.

Install the 3 AAA type batteries in the Trans- mitter battery bay, located on the base of the Transmitter. With the batteries already installed in the Transmitter, push the ON button. The Receiver will "beep" four times to indicate the Transmitter's command is accepted and sets to the particular code of that Transmitter. The system is now initialized.

Low Battery Power Detection

The life span of the Receiver batteries depends on various factors: quality of the batteries used, the number of ignitions of the appliance, the number of changes to the room temperature set point, etc.

When the Receiver batteries are low, no "beep" will be emitted from the Receiver when it receives an ON/OFF command from the Transmitter. This is an alert for a low battery condition for the Receiver. When the batteries are replaced the "beep" will be emitted from the Receiver when the ON/OFF key is pressed (See “Initializing the System for the First Time,” at left ).

When the transmitter batteries are low, a bat- tery icon will appear on the LCD display of the transmitter before all battery power is lost. When the batteries are replaced this icon will disappear.

Temperature Indicator Display

With the system in the "OFF" position, press the Room Temperature Key and the Mode Key at the same time (see Figure 5, next page). Look at the LCD screen on the Transmitter to verify that a C or F is visible to the right of the Room Temperature display (see Figure 6, next page).

Turn ON the Appliance

With the receiver switch in the "Remote" posi- tion, press the ON/OFF Key on the Transmitter. The Transmitter display will show all active icons on the screen. At the same time, the Receiver connects to the gas valve coil and the appliance main burner turns on. A single "beep" from the Receiver will confirm reception of the command.

Turn OFF the Appliance

Press the ON/OFF Key on the Transmitter. The Transmitter LCD display will only show the room temperature and Icon. At the same time, the Receiver disconnects the gas valve coil and the appliance burner turns off. A single "beep" from the Receiver confirms reception of the command.

Remote Flame Control

The system has six (6) flame levels. See Figure 7 (next page) for an example. With the system on, and the flame level at the maxi- mum in the appliance, pressing the DOWN Arrow Key once will reduce the flame height by one step until the flame is turned off.

The UP Arrow Key will increase the flame height each time it is pressed. If the Up Arrow Key is pressed while the system is on but the flame is off, the flame will come on in the high position (see Figure 8, next page). A single "beep will confirm reception of the command.

9

NOTE: DIAGRAMS & ILLUSTRATIONS ARE NOT TO SCALE.

Page 9
Image 9
Lennox Hearth LSM40ST-N-PV installation instructions Fire Hazard. Risk of severe injury, Remote Control System