Power system checkout
To verify a symptom, do the following:
1.Turn off the computer.
2.Remove the battery pack.
3.Connect the ac adapter.
4.Check that power is supplied when you turn on the computer.
5.Turn off the computer.
6.Disconnect the ac adapter and install the charged battery pack.
7.Check that the battery pack supplies power when you turn on the computer.
If you suspect a power problem, see the appropriate one of the following power supply checkouts:
v“Checking the ac adapter”
v“Checking operational charging”
v“Checking the battery pack” on page 52
v“Checking the backup battery” on page 52
Checking the ac adapter
You are here because the computer fails only when the ac adapter is used.
vIf the
vIf the computer does not charge during operation, go to “Checking operational charging”
To check the ac adapter, do the following:
1.Unplug the ac adapter cable from the computer.
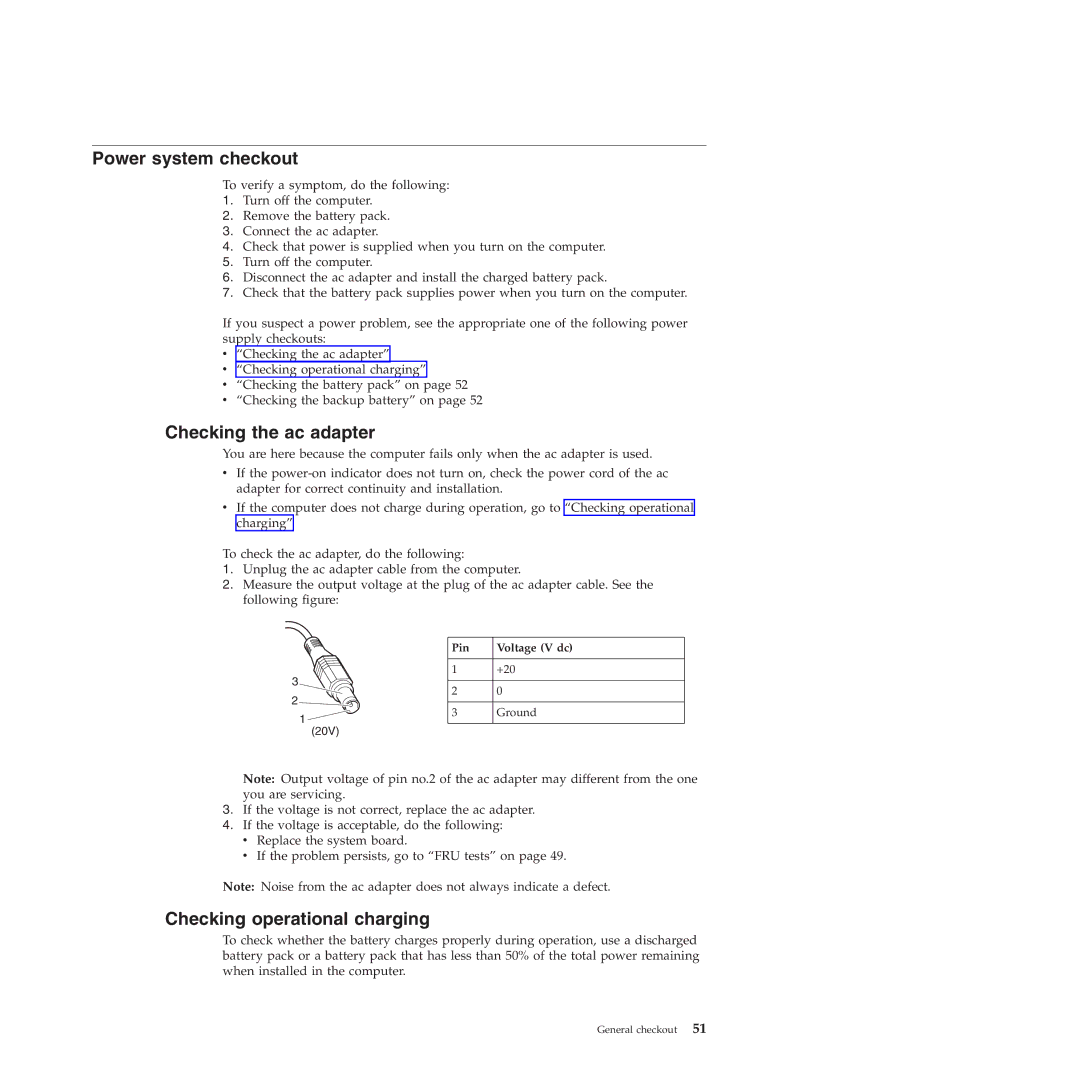
2.Measure the output voltage at the plug of the ac adapter cable. See the following figure:
3![]()
![]()
2![]()
![]()
1
(20V)
Pin | Voltage (V dc) |
1+20
20
3Ground
Note: Output voltage of pin no.2 of the ac adapter may different from the one you are servicing.
3.If the voltage is not correct, replace the ac adapter.
4.If the voltage is acceptable, do the following: v Replace the system board.
vIf the problem persists, go to “FRU tests” on page 49.
Note: Noise from the ac adapter does not always indicate a defect.
Checking operational charging
To check whether the battery charges properly during operation, use a discharged battery pack or a battery pack that has less than 50% of the total power remaining when installed in the computer.
General checkout 51