Chapter 3. On-screen display (OSD) menu settings
This section provides information on the
OSD menu controls
The projector has an OSD that lets you make image adjustments and change various settings.
Note: You must have a display on the screen in order to access the OSD.
Navigating the OSD
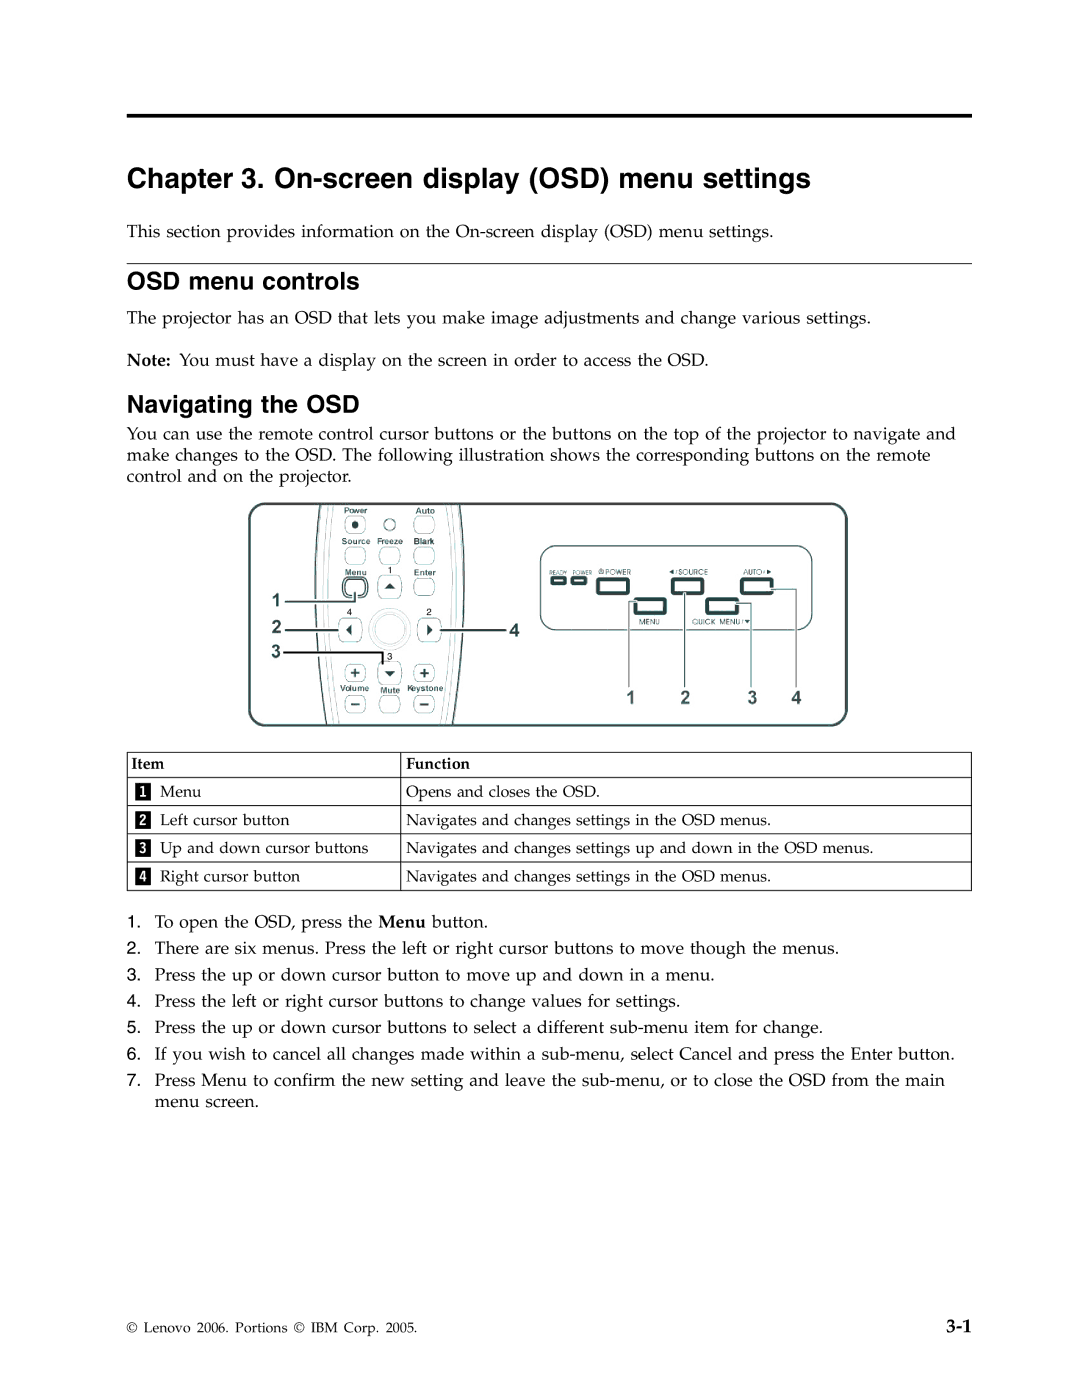
You can use the remote control cursor buttons or the buttons on the top of the projector to navigate and make changes to the OSD. The following illustration shows the corresponding buttons on the remote control and on the projector.
1
42
![]()
![]() 3
3
Item | Function |
|
|
Menu | Opens and closes the OSD. |
|
|
Left cursor button | Navigates and changes settings in the OSD menus. |
|
|
Up and down cursor buttons | Navigates and changes settings up and down in the OSD menus. |
|
|
Right cursor button | Navigates and changes settings in the OSD menus. |
|
|
1.To open the OSD, press the Menu button.
2.There are six menus. Press the left or right cursor buttons to move though the menus.
3.Press the up or down cursor button to move up and down in a menu.
4.Press the left or right cursor buttons to change values for settings.
5.Press the up or down cursor buttons to select a different
6.If you wish to cancel all changes made within a
7.Press Menu to confirm the new setting and leave the
© Lenovo 2006. Portions © IBM Corp. 2005. |