
MC-12 specifications
The Lexicon MC-12 is a high-end home theater processor that has garnered admiration for its impressive performance and advanced features. Designed for audiophiles and home theater enthusiasts, the MC-12 combines cutting-edge technologies with user-centric design to create an unparalleled listening experience.One of the standout features of the MC-12 is its analog bypass mode, which allows pure analog signals to pass through without digital processing. This feature is particularly appealing to users who prefer the warmth and richness of analog sound. The processor also boasts a 24-bit/192 kHz digital-to-analog converter (DAC), ensuring that audio playback is both high-fidelity and precise.
Equipped with a range of surround sound formats, including Dolby Digital, DTS, and THX, the MC-12 provides an immersive audio experience. It supports multiple channels, delivering up to 7.1 surround sound, making it ideal for cinema-style setups. The processor also features Lexicon's proprietary Logic 7 processing, which enhances stereo and discrete surround signals for a more enveloping soundstage.
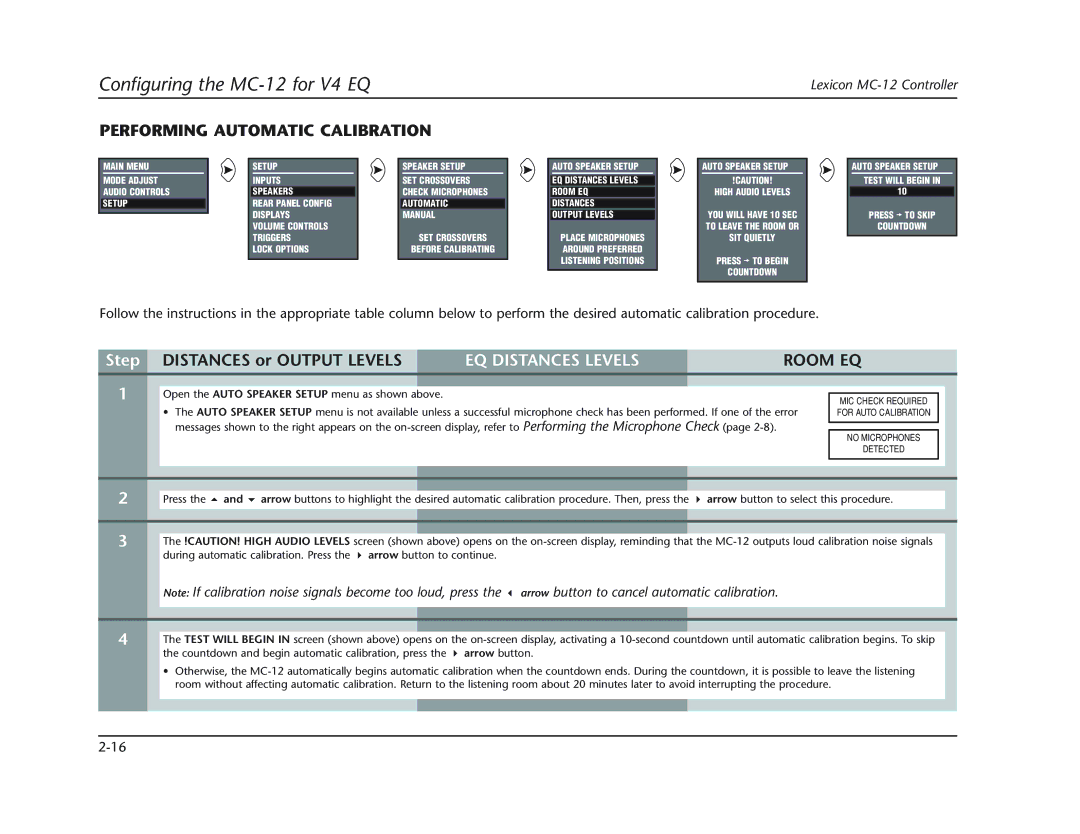
The MC-12 features customizable room acoustic settings that allow users to tailor the audio output to their specific environment. An integrated automatic calibration system uses sophisticated algorithms to analyze room acoustics and adjust speaker settings accordingly. This optimization ensures that users achieve the best possible sound quality, regardless of their room’s dimensions or layout.
Connectivity is another strong point of the MC-12. It comes with multiple inputs, including HDMI, coaxial, optical, and balanced inputs, allowing users to connect a variety of audio and video sources. Additionally, the processor includes both analog and digital outputs, ensuring compatibility with a multitude of external devices.
The Lexicon MC-12 also features a user-friendly interface, allowing for easy navigation and control. Its ergonomic design includes a sleek front panel and a backlit remote control, enhancing the overall user experience.
In summary, the Lexicon MC-12 stands out as a premium choice for audiophiles seeking exceptional sound quality and advanced features. Its combination of analog and digital processing, multiple surround sound formats, room calibration technology, and extensive connectivity options make it a versatile and powerful home theater processor. Whether for casual listening or serious cinephile pursuits, the MC-12 promises to deliver a captivating audio experience.