Lexmark S410 manual Fax troubleshooting checklist, Cannot send faxes, Connection checklist

Models: S410

1 55
Download 55 pages 3.9 Kb
Page 46
Image 46

Troubleshooting

46

“Cannot run the fax software” on page 47

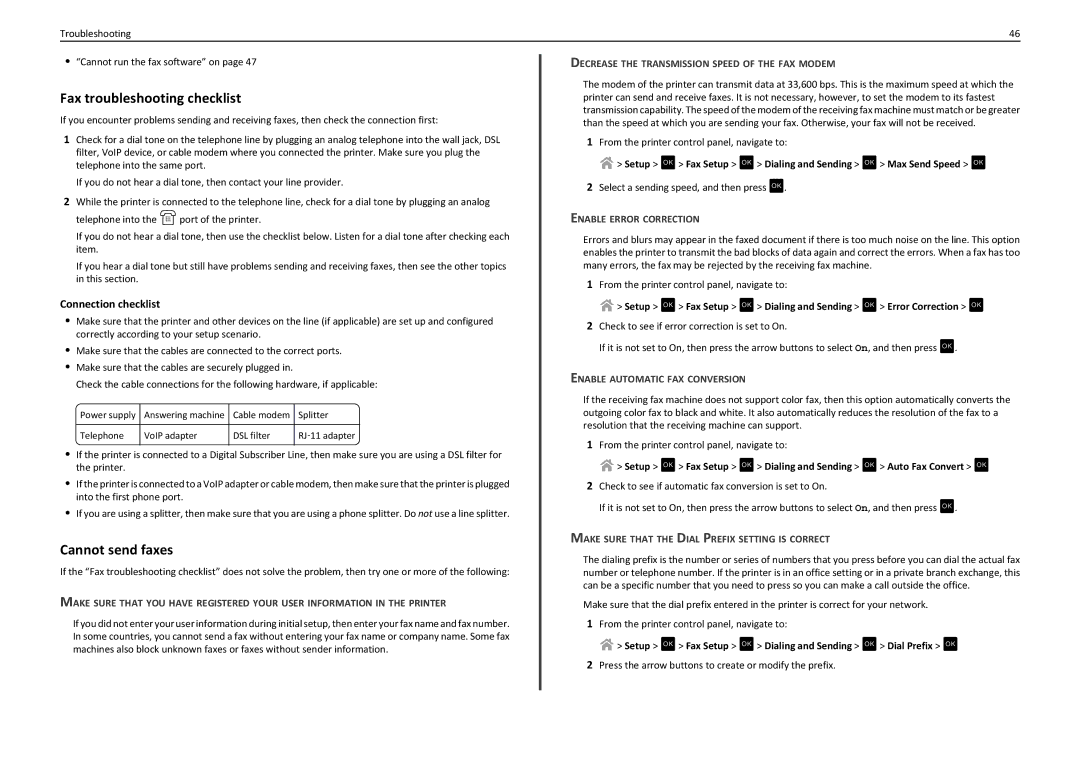
Fax troubleshooting checklist

If you encounter problems sending and receiving faxes, then check the connection first:

1Check for a dial tone on the telephone line by plugging an analog telephone into the wall jack, DSL filter, VoIP device, or cable modem where you connected the printer. Make sure you plug the telephone into the same port.

If you do not hear a dial tone, then contact your line provider.

2While the printer is connected to the telephone line, check for a dial tone by plugging an analog

telephone into the port of the printer.

If you do not hear a dial tone, then use the checklist below. Listen for a dial tone after checking each item.

If you hear a dial tone but still have problems sending and receiving faxes, then see the other topics in this section.

Connection checklist

Make sure that the printer and other devices on the line (if applicable) are set up and configured correctly according to your setup scenario.

Make sure that the cables are connected to the correct ports.

Make sure that the cables are securely plugged in.

Check the cable connections for the following hardware, if applicable:

Power supply

Answering machine

Cable modem

Splitter


Telephone

VoIP adapter

DSL filter

RJ11 adapter


If the printer is connected to a Digital Subscriber Line, then make sure you are using a DSL filter for the printer.

If the printer is connected to a VoIP adapter or cable modem, then make sure that the printer is plugged into the first phone port.

If you are using a splitter, then make sure that you are using a phone splitter. Do not use a line splitter.

Cannot send faxes

If the “Fax troubleshooting checklist” does not solve the problem, then try one or more of the following:

MAKE SURE THAT YOU HAVE REGISTERED YOUR USER INFORMATION IN THE PRINTER

If you did not enter your user information during initial setup, then enter your fax name and fax number. In some countries, you cannot send a fax without entering your fax name or company name. Some fax machines also block unknown faxes or faxes without sender information.

DECREASE THE TRANSMISSION SPEED OF THE FAX MODEM

The modem of the printer can transmit data at 33,600 bps. This is the maximum speed at which the printer can send and receive faxes. It is not necessary, however, to set the modem to its fastest transmission capability. The speed of the modem of the receiving fax machine must match or be greater than the speed at which you are sending your fax. Otherwise, your fax will not be received.

1From the printer control panel, navigate to:

> Setup > OK > Fax Setup > OK > Dialing and Sending > OK > Max Send Speed > OK

2Select a sending speed, and then press OK .

ENABLE ERROR CORRECTION

Errors and blurs may appear in the faxed document if there is too much noise on the line. This option enables the printer to transmit the bad blocks of data again and correct the errors. When a fax has too many errors, the fax may be rejected by the receiving fax machine.

1From the printer control panel, navigate to:

> Setup > OK > Fax Setup > OK > Dialing and Sending > OK > Error Correction > OK

2Check to see if error correction is set to On.

If it is not set to On, then press the arrow buttons to select On, and then press OK .

ENABLE AUTOMATIC FAX CONVERSION

If the receiving fax machine does not support color fax, then this option automatically converts the outgoing color fax to black and white. It also automatically reduces the resolution of the fax to a resolution that the receiving machine can support.

1From the printer control panel, navigate to:

> Setup > OK > Fax Setup > OK > Dialing and Sending > OK > Auto Fax Convert > OK

2Check to see if automatic fax conversion is set to On.

If it is not set to On, then press the arrow buttons to select On, and then press OK .

MAKE SURE THAT THE DIAL PREFIX SETTING IS CORRECT

The dialing prefix is the number or series of numbers that you press before you can dial the actual fax number or telephone number. If the printer is in an office setting or in a private branch exchange, this can be a specific number that you need to press so you can make a call outside the office.

Make sure that the dial prefix entered in the printer is correct for your network.

1From the printer control panel, navigate to:

> Setup > OK > Fax Setup > OK > Dialing and Sending > OK > Dial Prefix > OK

2Press the arrow buttons to create or modify the prefix.

Page 46
Image 46
Lexmark S410 manual Fax troubleshooting checklist, Cannot send faxes, Connection checklist

S410 specifications

The Lexmark S415 and S410 series of printers, along with the 90T4110 toner cartridge, are designed to meet the needs of small to medium-sized businesses that require reliable, efficient, and high-performance printing solutions.

The Lexmark S415 is a multifunction device that combines printing, copying, scanning, and faxing capabilities in a single compact unit. It boasts a print speed of up to 33 pages per minute (ppm) for black and white prints and up to 28 ppm for color. This model utilizes Lexmark's proprietary Unison toner, which ensures consistent, high-quality output and reduces the need for frequent cartridge replacements. The S415 supports a variety of paper types and sizes, making it versatile for various office tasks.

On the other hand, the Lexmark S410 is designed for everyday printing needs with its streamlined functionality. It provides print speeds similar to the S415 and is equipped with a user-friendly interface that simplifies operation. The S410 model emphasizes energy efficiency, featuring Eco Mode to minimize energy consumption and reduce printing costs. The printer also supports mobile printing technologies such as AirPrint and Google Cloud Print, allowing users to print directly from their smartphones or tablets.

Both models incorporate advanced security features to protect sensitive business information. These include secure printing, which ensures that documents are only printed when the user is present at the device. Additionally, the printers offer various connectivity options, including USB, Ethernet, and wireless capabilities, providing flexibility in a networked office environment.

The 90T4110 toner cartridge, compatible with both the S415 and S410 series, offers a generous page yield, delivering more prints while reducing overall printing costs. This toner cartridge is engineered to provide consistent print quality and prevent downtime associated with frequent replacements.

In summary, the Lexmark S415 and S410 printers, supported by the 90T4110 toner cartridge, deliver robust performance and versatile features tailored for modern business requirements. With their multifunction capabilities, high print speeds, and emphasis on security and energy efficiency, these devices are invaluable assets for enhancing productivity in any office setting.