LCD TV
TruSurround XT
Duct to Rain or Moisture
Appliance
Including amplifiersthat produce heat
Important Safety Instructions
Do not use this apparatus near water
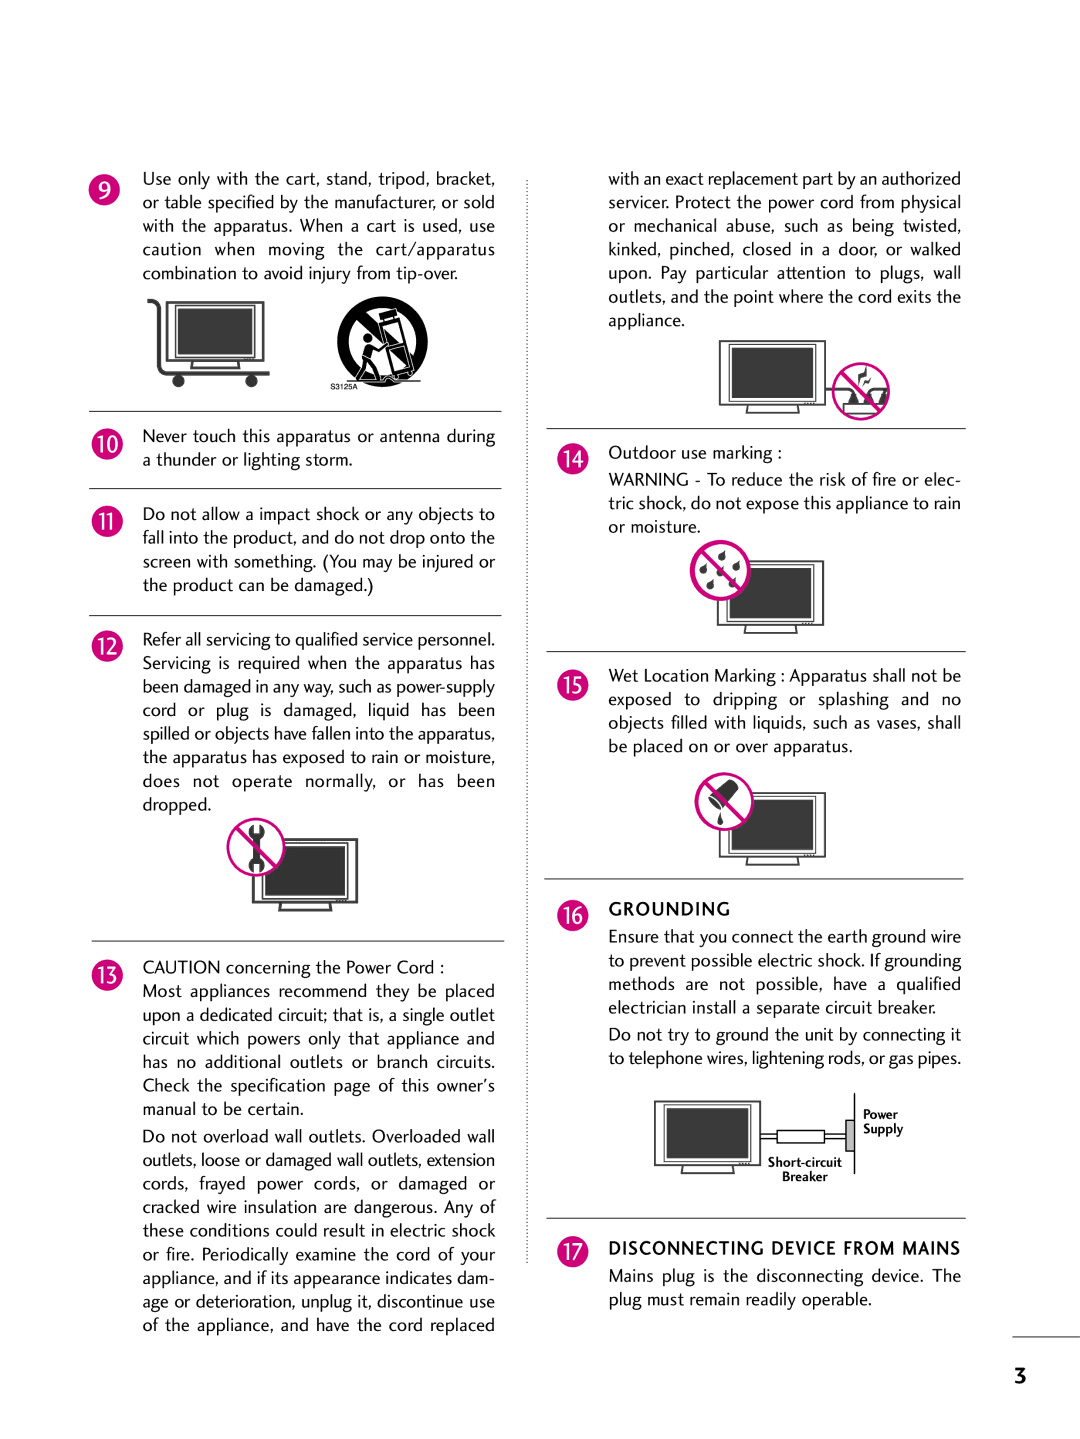
Grounding
Contents
IR Codes External Control through RS-232C
Troubleshooting Maintenance Product Specifications
Features of this TV
Preparation
Accessories
Volume
Remote Control Sensor
Front Panel Controls
Channel
37/42/47/52LB5D
Video device
Back Panel Information
Here shown may be somewhat different from your TV
Component
Preparation HDMI/DVI
Rgbpc Audio RGB/DVI
Video
32/37/42LB4D
Attaching the TV to a Wall
Stand Installation Only 32/37 inches models
Holder
Back Cover for Wire Arrangement
37/42/47/52LB5D
Vesa Wall Mounting
Desktop Pedestal Installation
Antenna or Cable Connection
Using both cable and antenna
Antenna analog or digital
Cable
When connecting Component cable
HD Receiver Setup
How to connect
How to use
When connecting Hdmi cable
When connecting D-sub 15pin cable
Connect the digital set-top box to HDMI/DVI IN1
Or 3 jack on the set
When connecting Hdmi to DVI cable
External Equipment Setup
Match the jack colors = green, PB = blue, and PR = red
DVD Setup
Remote control
When connecting with an S-Video cable
Input jacks on the set
Turn on the DVD player, insert a DVD
Setup
VCR Setup
When connecting with an antenna
White,and Audio Right = red
When connecting with a RCA cable
Connect the AUDIO/VIDEO jacks between TV
Other A/V Source Setup
When connecting D-sub 15 pin cable
PC Setup
RGB
External Equipment Setup
Supported Display Specifications HDMI-DTV
Supported Display Specifications RGB/HDMI-PC
Supported Display Specifications Y, CB /PB, CR /PR
720x400
Overview
Screen Setup for PC mode
Press the G button to enter the screen adjustment Menu
Press the Enter button
Initializing Reset to original factory values
Connect the USB device to the USB in jacks on the side of TV
USB in Setup
Connect audio outputs to the TV’s Audio OUT jacks
Audio OUT Setup
Watching TV / Channel Control
Remote Control Functions
VCR/DVD Control video cassette recorders or DVD players
Channel Control
Inside the Sliding Cover
Watching TV
Control
Turning on TV
Watching
Channel Selection
Adjust the volume to suit your personal preference
Volume Adjustment
Press the VOL D or E button to adjust the volume
If you want to switch the sound off, press the Mute but Ton
ON-SCREEN Menus Selection
Setup Picture
Option
Audio
Auto ScanAuto Tuning
Channel Setup
Select DTV, TV, CADTV, and Catv
Add/Delete ChannelManual Tuning
Channel Editing
RGB-PC Component2
Input List
AV2
SimpLink device with the Hdmi cable
Additional cables and settings
SimpLink Preparations
SimpLink Menu
When a device is
SimpLink Functions
Input Label
Media Host
Entry Modes
Usable USB memory Current page/Total pages
Photo List
Photo Selection and PopUp Menu
Media
When selected, the selected photos are displayed
PopUp menu
Selected photo is displayed in full size
Media Host
Music file on your USB device can be played by this unit
Music List
Music Selection and PopUp Menu
Picture Control
RGB-PC input source use 43 or 169 aspect ratio
You can also use the Picture menu to adjust Picture Mode
Preset Picture Settings
Picture Mode -Preset
To select the Picture menu
Color Tone -Preset
Select Color Temperature
Picture Mode -User Mode
Manual Picture Adjustment
Select User
Color Tone -User Mode
Or E button to
Use the F or G button to select O n or Off
XD Picture Improvement Technology
Select XD
Advanced -CINEMA 32 Pulldown Mode
Select Black level
ADVANCED-BLACKDARKNESS Level
Select TruM
Only 32/37/42LB4D models
To original values
Picture Reset
Sound & Language Control
Sound & Language Control
You can also adjust Sound Mode in the Audio menu
Preset Sound Settings Sound Mode
Front Surround
Adjust the sound to suit your taste and room situations
3D EchoSound System
Press the G button and then use
Sound
Balance
To select the Audio menu
STEREO/SAP Broadcast Setup
TV Speakers ON/OFF Setup
Select Language
Audio Language
ON-SCREEN Menus Language Selection
Text
Caption Mode
Caption
Select Analog
Using the Menu button
Digital Broadcasting System Captions
Sound &LANGUAGE Control
Auto Clock Setup
Clock Setting
Select your viewing area time zone
Your viewing area observes Daylight Saving time
Setting
Manual Clock Setup
Select Clock
Select Manual
Auto ON/OFF Time Setting
Options 10, 20, 30, 60, 90, 120, 180, and 240 minutes
Sleep Time Setting
Time Setting
Auto SHUT-OFF Setting
Setting up your Password
SET Password & Lock System
Chip rating and categories
Parental Control / Rating
Lock System
Set Password
To choose Block Channel
Channel Blocking
With channel numbers and a preview picture
Use D E F G button to select a channel and then
Movie Rating Mpaa -for USA only
Movie & TV Rating
Or E button
To choose Movie Rating
TV Rating General -for USA only
TV Rating Children -for USA only
TV Rating english for Canada only
To choose Input Block
KEY Lock
Locking out the front panel controls
Set to even if you turn the TV off
Appendix
Troubleshooting
Remote control Doesn’t work Power is suddenly Turned off
Check the input source
Check the signal cable
Reinstall the PC video card
Cleaning the Screen
Maintenance
Cleaning the Cabinet
Extended Absence
37LB5D
Product Specifications
32LB4D
Programming a code into a remote mode
Programming the Remote Control
VCRs
Remote control code
Hdstb
Cable Box
DVD
Audio
IR Codes
Remote Control IR Codes
Code Function
Type of Connector D-Sub 9-Pin Male
RS-232C Setup
External Control Through RS-232C
GND
This product has command echo back in the RS-232C Command
RS-232C Configurations
Set ID
Communication Parameters
Tint Sharpness
Command Reference List
Transmission
Transmission / Receiving Protocol
104
105
106
107