Installing and Composition
Basic Operation of the Projector
1.Place the projector on a sturdy and horizontal surface with the PC or AV source.
2.Place the projector the correct distance from the screen. The distance between the projector and the screen determines the actual size of the image.
3.Position the projector so that the lens is set at a right angle to the screen. If the projector is not set at a right angle, the screen image will be crooked. If this is so then the keystone adjustment may correct this (Refer to page 22.)
4.Connect the cables of the projector to a wall power socket and other connected sources.
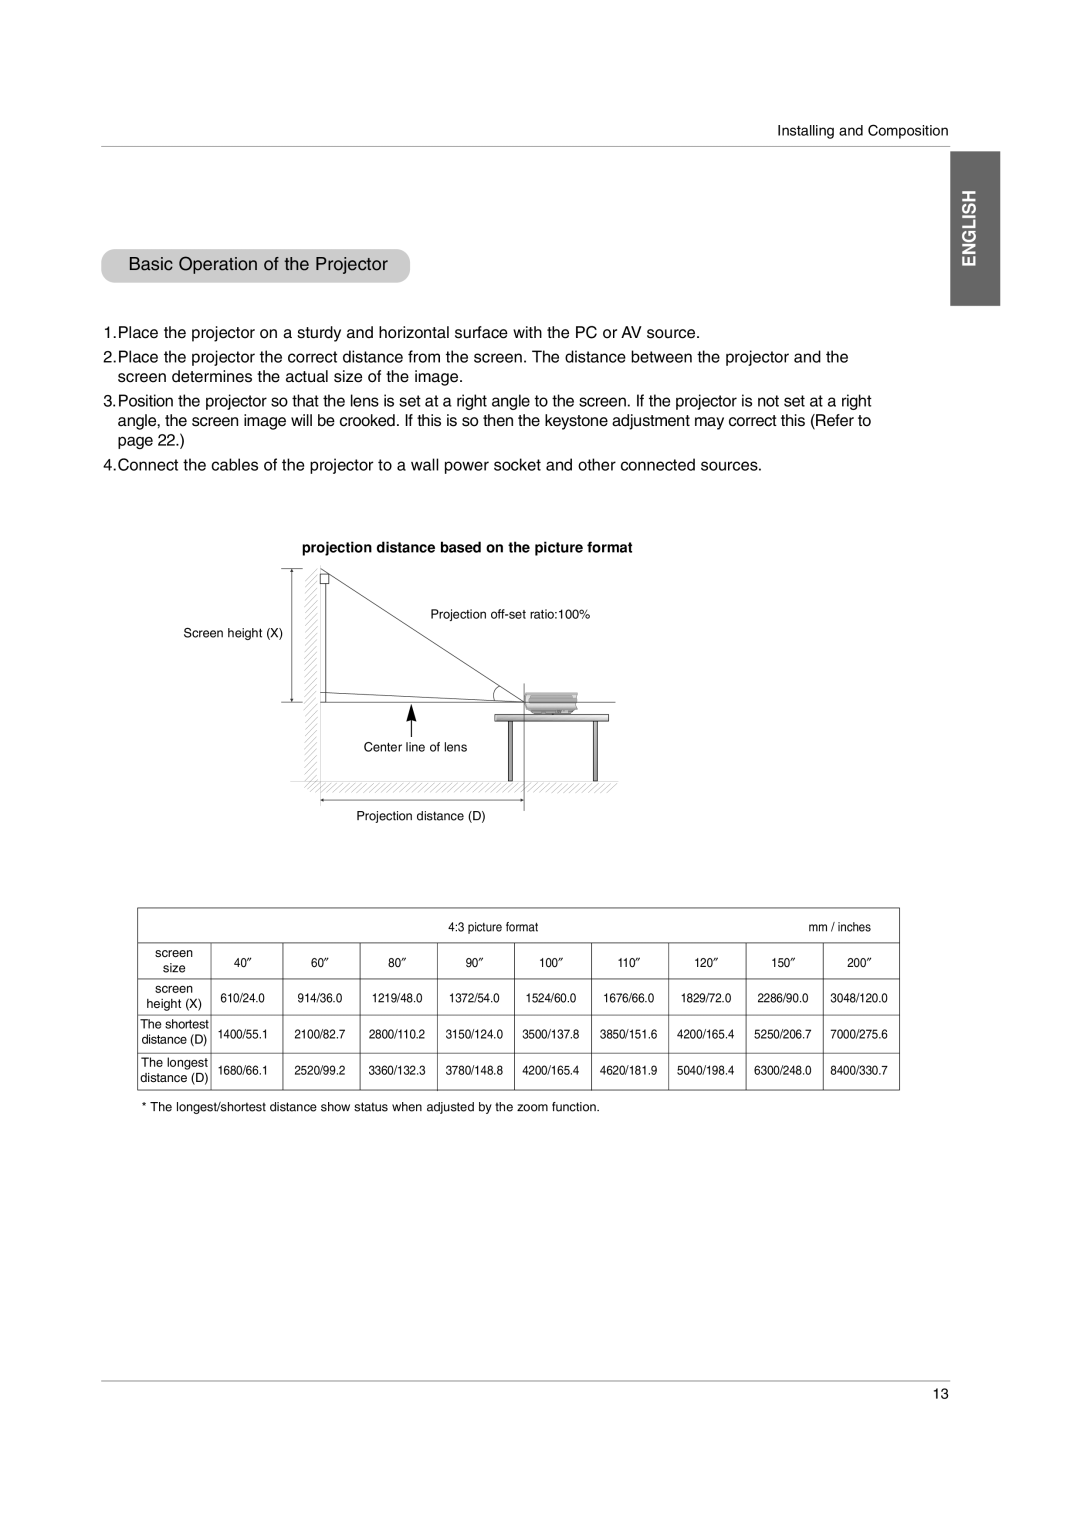
projection distance based on the picture format
Projection
Screen height (X)
Center line of lens
Projection distance (D)
|
|
|
| 4:3 picture format |
|
| mm / inches | |||
|
|
|
|
|
|
|
|
|
| |
screen | 40″ | 60″ | 80″ | 90″ | 100″ | 110″ | 120″ | 150″ | 200″ | |
size | ||||||||||
|
|
|
|
|
|
|
|
| ||
|
|
|
|
|
|
|
|
|
| |
screen | 610/24.0 | 914/36.0 | 1219/48.0 | 1372/54.0 | 1524/60.0 | 1676/66.0 | 1829/72.0 | 2286/90.0 | 3048/120.0 | |
height (X) | ||||||||||
|
|
|
|
|
|
|
|
| ||
|
|
|
|
|
|
|
|
|
| |
The shortest | 1400/55.1 | 2100/82.7 | 2800/110.2 | 3150/124.0 | 3500/137.8 | 3850/151.6 | 4200/165.4 | 5250/206.7 | 7000/275.6 | |
distance (D) | ||||||||||
|
|
|
|
|
|
|
|
|
| |
The longest | 1680/66.1 | 2520/99.2 | 3360/132.3 | 3780/148.8 | 4200/165.4 | 4620/181.9 | 5040/198.4 | 6300/248.0 | 8400/330.7 | |
distance (D) |
|
|
|
|
|
|
|
|
| |
* The longest/shortest distance show status when adjusted by the zoom function.
ENGLISH
13