10Connecting
2
Connecting
Connecting to your TV
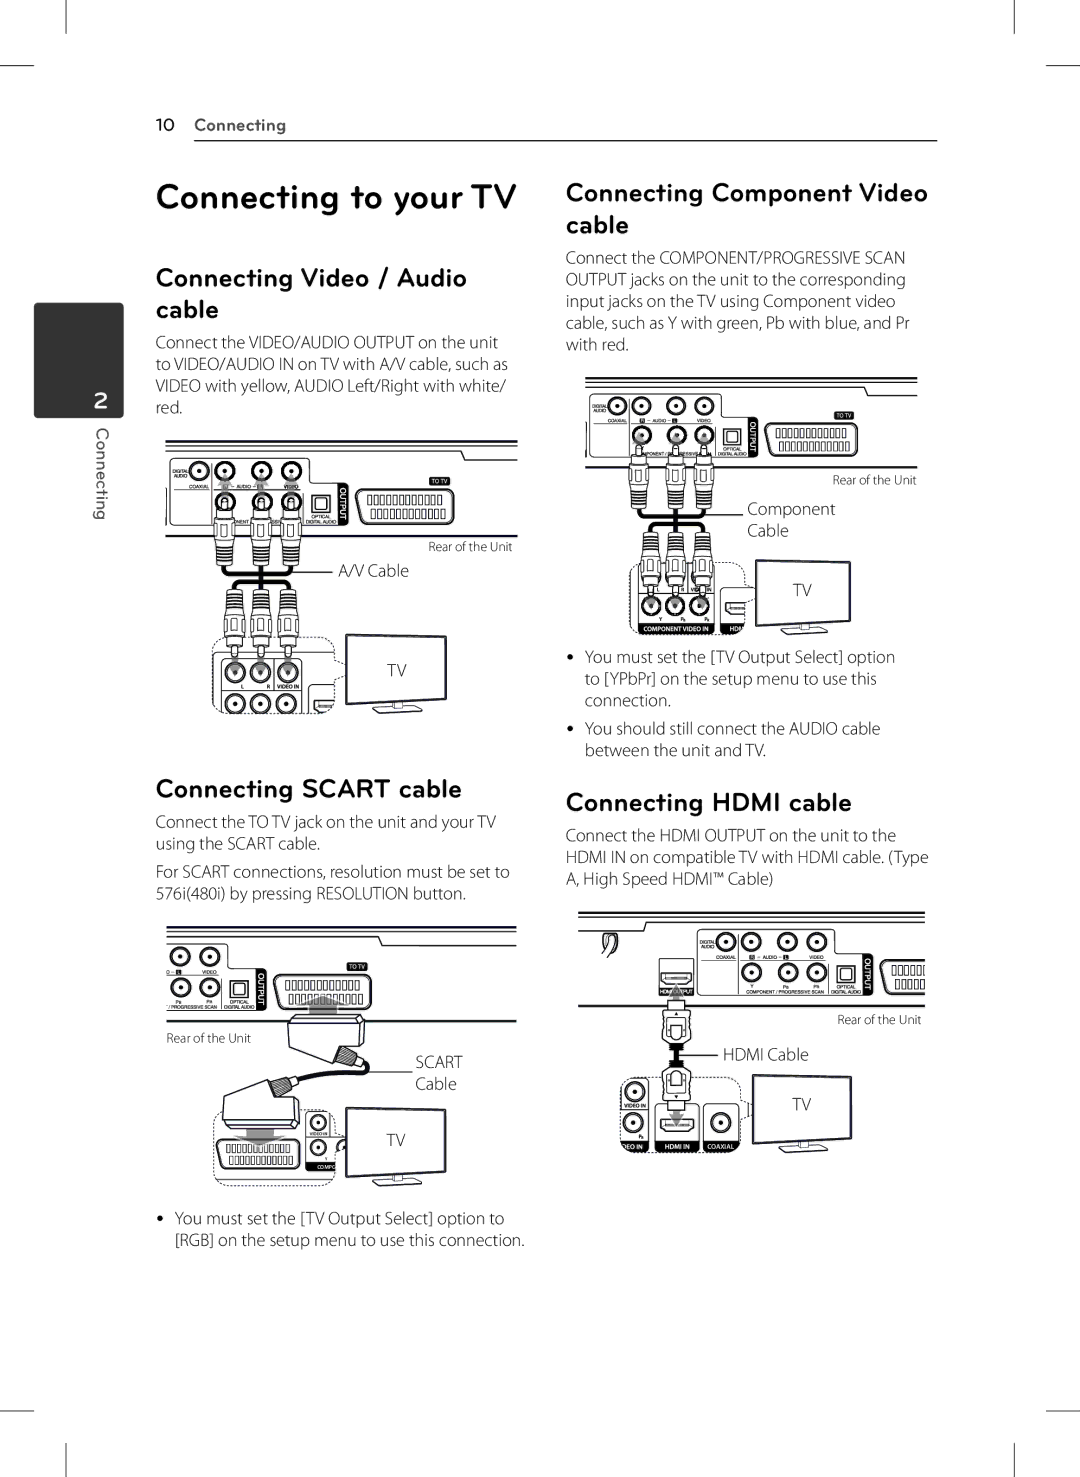
Connecting Video / Audio cable
Connect the VIDEO/AUDIO OUTPUT on the unit to VIDEO/AUDIO IN on TV with A/V cable, such as VIDEO with yellow, AUDIO Left/Right with white/ red.
Rear of the Unit
![]()
![]()
![]()
![]()
![]() A/V Cable
A/V Cable
TV
Connecting Component Video cable
Connect the COMPONENT/PROGRESSIVE SCAN OUTPUT jacks on the unit to the corresponding input jacks on the TV using Component video cable, such as Y with green, Pb with blue, and Pr with red.
Rear of the Unit
![]()
![]()
![]() Component
Component
Cable
TV
yy You must set the [TV Output Select] option
to [YPbPr] on the setup menu to use this connection.
yy You should still connect the AUDIO cable between the unit and TV.
Connecting SCART cable
Connect the TO TV jack on the unit and your TV using the SCART cable.
For SCART connections, resolution must be set to 576i(480i) by pressing RESOLUTION button.
Connecting HDMI cable
Connect the HDMI OUTPUT on the unit to the HDMI IN on compatible TV with HDMI cable. (Type A, High Speed HDMI™ Cable)
![]()
![]() Rear of the Unit Rear of the Unit
Rear of the Unit Rear of the Unit![]()
![]()
|
| SCART |
|
|
| HDMI Cable | |
|
|
|
|
| |||
|
|
|
|
|
| ||
|
| Cable |
|
| TV | ||
VIDEO IN L | TV |
|
|
|
|
| |
|
|
|
|
| |||
|
|
|
|
| |||
|
|
|
|
|
| ||
|
|
|
|
| COAXIAL | ||
YPB
COMPONENT VIDE
yy You must set the [TV Output Select] option to [RGB] on the setup menu to use this connection.