LEARNING TO WELD |
Helpful Hints
1.For general welding, it is not necessary to weave the arc, neither forward or backward nor sideways. Weld along at a steady pace. You will find it easier.
2.When welding on thin plate, you will find that you will have to increase the welding speed, whereas when welding on heavy plate, it is necessary to go more slowly in order to get good penetration.
3.When welding sheet metal 16 gauge (1.5 mm) and lighter, heat buildup may cause part warpage and burn through. One way to eliminate these problems is to use the
First weld from A to B; then from C to A; then from D to C; then from E to D, and so on.
B A C D E
FIGURE B.21
Practice
The best way of getting practice in the four skills that enable you to maintain:
1.Correct welding position
2.Correct way to strike an arc
3.Correct electrical stickout
4.Correct welding speed
is to perform the following exercise.
For the WELD MARK 135 PLUS, use the
following:
| Mild Steel | 16 gauge or 1/16 inch |
|
| (1.6 mm) |
| Electrode | 0.035" (0.9 mm) |
|
| |
|
| Innershield Wire |
| Voltage Setting “V” | E |
| Wire Feed Speed “oo” | 2 |
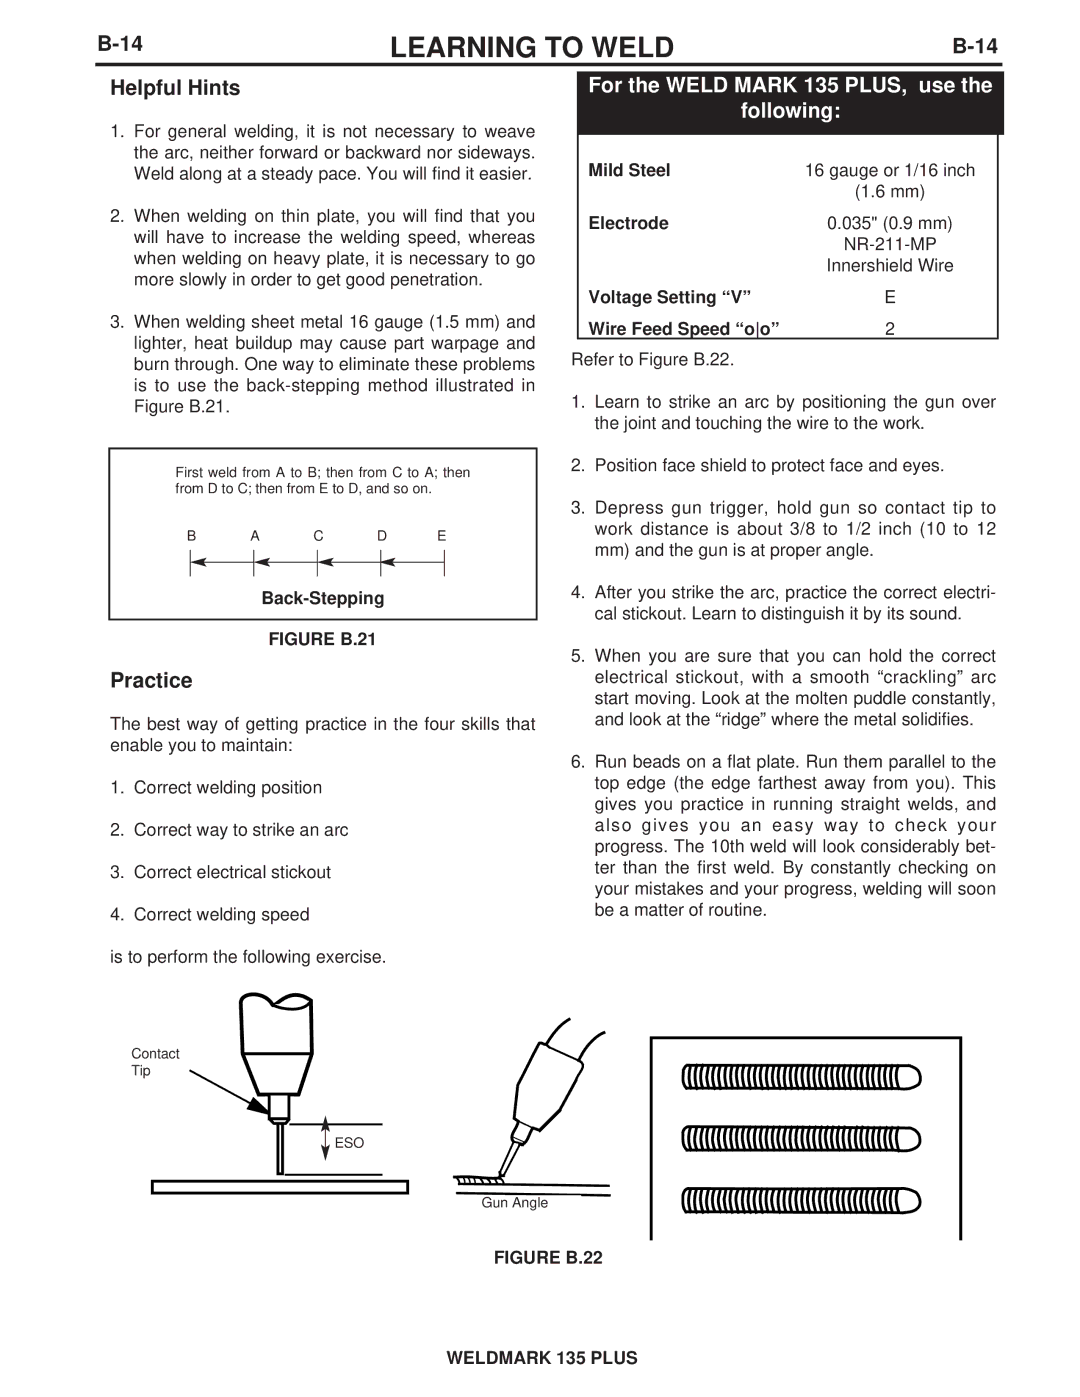
Refer to Figure B.22. |
| |
1.Learn to strike an arc by positioning the gun over the joint and touching the wire to the work.
2.Position face shield to protect face and eyes.
3.Depress gun trigger, hold gun so contact tip to work distance is about 3/8 to 1/2 inch (10 to 12 mm) and the gun is at proper angle.
4.After you strike the arc, practice the correct electri- cal stickout. Learn to distinguish it by its sound.
5.When you are sure that you can hold the correct electrical stickout, with a smooth “crackling” arc start moving. Look at the molten puddle constantly, and look at the “ridge” where the metal solidifies.
6.Run beads on a flat plate. Run them parallel to the top edge (the edge farthest away from you). This gives you practice in running straight welds, and also gives you an easy way to check your progress. The 10th weld will look considerably bet- ter than the first weld. By constantly checking on your mistakes and your progress, welding will soon be a matter of routine.
Contact
Tip
![]() ESO
ESO
Gun Angle
