ProConnect® Series |
|
| ProConnect® |
Troubleshooting |
| Appendix | |
|
|
|
|
This section provides possible solutions to problems regarding the installation |
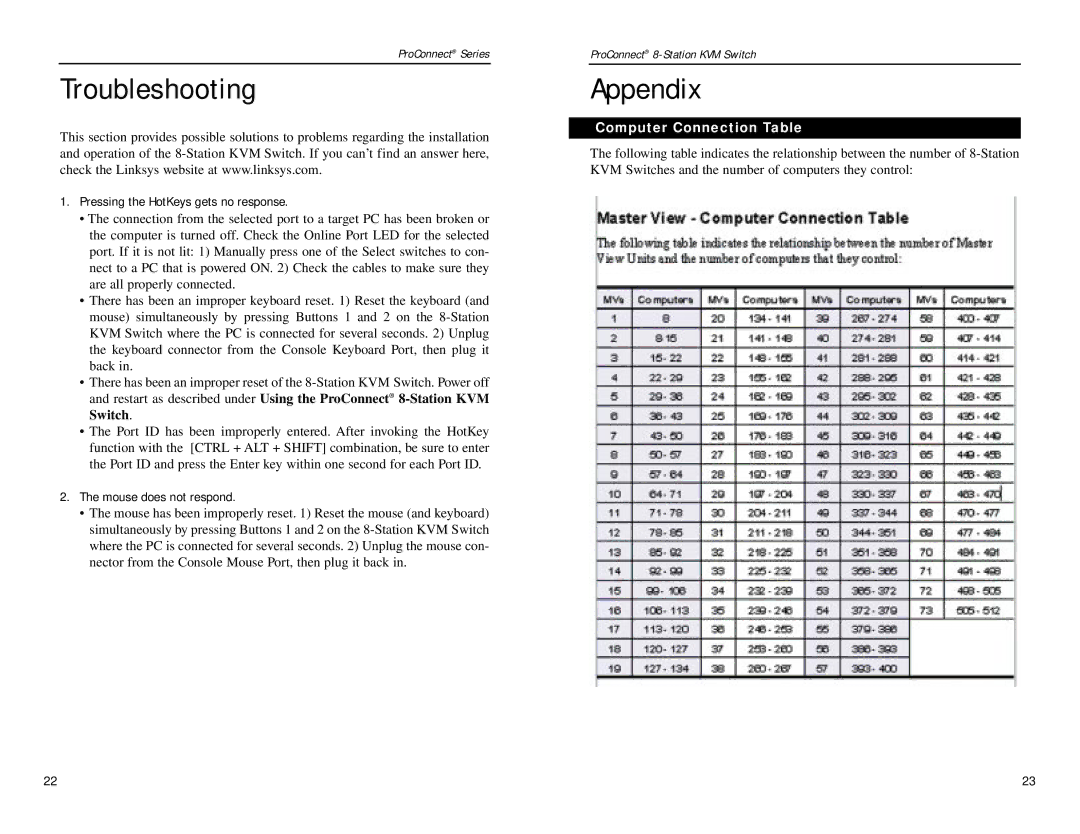
| Computer Connection Table | |
| The following table indicates the relationship between the number of | ||
and operation of the |
| ||
check the Linksys website at www.linksys.com. |
| KVM Switches and the number of computers they control: | |
1. Pressing the HotKeys gets no response. |
|
| |
• The connection from the selected port to a target PC has been broken or |
|
| |
the computer is turned off. Check the Online Port LED for the selected |
|
| |
port. If it is not lit: 1) Manually press one of the Select switches to con- |
|
| |
nect to a PC that is powered ON. 2) Check the cables to make sure they |
|
| |
are all properly connected. |
|
| |
• There has been an improper keyboard reset. 1) Reset the keyboard (and |
|
| |
mouse) simultaneously by pressing Buttons 1 and 2 on the |
|
| |
KVM Switch where the PC is connected for several seconds. 2) Unplug |
|
| |
the keyboard connector from the Console Keyboard Port, then plug it |
|
| |
back in. |
|
| |
• There has been an improper reset of the |
|
| |
and restart as described under Using the ProConnect® |
|
| |
Switch. |
|
| |
• The Port ID has been improperly entered. After invoking the HotKey |
|
| |
function with the [CTRL + ALT + SHIFT] combination, be sure to enter |
|
| |
the Port ID and press the Enter key within one second for each Port ID. |
|
| |
2. The mouse does not respond. |
|
| |
• The mouse has been improperly reset. 1) Reset the mouse (and keyboard) |
|
| |
simultaneously by pressing Buttons 1 and 2 on the |
|
| |
where the PC is connected for several seconds. 2) Unplug the mouse con- |
|
| |
nector from the Console Mouse Port, then plug it back in. |
|
| |
22 | 23 |