Wireless-N Gigabit Router with Storage Link
•DMZ. Click this tab to allow one local user to be exposed to the Internet for use of
•QoS. Quality of Service (QoS) ensures better service to
Administration
•Management. On this screen, alter the Router’s password, access privileges, and UPnP settings. You can also use this screen to back up and restore the Router’s configuration file.
•Log. If you want to view or save activity logs, click this tab.
•Diagnostics. If you want to run a ping or traceroute test, then use this screen.
•Factory Defaults. If you want to restore the Router’s factory defaults, then use this screen.
•Firmware Upgrade. Click this tab if you want to upgrade the Router’s firmware.
Status
•Router. This screen provides status information about the Router.
•Local Network. This provides status information about the local network.
•Wireless Network. This provides status information about the wireless network.
How to Access the Web-based Utility
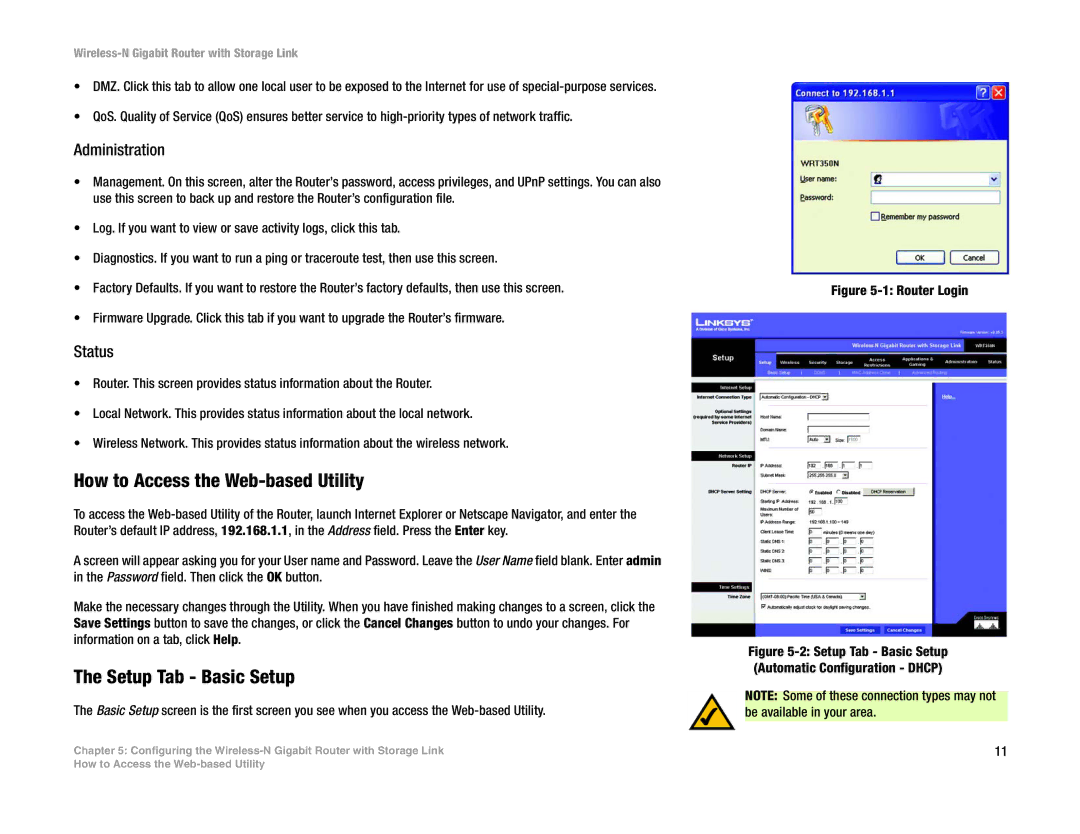
To access the
A screen will appear asking you for your User name and Password. Leave the User Name field blank. Enter admin in the Password field. Then click the OK button.
Make the necessary changes through the Utility. When you have finished making changes to a screen, click the Save Settings button to save the changes, or click the Cancel Changes button to undo your changes. For information on a tab, click Help.
The Setup Tab - Basic Setup
The Basic Setup screen is the first screen you see when you access the
Chapter 5: Configuring the
Figure 5-1: Router Login
Figure 5-2: Setup Tab - Basic Setup (Automatic Configuration - DHCP)
NOTE: Some of these connection types may not be available in your area.
11
How to Access the