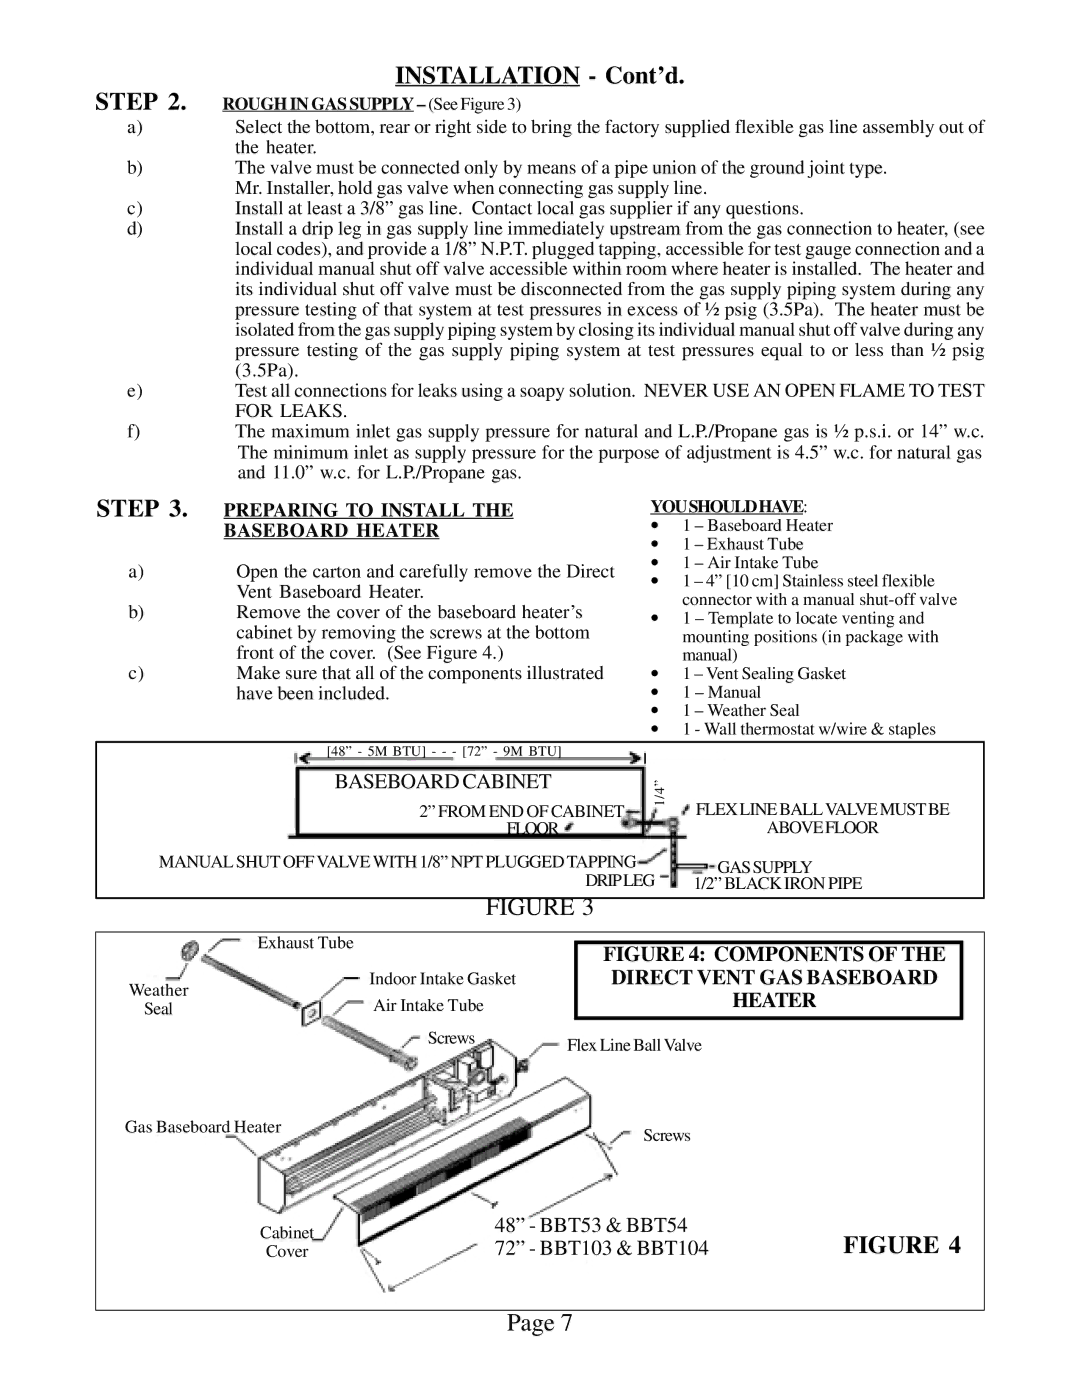
BBT103, BBT104, BBT54, BBT53 specifications
Louisville Tin and Stove's BBT series, specifically the BBT54, BBT53, BBT103, and BBT104, represents a blend of traditional craftsmanship and modern heating technology. Each model is engineered to provide efficient heating solutions, making them ideal for both residential and commercial applications.The BBT54 is a compact yet powerful unit, designed to fit seamlessly into smaller spaces while delivering robust heating capabilities. It features advanced insulation technology that maximizes heat retention, ensuring that the warmth permeates the room efficiently. With its user-friendly thermostat, homeowners can easily select their desired temperature settings, making it an excellent choice for energy-conscious consumers.
In contrast, the BBT53 emphasizes versatility and aesthetic appeal. It showcases a sleek design that complements various interior styles, from rustic to contemporary. This model includes a multi-fuel option, allowing users to choose between wood, coal, or gas, providing flexibility depending on the user's preferences and availability of resources. The BBT53 is also equipped with an automated ash removal system, reducing maintenance needs and making it user-friendly.
The BBT103 stands out with its larger heating capacity, suitable for bigger rooms or open floor plans. Its convection heating technology ensures even heat distribution, avoiding hot and cold spots in the room. This model also comes with smart technology features, including remote operation via smartphone apps, making it convenient for users to manage their heating systems from a distance.
Finally, the BBT104 is the flagship model in this series, boasting both power and sophistication. It integrates advanced environmental technologies, such as an eco-mode that optimizes fuel consumption, significantly reducing emissions. The BBT104 is also designed with a premium finish, adding an elegant touch to any space. Moreover, its enhanced safety features include automatic shut-off and carbon monoxide detection, ensuring peace of mind for families and businesses alike.
The Louisville Tin and Stove BBT series exemplifies the brand's commitment to quality and innovation in heating technology. Each model caters to different needs, whether it’s for energy efficiency, versatility, or enhanced safety, making the BBT54, BBT53, BBT103, and BBT104 outstanding choices for those seeking reliable and stylish heating solutions.

