MODEL WFF81-C OPTIONAL FAN KIT
INSTALLATION INSTRUCTIONS
NOTE: This fan kit is to be installed after installation of wall furnace and with the wall furnace front panel in place.
STEP 1. | This appliance, when installed, must be electrically grounded in accordance with local codes, or in |
| the absence of local codes, with the latest edition of the National Electric Code, ANSI/NFPA |
| No. 70. In Canada, see the current Canadian Electrical Code CSA C22.1. |
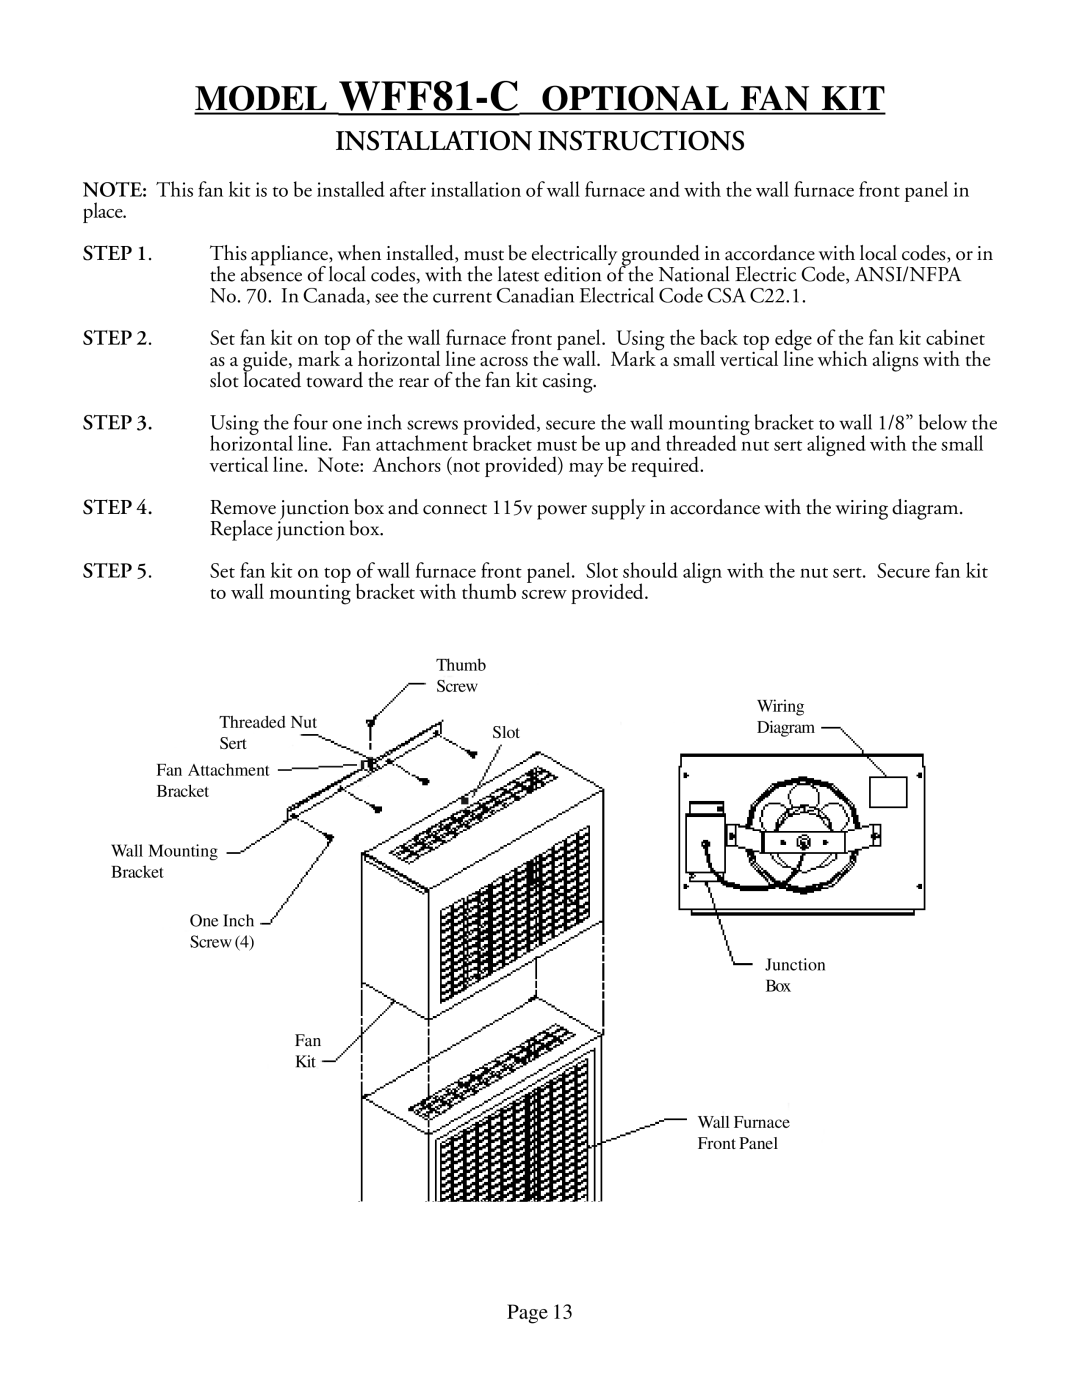
STEP 2. | Set fan kit on top of the wall furnace front panel. Using the back top edge of the fan kit cabinet |
| as a guide, mark a horizontal line across the wall. Mark a small vertical line which aligns with the |
| slot located toward the rear of the fan kit casing. |
STEP 3. | Using the four one inch screws provided, secure the wall mounting bracket to wall 1/8” below the |
| horizontal line. Fan attachment bracket must be up and threaded nut sert aligned with the small |
| vertical line. Note: Anchors (not provided) may be required. |
STEP 4. | Remove junction box and connect 115v power supply in accordance with the wiring diagram. |
| Replace junction box. |
STEP 5. | Set fan kit on top of wall furnace front panel. Slot should align with the nut sert. Secure fan kit |
| to wall mounting bracket with thumb screw provided. |
Thumb
Screw
Wiring
Threaded Nut | Slot | Diagram | |
Sert | |||
| |||
|
| ||
Fan Attachment |
|
| |
Bracket |
|
|
Wall Mounting
Bracket
One Inch
Screw (4)
Junction
Box
Fan
Kit
Wall Furnace
Front Panel
Page 13