Starting to use
· |
· |
· |
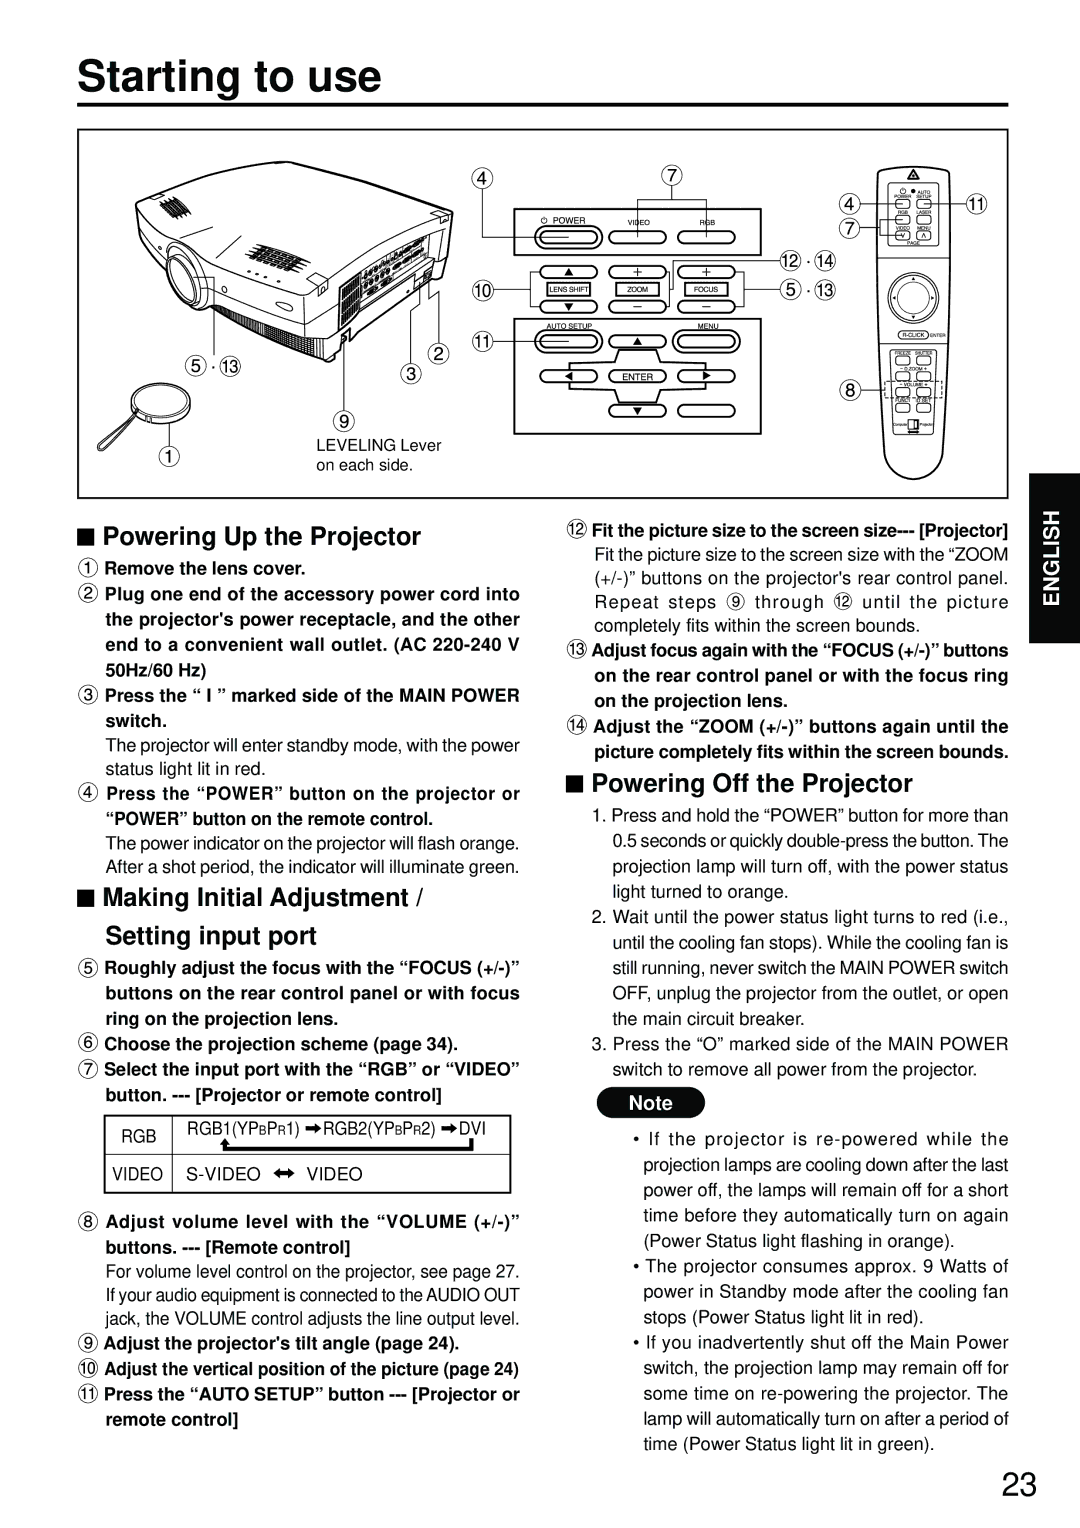
LEVELING Lever |
on each side. |
 Powering Up the Projector
![]() Remove the lens cover.
Remove the lens cover.
![]() Plug one end of the accessory power cord into the projector's power receptacle, and the other end to a convenient wall outlet. (AC
Plug one end of the accessory power cord into the projector's power receptacle, and the other end to a convenient wall outlet. (AC
![]() Press the “ I ” marked side of the MAIN POWER switch.
Press the “ I ” marked side of the MAIN POWER switch.
The projector will enter standby mode, with the power status light lit in red.
![]() Press the “POWER” button on the projector or “POWER” button on the remote control.
Press the “POWER” button on the projector or “POWER” button on the remote control.
The power indicator on the projector will flash orange. After a shot period, the indicator will illuminate green.
 Making Initial Adjustment /
Setting input port
![]() Roughly adjust the focus with the “FOCUS
Roughly adjust the focus with the “FOCUS
![]() Choose the projection scheme (page 34).
Choose the projection scheme (page 34).
![]() Select the input port with the “RGB” or “VIDEO” button.
Select the input port with the “RGB” or “VIDEO” button.
RGB RGB1(YPBPR1)![]() RGB2(YPBPR2)
RGB2(YPBPR2)![]() DVI
DVI
VIDEO ![]() VIDEO
VIDEO
![]() Adjust volume level with the “VOLUME
Adjust volume level with the “VOLUME
For volume level control on the projector, see page 27. If your audio equipment is connected to the AUDIO OUT jack, the VOLUME control adjusts the line output level.
![]() Adjust the projector's tilt angle (page 24).
Adjust the projector's tilt angle (page 24).
![]() Adjust the vertical position of the picture (page 24)
Adjust the vertical position of the picture (page 24) ![]() Press the “AUTO SETUP” button
Press the “AUTO SETUP” button
![]() Fit the picture size to the screen
Fit the picture size to the screen
Fit the picture size to the screen size with the “ZOOM
Repeat steps ![]() through
through ![]() until the picture completely fits within the screen bounds.
until the picture completely fits within the screen bounds.
![]() Adjust focus again with the “FOCUS
Adjust focus again with the “FOCUS
![]() Adjust the “ZOOM
Adjust the “ZOOM
 Powering Off the Projector
1.Press and hold the “POWER” button for more than 0.5 seconds or quickly
2.Wait until the power status light turns to red (i.e., until the cooling fan stops). While the cooling fan is still running, never switch the MAIN POWER switch OFF, unplug the projector from the outlet, or open the main circuit breaker.
3.Press the “O” marked side of the MAIN POWER switch to remove all power from the projector.
Note
•If the projector is
•The projector consumes approx. 9 Watts of power in Standby mode after the cooling fan stops (Power Status light lit in red).
•If you inadvertently shut off the Main Power switch, the projection lamp may remain off for some time on
ENGLISH
23