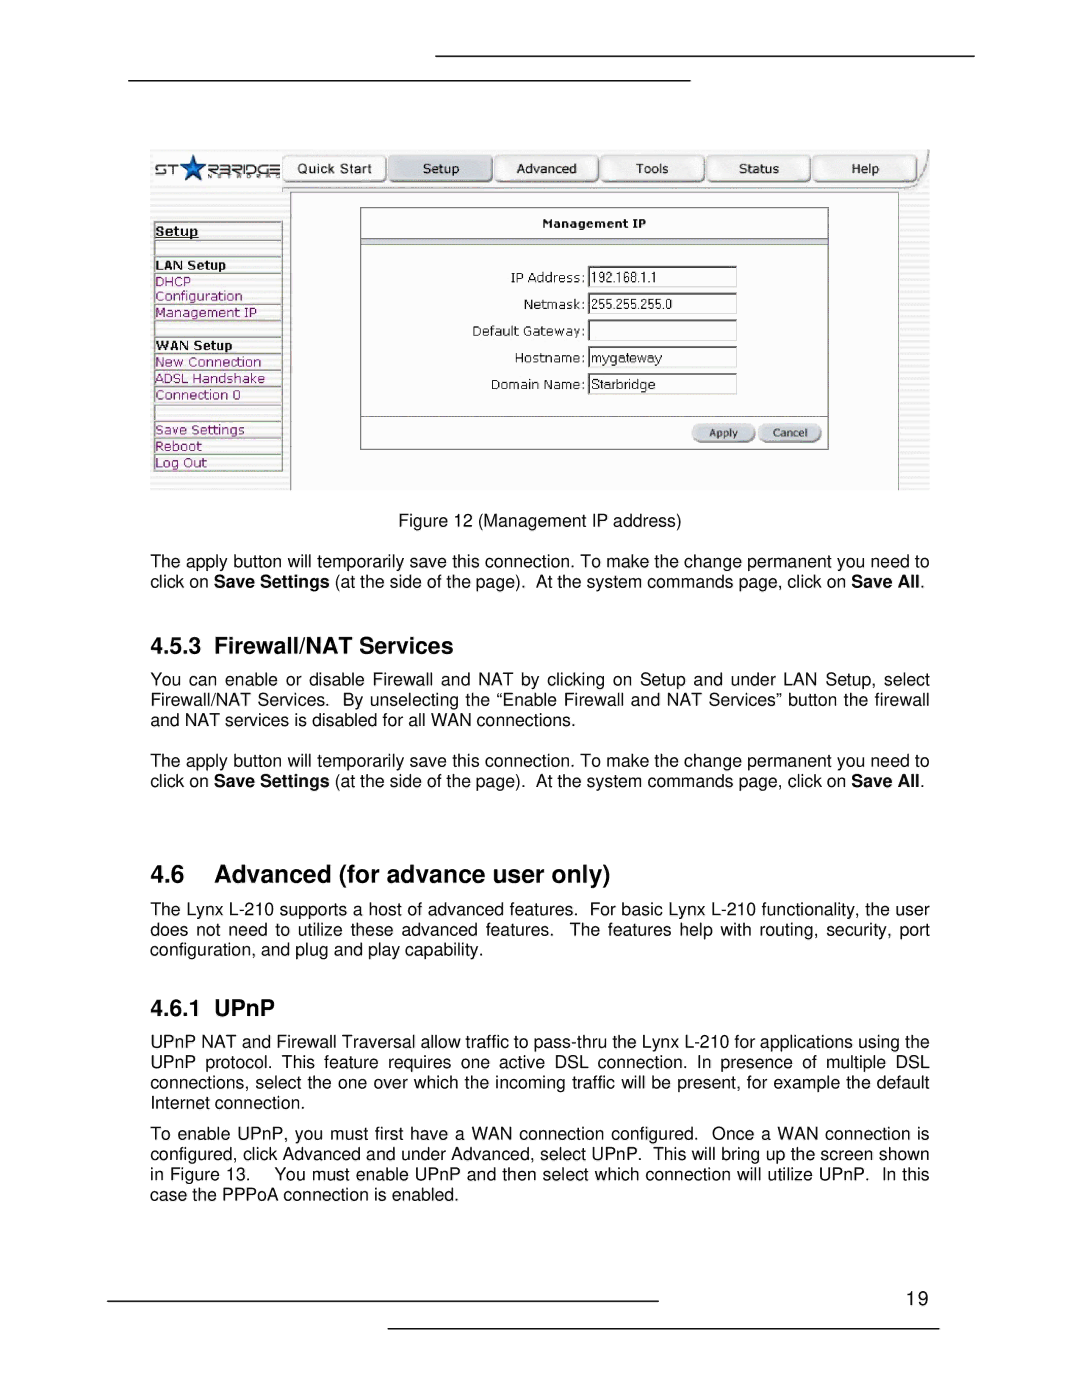
Figure 12 (Management IP address)
The apply button will temporarily save this connection. To make the change permanent you need to click on Save Settings (at the side of the page). At the system commands page, click on Save All.
4.5.3 Firewall/NAT Services
You can enable or disable Firewall and NAT by clicking on Setup and under LAN Setup, select Firewall/NAT Services. By unselecting the “Enable Firewall and NAT Services” button the firewall and NAT services is disabled for all WAN connections.
The apply button will temporarily save this connection. To make the change permanent you need to click on Save Settings (at the side of the page). At the system commands page, click on Save All.
4.6Advanced (for advance user only)
The Lynx
4.6.1 UPnP
UPnP NAT and Firewall Traversal allow traffic to
To enable UPnP, you must first have a WAN connection configured. Once a WAN connection is configured, click Advanced and under Advanced, select UPnP. This will bring up the screen shown in Figure 13. You must enable UPnP and then select which connection will utilize UPnP. In this case the PPPoA connection is enabled.
19