1.Plug the microphones into the mic inputs 1 & 2 of the
2.Plug the outputs of the
3.Plug the hardware outputs
We’re now physically set up to monitor, record, and playback audio with the Delta 44 and related components. The next steps involve the settings in the Delta Control Panel. We’ll use the same settings as Typical Setup #1 for the Delta Control Panel’s ‘Hardware Settings’ page, i.e. “Reset Rate When Idle” and 48kHz idle sampling rate. The settings that we’ll focus on will involve the ‘Patchbay/Router’ page. We won’t be using the Delta 44’s Monitor Mixer, so we’ll ignore the ‘Monitor Mixer’ page.
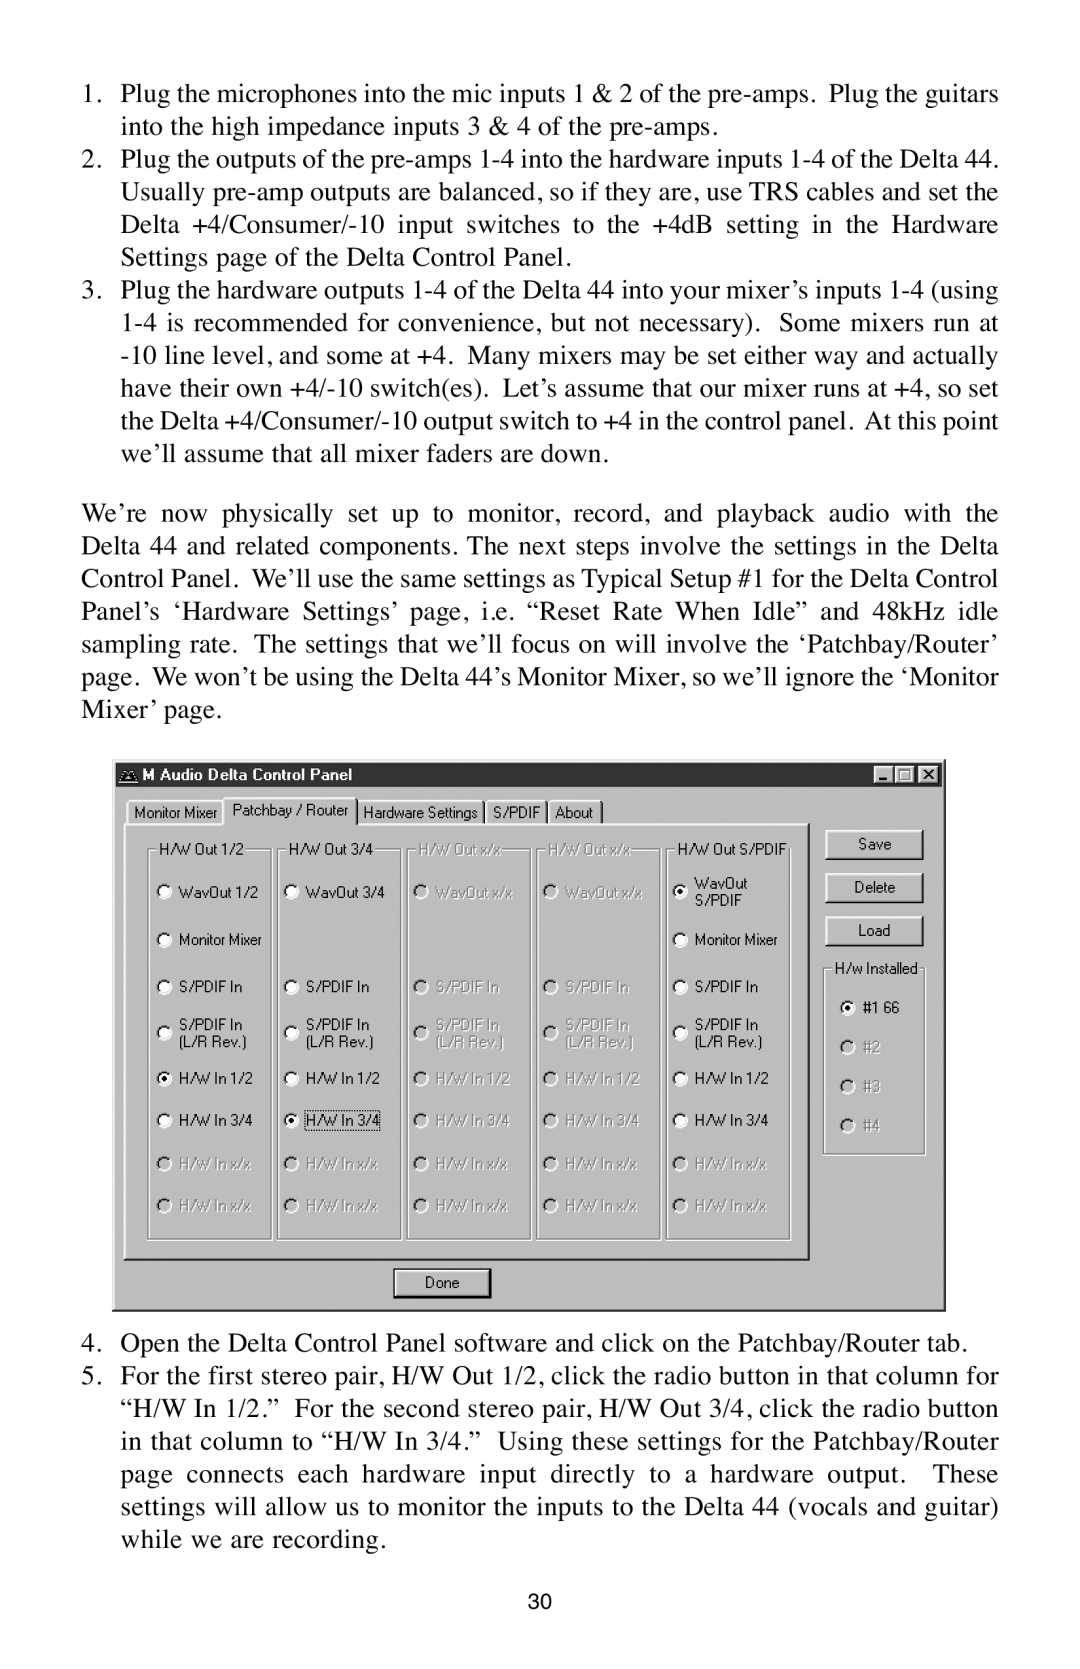
4.Open the Delta Control Panel software and click on the Patchbay/Router tab.
5.For the first stereo pair, H/W Out 1/2, click the radio button in that column for “H/W In 1/2.” For the second stereo pair, H/W Out 3/4, click the radio button in that column to “H/W In 3/4.” Using these settings for the Patchbay/Router page connects each hardware input directly to a hardware output. These settings will allow us to monitor the inputs to the Delta 44 (vocals and guitar) while we are recording.
30