16
4.Practice Example for Layout of a DVD Menu
The following section offers two practice examples to introduce you to the creation of DVD menus.
It is not necessary to write a DVD for these practice examples. You can view the result with the
4.1 Menu layout with DVD-Arabesk 2
In this practice example we would like to demonstrate the possibilities of the program
You will learn how to specify a layout for a DVD menu and how to use various functions.
In this example we assume that you have already created three different film projects on your Casablanca system and that these projects are ready to be written. Of course it can be more or less projects than this.
Create a short leader introducing your DVD. You can use e.g. a black scene of 20 to 30 seconds duration that has been given a title, or think up something spectacular, whatever you wish!
Use
Now enter the menu “Finish” and start the program
After a moment you will see the
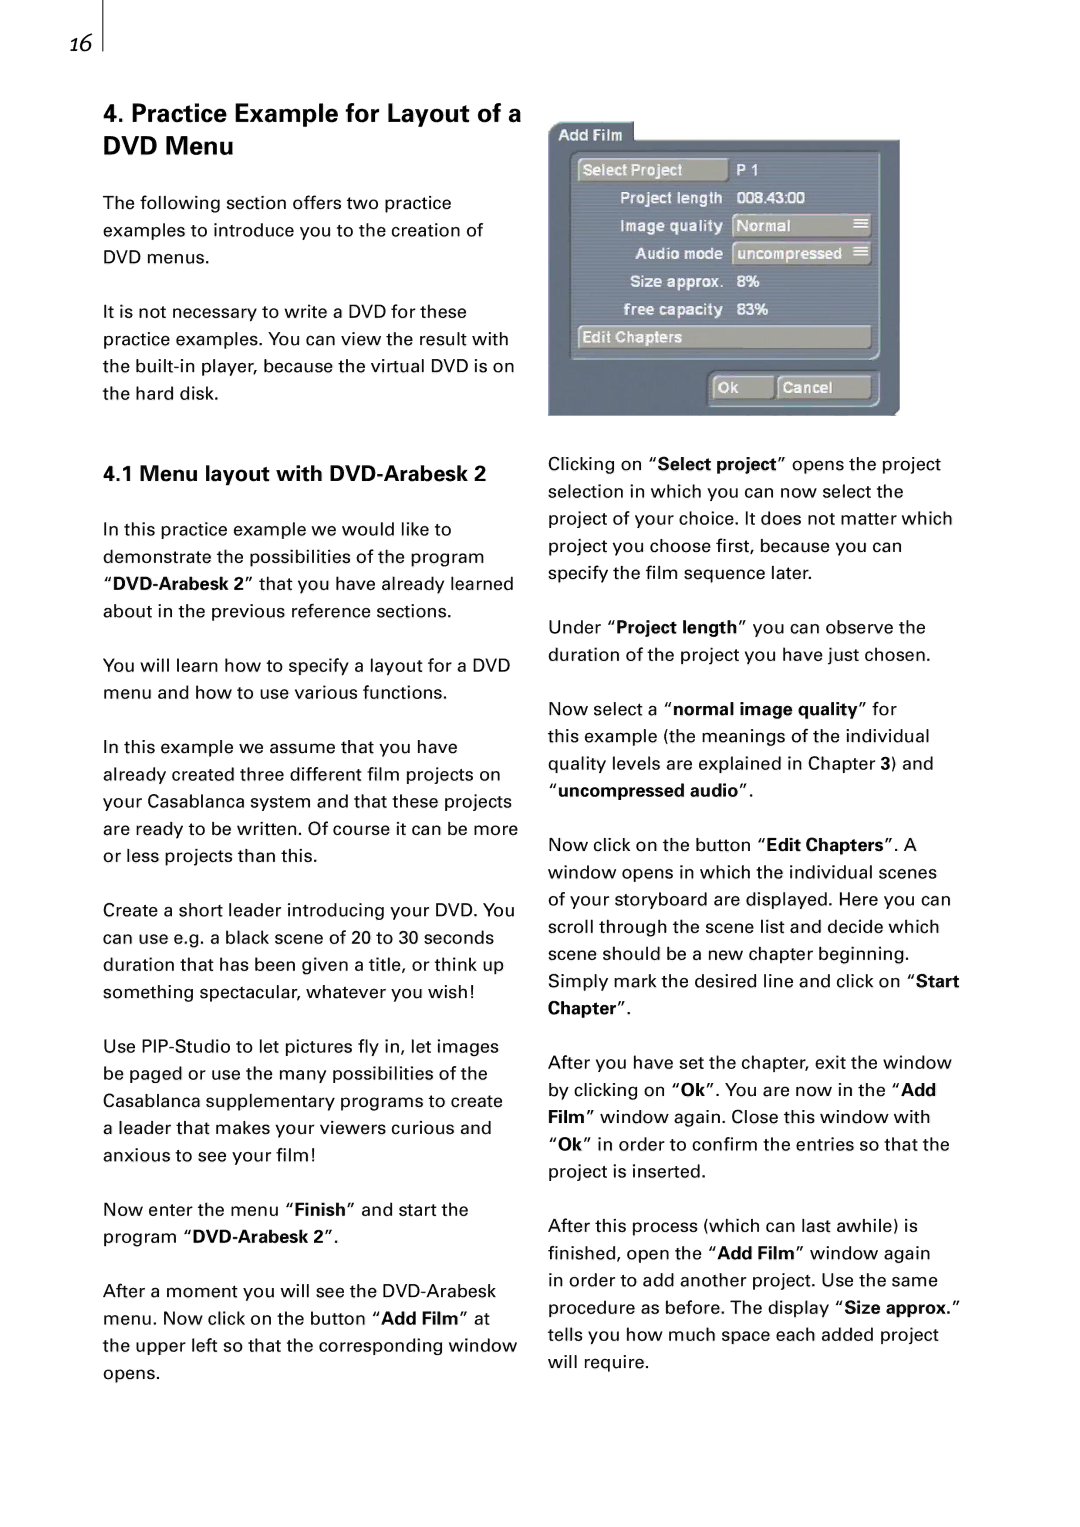
Clicking on “Select project” opens the project selection in which you can now select the project of your choice. It does not matter which project you choose first, because you can specify the film sequence later.
Under “Project length” you can observe the duration of the project you have just chosen.
Now select a “normal image quality” for this example (the meanings of the individual quality levels are explained in Chapter 3) and
“uncompressed audio”.
Now click on the button “Edit Chapters”. A window opens in which the individual scenes of your storyboard are displayed. Here you can scroll through the scene list and decide which scene should be a new chapter beginning. Simply mark the desired line and click on “Start Chapter”.
After you have set the chapter, exit the window by clicking on “Ok”. You are now in the “Add Film” window again. Close this window with “Ok” in order to confirm the entries so that the project is inserted.
After this process (which can last awhile) is finished, open the “Add Film” window again in order to add another project. Use the same procedure as before. The display “Size approx.” tells you how much space each added project will require.